Schäuble Jr Aims To Take Away Your Privacy!

[Mnt] wrote in to tell us about this 360 degree array of cameras featured on [Codeninja]. This has to be one of the most impressive arrays of cameras and sound equipment that we’ve seen at Hack a day.

The array is capable of 360 degree x 140 degree panoramic views using the 9 cameras arranged in a circle around the base. Impressive in itself, these cameras are all capable of both pan and tilt rotation via and Arduino-controlled servo setup. It also has a native 360 degree camera mounted on top of everything for calibration purposes and IR-LED illumination capabilities.

On top of all of this, the camera array also features audio capability with a 9-microphone setup, presumably one for each camera. This, coupled with piezoelectric speakers should provide for echolocation capability. Although jokingly called the “Schäuble Jr.” after a German politician, we’re not sure of the true purpose for this “sensor array.” We can only hope that it will be used for good. A very impressive build, it will be interesting to see what comes of it.

SPDIF Passthrough Lets You Digitally Manipulate The Audio

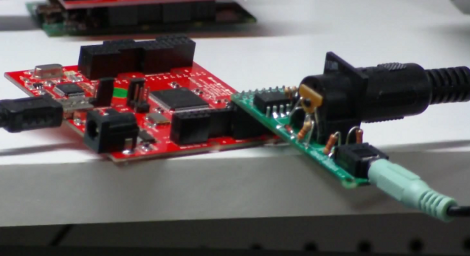
[Mike Field] took what he had learned with a few past projects and combined them to make this FPGA-based SPDIF audio pass-through. In order to get the SPDIF signal ready for the FPGA he needed a few components to use for level conversion. Once everything was connected he used a first in first out (FIFO) buffer to ensure that the outgoing bitrate is the same as the input, while still allowing enough time for the FPGA to do some digital manipulation.

This reminds us of the NeTV, which is an HDMI pass-through device. That one allows you to overlay your own video information to any TV that has an HDMI port. This would allow you patch into any audio system that’s using SPDIF, letting you inject your own audio, such as a paging system in a public lobby, or the ringing of a phone when you get a call, or to create your own sounds.

We like his overhand knot cable management system to keep those jumper wires from becoming too much of a mess on the breadboard.

Bluetooth Cassette Adapter

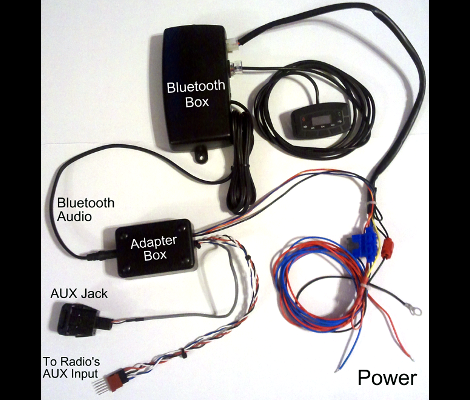
Today, with iPods that can hold entire music collections and cell phones that stream music from the Internet, the lowly cassette seems like an anachronism. [Matt] still has a cassette deck in his truck, but wanted Bluetooth connectivity for his stereo. The obvious solution was to stuff Bluetooth headphones into a cassette adapter.

Audio cassette adapters are dead-simple devices. They’re really just a tape head, stuffed into the shell of a cassette and a wire going out to a media player. To put Bluetooth into his adapter, [Matt] got a cheap pair of Bluetooth headphones and tore them apart. He was left with a circuit board, battery, and two earphones. [Matt] cut off the leads to the ear phones and wired them to the cassette adapter head. After a little bit of modifications to the case, [Matt] had a functional Bluetooth-cassette adapter.

While it’s true [Matt] could have gotten a ready-made Bluetooth cassette adapter shipped from China to his door for $10, there’s not much fun in just buying one. Kudos to [Matt] for going the home-brew route.

Program An Arduino Using Your Sound Card

audioino_programming_arduino_with_sound

[Chris] wrote us to share a neat technique he has been using to program the Arduinos he uses in his projects. He likes to build bare bones Arduino clones rather than sacrifice full dev boards, and instead of programming them via traditional means, he is using his computer’s sound card.

He builds a simple dead bug Arduino (which he calls an Audioino) using a handful of resistors, a pair of caps, an LED, a reset switch, and most importantly – an audio jack. After burning a special audio bootloader to the chip, he can connect the Arduino directly into his computer’s speaker port for programming.

Once the microcontroller is connected to his computer, he runs the IDE-generated hex file through a Java app he created, which converts the data into a WAV file. With the Arduino put into programming mode, he simply plays the WAV file with an audio player, and the code is uploaded.

He says that this method of programming comes in handy in certain cases where he builds things for friends, because they can easily update the software on their own without a lot of fuss.

Spectrum Analyzer Users Custom Characters On An HD44780 Display

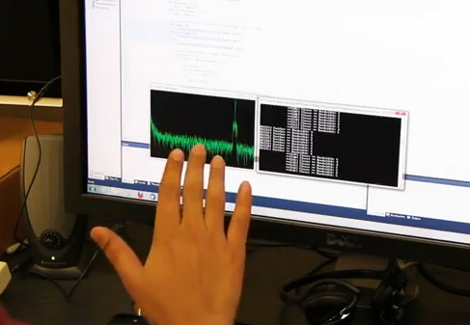
[Camilo] built a spectrum analyzer to use with his audio system (translate). The hardware is quite simple, using an op-amp, microcontroller and LCD display. He chose an LMV324M low-voltage op-amp which connects to the incoming audio signal and feeds its output to the microcontroller’s ADC. In this case, he chose a Freescale microcontroller from the HCS08 family which is running at 20 MHz. This gives the project enough speed to properly analyze the incoming audio. He mentions that he’s following the guidelines set forth in the Nyquist-Shannon sampling theorem and using the Fast Fourier Transform when processing the samples.

This isn’t the first time we’ve seen a character LCD used as a display for a frequency analyzer. This other ATmega8-based rendition supported several different screen layouts. These displays have enough RAM to store eight custom characters. Each character is 5×8 pixels, lending eight levels to each character for a total of 16 for each column seen above. We love the simplicity of the hardware in the project but we wouldn’t mind seeing an additional potentiometer to fine-tune how the data is displayed on the screen to take advantage of its full range. See the project in action in the clip after the break.

Continue reading “Spectrum Analyzer Users Custom Characters On An HD44780 Display”

PIC-based Voice Recorder

[Vinod] just finished building a voice recorder and it turned out even better than he thought it would. The video after the break shows him recording what is surely one of your favorite songs from his cellphone and then playing it back. The audio quality does sound quite good for a project with very few components.

A PIC 16F877A makes up the majority of the build. Its ADC is used to capture the incoming line from an amplified microphone input (you’ll find that amp schematic half way through his post). He’s storing the data on an MMC card, which was a bit of a hack since the PIC has limited RAM to manage that overhead. The stored data is in a raw format, as the card is not accessed using a file system. This makes it easy to record at a high bit rate, leading to better audio quality. Playback consists of connecting a speaker via a low-pass filter and amplifier circuit to the hardware PWM output on the PIC.

Continue reading “PIC-based Voice Recorder”

Speaker-mounted WAV Player For Street Performances

This naked speaker is the basis for [MaoMakMaa’s] newest project called the Wavedrone. He plans on using the autonomous and cable-less device during street performances. You can hear the effect of some stretched jazz cords being played on it in the video clip after the break. The sound is kind of an ethereal background noise that observers might not immediately realize is there.

You can see the 9V battery which serves as the power source clinging to the frame of the speaker. A 7805 linear regulator tames that battery and feeds the two IC’s on the circuit board seen to the right. The ATtiny85 is reading music from an SD card and playing it back in mono (obviously) with the help of an LM386 audio amplifier chip. The trimpots that go into the high pass and low pass filters in between the microcontroller and amplifier allow for a bit of sound manipulation, but we’re more impressed with the quality of the sound this is getting when properly trimmed.

Continue reading “Speaker-mounted WAV Player For Street Performances”