Automated musical instrument with LED array

ESP32 Is The Brains Behind This Art Installation

The ESP32 has enabled an uncountable number of small electronics projects and even some commercial products, thanks to its small size, low price point, and wireless capabilities. Plenty of remote sensors, lighting setups, and even home automation projects now run on this small faithful chip. But being relegated to an electronics enclosure controlling a small electrical setup isn’t all that these tiny chips can do as [Eirik Brandal] shows us with this unique piece of audio and visual art.

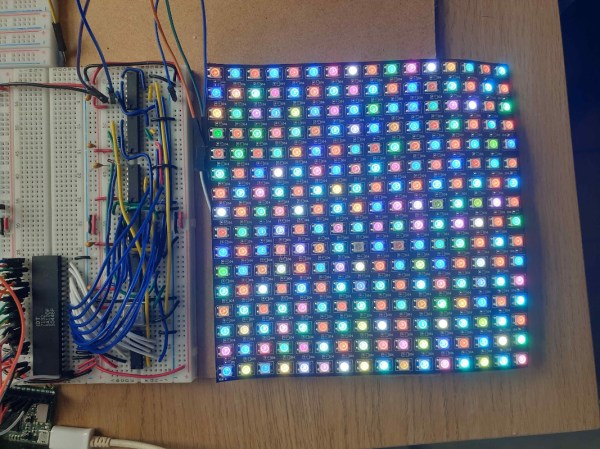
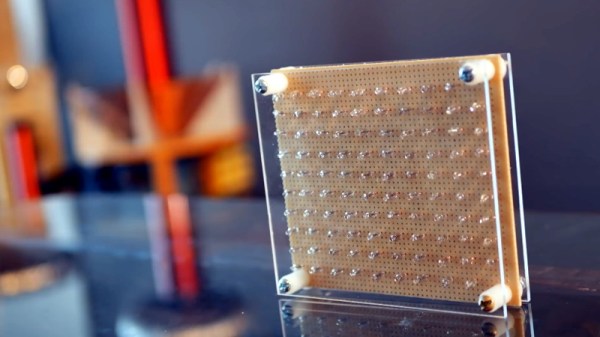
The project is essentially a small, automated synthesizer that has a series of arrays programmed into it that correspond to various musical scales. Any of these can be selected for the instrument to play through. The notes of the scale are shuffled through with some random variations, allowing for a completely automated musical instrument. The musical generation is entirely analog as well, created by some oscillators, amplifiers, and other filtering and effects. The ESP32 also controls a lighting sculpture that illuminates a series of LEDs as the music plays.

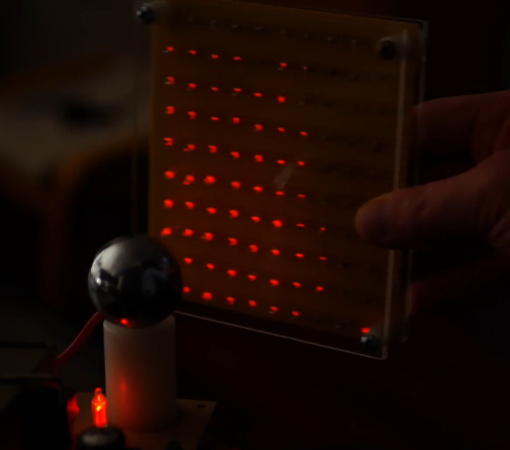
The art installation itself creates quite haunting, mesmerizing tunes that are illustrated in the video linked after the break. While it’s not quite to the realm of artificial intelligence since it uses pre-programmed patterns with some randomness mixed in, it does give us hints of some other projects that have used AI in order to compose new music.

Continue reading “ESP32 Is The Brains Behind This Art Installation”

8-Bit Computer Addresses LEDs

Homebrew 8-bit computers tend to have fairly limited displays, often one or more seven-segment displays and an array of LEDs to show the values of RAM or perhaps some other states of the computer. [Duncan] is in the process of building just such an computer, but wondered if there was a way to create a more visually appealing display while still keeping the computer true to its 8-bit roots. With some interesting TTL logic he was able to create this addressable RGB LED display to some remarkable results.

The array works by controlling the WS2812B LED strips with a specific timing cycle which was pioneered by [Tim] for a different project. [Tim] was able to perform this timing cycle with some simple Assembly code, which means that [Duncan] could convert that code into TTL gate logic relatively easily. Using 74LS02 NOR chips gets the job done as far as timing goes, and the pulses are then fed into a shift register and support logic which then creates the signal for the LED strips.

When everything is said and done, [Duncan] has a fully addressable 16×16 RGB LED array as a display for his 8-bit computer without violating any of his design principles and keeping everything to discrete TTL logic chips and a stick of RAM. It’s a unique method of display that might go along really well with any other homebrew computer like this one that’s also built with 74LS chips.

The Most Expensive D20 You’ll See Today

Roll your negotiation skill, because this d20 is a hefty one. The Tweet is also below. We are charmed by [Greg Davill]’s twenty-sided LED contraption, but what do we call it? Is it a device? A sculpture? A die? Even though “d20” is right on his custom controller PCB, we don’t think this will grace the table at the next elf campaign since it is rather like taking a Rolls Royce to the grocery store. Our builder estimates the price tag at $350 USD and that includes twenty custom PCB light panels with their components, a controller board, one battery pack, and the 3D printed chassis that has to friction-fit the light faces.

Power and communication for all the panels rely on twenty ribbon cables daisy-chained throughout the printed scaffolding, which you can see in the picture above. [Greg] made a six-sided LED cube last year, and there are more details for it, but we suspect he learned his lesson about soldering thousands of lights by hand. There are one-hundred-twenty LEDs per panel, times twenty, that is over two-thousand blinkenlights. We don’t yet have specs on the controller, but last time he used a SAMD51 processor to support over three-thousand lights. We don’t know where he’ll go next, but we’re game if he wants to make a chandelier for Hackaday’s secret underground lair.

(Editor’s Note: If you were at Supercon last year, and you got to play with this thing in the flesh, it’s worth it!)

Continue reading “The Most Expensive D20 You’ll See Today”

500 Lasers Are Not Necessarily Better Than One, But They Look Great

If playing with but a single laser pointer is fun, then playing with 500 laser pointers must be 500 times the fun, right? So by extension, training 500 laser pointers on a single point must be the pinnacle of pointless mirth. And indeed it is.

When we first spotted this project, we thought for sure it was yet another case of lockdown-induced  boredom producing an over-the-top build. Mind you, we have no problem with that, but in this case, [nanoslavic] relates that this is actually a project from a few years back. It’s really as simple as it looks: 500 laser pointer modules arranged on a plate with a grid of holes in a 25 by 20 array. As he placed the laser modules on the board with a glob of hot glue, he carefully aimed each one to hit a single point about a meter and a half away.  There are also a handful of blue LEDs nestled into the array, because what project is complete without blue LEDs?

The modules are wired in concentric circuits and controlled by a simple bank of toggle switches. Alas, 500 converging 150-mW 5 mW lasers do not a 75-W 2.5 W laser make; when fully powered, the effect at the focal point is reported to be only a bit warm. But it looks incredible, especially through smoke. Throwing mirrors and lenses into the beam results in some interesting patterns, too.

You’ll still need to take safety seriously if you build something like this, of course, but this one is really just for show. If you’re really serious about doing some damage with lasers, check out the long list of inadvisable laser builds that [Styropyro] has accumulated — from a high-powered “lightsaber” to a 200-Watt laser bazooka.

(Terminate your beams carefully, folks. We don’t want anyone going blind.)

Continue reading “500 Lasers Are Not Necessarily Better Than One, But They Look Great”

Visualizing Energy Fields With A Neon Bulb Array

Everyone knows that one of the coolest things to do with a Tesla coil is to light up neon or fluorescent tubes at a distance. It’s an easy and very visual way to conceptualize how much energy is being pumped out, making it a favorite trick at science museums all over the world. But what would it look like if you took that same concept and increased the resolution? Replace that single large tube with an array of smaller ones. That’s exactly what [Jay Bowles] did in his latest video, and the results are impressive to say the least.

From a hardware standpoint, it doesn’t get much simpler. [Jay] knew from experience that if you bring a small neon indicator close to a Tesla coil, it will start to glow when approximately 80 volts is going through it. The higher the voltage, the brighter the glow. So he took 100 of these little neon bulbs and arranged them in a 10×10 grid on a piece of perfboard. There’s nothing fancy around the backside either, just all the legs wired up in parallel.

When [Jay] brings the device close to his various high-voltage toys, the neon bulbs still glow like they did before. But the trick is, they don’t all glow at the same brightness or time. As the panel is moved around, the user can actually see the shape and relative strength of the field by looking at the “picture” created by the neon bulbs.

The device isn’t just a cool visual either, it has legitimate applications. In the video, [Jay] explains how it allowed him to observe an anomalous energy field that collapsed when he touched the base of his recently completed Tesla coil; an indication that there was a grounding issue. He’s also observed some dead spots while using what he’s come to call his “High-Voltage Lite-Bright” and is interested in hearing possible explanations for what he’s seeing.

We’ve been fans of [Jay] and the impressively produced videos he makes about his high-voltage projects for years now, and we’re always excited when he’s got something new. Most hardware hackers start getting sweaty palms once the meter starts indicating more than about 24 VDC, so we’ve got a lot of respect for anyone who can build this kind of hardware and effectively communicate how it works to others.

Continue reading “Visualizing Energy Fields With A Neon Bulb Array”

Step The Halbach From My Magnets

[Klaus Halbach] gets his name attached to these clever arrangements of permanent magnets but the effect was discovered by [John C. Mallinson]. Mallinson array sounds good too, but what’s in a name? A Halbach array consists of permanent magnets with their poles rotated relative to each other. Depending on how they’re rotated, you can create some useful patterns in the overall magnetic field.

Over at the K&J Magnetics blog, they dig into the effects and power of these arrays in the linear form and the circular form. The Halbach effect may not be a common topic over dinner, but the arrays are appearing in some of the best tech including maglev trains, hoverboards (that don’t ride on rubber wheels), and the particle accelerators they were designed for.

Once aligned, these arrays sculpt a magnetic field. The field can be one-sided, neutralized at one point, and metal filings are used to demonstrate the shape of these fields in a quick video. In the video after the break, a powerful magnetic field is built but when a rare earth magnet is placed in the center, rather than blasting into one of the nearby magnets, it wobbles lazily.

Be careful when working with powerful magnets, they can pinch and crush, but go ahead and build your own levitating flyer or if you came for hoverboards, check out this hoverboard built with gardening tools.


Continue reading “Step The Halbach From My Magnets”

Adventures In Gas Filled Tube Arrays

Vacuum tubes are awesome, and Nixies are even better. Numitrons are the new hotness, but there’s one type of tube out there that’s better than all the rest. It’s the ИГГ1-64/64M. This is a panel of tubes in a 64 by 64 grid, some with just green dots, some with green and orange, and even a red, green, blue 64 by 64 pixel matrix. They’re either phosphors or gas-filled tubes, but this is the king of all tube-based displays. Not even the RGB CRTs in a Jumbotron can match the absurdity of this tube array.

[Muth] got his hands on a few of these panels, and finally he’s displaying images on them. It’s an amazing project that involved finding the documentation, translating it, driving the tubes with 360 Volts, and figuring out a way to drive 128 inputs from just a few microcontroller pins.

First, the power supply. These panels require about 360 Volts to light up. This is significantly higher than what would usually be found in a Nixie clock or other normal tube-based display. That’s no problem, because a careful reading of the datasheet revealed a circuit that brings a normal-ish 180 Volt Nixie power supply up to the proper voltage. To drive these pixels, [Muth] settled on a rather large PIC18F microcontroller with eight tri-state buffers. The microcontroller takes data over a serial port and scans through the entire framebuffer. All in all, there are eight driver boards, 736 components, and 160 wires connecting everything together. It’s a lot of work, but now [Muth] has a 64×64 display that’s green and orange.

You can check out a ‘pixel dust’ demo of this display in action below.

Continue reading “Adventures In Gas Filled Tube Arrays”