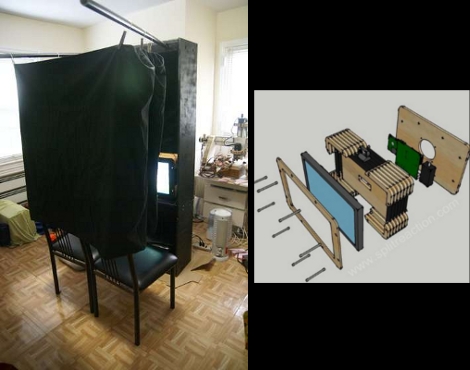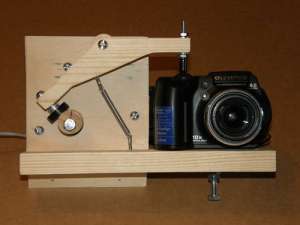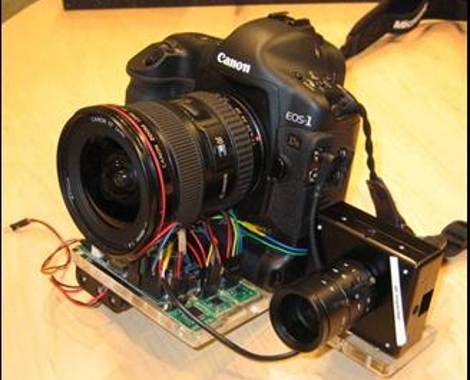
You Know That They Say About Guys With Big Lenses?

[Tony Lovell] and [dkpeterborough] built a sizable camera lens using optics from a flight simulator projector. What they ended up with is a 900mm lens that can make a beautiful photo of the moon, or capture distant landscapes in great detail. The body of the lens was designed in CAD and sent off for fabrication out of aluminum, as seen above. The concentric baffles help to prevent lens flare but it can’t be used in its bare-aluminum condition. The internals were coated using a stippling finish that leaves a sandy texture. That was covered with matte black barbecue paint, doing a great job of preventing optical interference, and the outside received a glossy white coat. Finished weight: 59 pounds, but once you see the pictures you’ll agree it’s worth lugging the bulky instrument around to grab that killer shot.

[via Make]

Time-lapse Camera Dolly

[Brian Grabski] was asked by a friend to design and build a dolly that would move a camera during a time-lapse sequence. Above you can see the product of his toils, and the videos after the break show off the parts that went into the design and showcase effectiveness of the build.

The dolly is designed to ride on a pair of tubular rails. These can be bent to match any desired path and the dolly will have no problem following it thanks to two features. First, the triad of skateboard wheels on each of the three corners are mounted on a swivel bearing that allows them to rotate without binding. The other piece of the puzzle is a set of drawer slides that let the third support move perpendicular to the other two sets of rollers. A motor drives a geared wheel to move the dolly along the track with speed adjustments courtesy of the motor controller. There’s also a failsafe that will shut the system down when it runs out of track, protecting that fancy piece of hardware taking the pictures.

We’ve seen timelapse equipment that moves the camera in the past, but those hacks usually involve rotating the camera along and axis. This track-based setup is a well executed tool useful at all levels of photography. We can’t wait to see the arch-based dolly that is teased at the end of the demo video.

Continue reading “Time-lapse Camera Dolly”

Timelapse Circuit For Point And Shoot Cameras

[Andyk75] has done some fantastic work documenting his timelapse addition to his digital camera.  Most of the more expensive models of cameras have a remote shutter release, but the point and shoot jobs usually don’t. He decided to add the ability to turn the camera on, then shoot a picture, then turn it back off. Pretty smart, since these things tend to eat batteries pretty quickly if left on.  He is using an ATtiny24 for the brains, but the circuit should be pretty adaptable to others. The final piece has several features, like the ability to change the length of time between shots and automatically shut down when it gets too dark outside to continue. He has posted the schematics as well as the board layouts if you can find them amongst the ads in instructibles. You can check out a video of a sunset taken with this camera after the break.

Continue reading “Timelapse Circuit For Point And Shoot Cameras”

Anaglyphic Photography Made Easy

[ProfHankD] came up with a pretty easy way to take 3D photos using a single lens. He’s making Anaglyph images which use color filtering glasses to produce stereoscopic 3D effects. We’ve seen stereoscopic imaging hacks that use two cameras or a clever combination of mirrors, but this one uses a special filter and post-processing. [ProfHankD] drew up a template that can be used to properly align two colored filters, like those in the lens cap seen above. Once installed, just snap all the pictures you want and then hit them with your favorite photo editing software. This involves separating the color channels of the photograph and offsetting them to increase the depth of focus.

It’s a nice little process, and his writeup is easy to understand even if you’re not a hardcore photography guru.

[Thanks Paul]

Motion Activated Wildlife Camera (or A Spy Device)

Now you can capture pictures of our furry friends by building a motion activated wildlife camera. [Doug Paradis] took his Air Freshener hack and used it to trigger a camera. The white dome in the picture above is the PIR sensor from an Air Wick Freshmatic, along with a cheap keychain camera and an MSP430 microcontroller. He used one of the chips that came with the TI Launchpad, a transistor, and some discreet components to interface the devices and then put them into a project box. Now he’s got a fully configurable motion-sensing camera.

Adding Pan And Tilt To A Webcam

[Brent] and his wife wanted a way to provide more family time for Grandparents that lived far away. They tried a webcam, but their daughter just didn’t oblige by staying in the frame. Instead of chasing her around the room with with the camera he added pan and tilt features to the device. He settled on IR control using a common television remote, similar to our USB remote control receiver tutorial except that it drives servo motors instead of forwarding signals over the serial connection. [Brent] used a Picaxe 08M, connecting two servos together as a base on top of the project box. If you try this yourself there’s a lot of room to grow. Once you’ve assembled the hardware it wouldn’t be too hard to make this web enabled so that Grandpa can click on a web interface to look around the room.

Retro Adapter For Canon SLR

[calculon] was able to modify a “dumb” adapter to allow his Canon SLR to use the aperture and focus on a retro lens.  With his new flip mounted wide angle lens he was able to achieve some pretty neat macro shots.  By cutting away some of the cheaper ring he was able to feed the wire through and glue it onto the the cameras contact points.  The wire was then attached to the inputs on the “new” lens. With a new adapter running about $375 not only was this a neat little hack but it was also a money saver. You can see some more of his photos on his flicker