Hand Cranking The Malevolent Mechanical Pumpkin

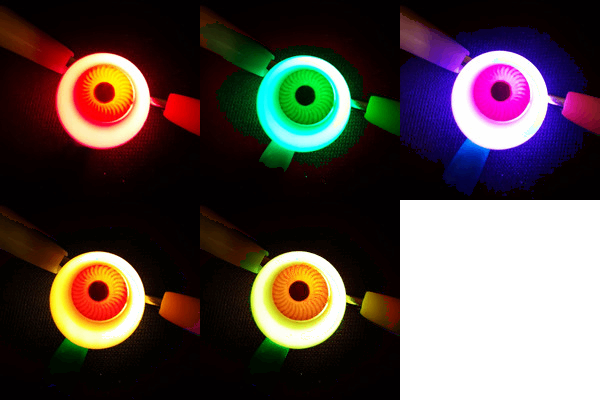
Meet Marty. He’s a pumpkin that has been fitted out with a moving eyes, tongue and an expression of malevolent glee. You would probably assume that this is all driven by servos, right? Nope: Marty is driven by an old-fashioned crank mechanism, designed and built by [Ben Brandt].

He wanted to make something that could be driven by a hand crank. Of course, there is nothing stopping you from throwing a motor on the back to drive the mechanism, but [Ben] wanted the internals to be fireproof so he could light it with a candle. His mechanism, built from old bits of wire and sheet metal, is not flammable or adversely affected by heat like a motor and power supply would be. He succeeded admirably, and he has also done an excellent job of documenting the process to providing handy tips on creating a mechanical pumpkin-based monstrosity.

Those hackers down with a little electronic wet work you should start building their LED-integrated Jack-O-Lantern now. These things take a lot of time turn out.

Continue reading “Hand Cranking The Malevolent Mechanical Pumpkin”

Apple Cider Press Is Just In Time For Fall

Do you like hacking? Do you like apple cider? Do you like ceiling fans? If you answered “yes” to any of those questions, then boy do we have the project for you! [Lou Wozniak] has an awesome tutorial for building an apple cider press using a ceiling fan motor and a handful of items available at your local hardware store.

The build is pretty simple in concept but complex in execution, and [Lou] does a fantastic job of covering every step in detail in his two project videos. The project has two main components: the grinder to decimate the apples and create a juicy, pulpy soup, and the press to extract the juice. The grinder is powered by the fan motor, while the press uses a screw-drive connected to a power drill, and then a ratchet to squeeze out every last drop.

Eager for more ceiling fan motor goodness? You’re in luck! Apparently [Lou] is a master of repurposing fan motors, and we featured a pottery wheel he made with one a while back.

Continue reading “Apple Cider Press Is Just In Time For Fall”

HC-SR04 Isn’t The Same As Parallax PING))) But It Can Pretend To Be!

“It’s only software!” A sentence that strikes terror in the heart of an embedded systems software developer. That sentence is often uttered when the software person finds a bug in the hardware and others assume it’s going to be easier for fix in software rather than spin a new hardware revision. No wonder software is always late.

[Clint Stevenson] is his own hardware and software guy, as are most of us. He wanted to use the less expensive HC-SR04 ultrasonic rangefinder in a prototype. Longer term he wanted to have the choice of either a Parallax PING or MaxBotix ultrasonic sensor for their better performance outdoors. His hardware hack of the SR04 made this a software problem which he also managed to solve!

[Clint] was working with the Arduino library, based on the Parallax PING, which uses a single pin for trigger and echo. The HC-SR04 uses separate pins. Originally he modified the Arduino library to accept the two pin approach. But with his long term goal in mind, he also modified the HC-SR04 sensor by removing the on-board pull-up resistor and adding a new one on the connector side to combine the signals. That gave him an SR04 that worked with the single-pin based library.

We’ve seen Parallax PING projects for sensing water depth and to generate music. These could be hacked to use the HC-SR04 using [Clint’s] techniques.

[Arduino and HC-SR04 photo from Blax Lab]

Robot Chicken

T-1000C: This Time The Chickens Will Be Back

For whatever reason the city [Jenslabs] lives in decided it was a good use of taxpayer money to make some giant twig chickens and put them on the boulevard in front of his house. So he decided to spruce them up a bit with some electronics.

We’re still unsure why they did this, but [Jens] recognized them for what they truly are. T-1000C — the chicken edition. Giant robot chickens sent from the future to keep an eye on [Jens] to make sure he doesn’t stop ChickenNet. Naturally they needed glowing red eyes.

Fully expecting all his hard work to be thrown out eventually, [Jens] built the upgrades out of cheap components. A few LEDs, some transistors, resistors and a LDR (light dependent resistor). That way the eyes only glow at night.  And to waterproof it all, he wrapped it in good ‘ol duct tape.

For more fun Easter hacks, why not add some LEDs to your decorated eggs?

Laser Cut Settlers Of Catan Board = Best Christmas Gift Ever

[JoshBaker] wanted to make something special for his brother this past Christmas.  He decided on making a wooden game board version of the Settlers of Catan game. [Josh] used CorelDraw to construct the vector images needed for the board. Then, he set out cutting the base, engraving and cutting out the many wooden pieces with a laser cutter. All the pieces were stained and then sealed with polyurethane. He assembled the base so that the removable hex tiles, ports, and resource numbers sit nicely in the recessed parts and don’t shift during gameplay. He complemented the board with tokens and game pieces that he hand-painted. [Josh] also created a new set of cards to fit with the board’s aesthetic.

The board is done incredibly well, not to mention beautiful to look at. The hex tiles’ designs are very detailed. The stained and engraved wood really adds to the atmosphere of the game. We featured a coffee table that would be perfect to play it on. [Josh] has listed all of the vector files for the version he gave his brother, as well as additional ones for the Cities and Knights Expansion. We wish we could have seen the look on his brother’s face when he got such an awesome Christmas gift!

[via Instructables]

Use Ruby To Make Any Window A Blinken Window

[Akhil Stanislavose] wanted to spice up his window decorations for the holidays. Inspired by blinkenlights, he decided to make his front window interactive. The Blinken Window is a grid of 6 x 10 programmable LEDs running on a Raspberry Pi. Since a RasPi doesn’t have enough GPIO pins for 60 LEDs, [Akhil] built an expander board using 8 daisy chained standard CD4094 (74HC595 could also be used) shift registers to accommodate them.

[Akhil] designed a PCB to replace the expander board for future use. It is modular in nature so that many of them can be connected together to provide as many outputs as one needs, allowing any size window to become a Blinken Window. The PCBs are still being fabricated, but the Eagle files are available for download (zip file). Ruby was used to implement the API. You can find the project files on GitHub, which also features a simulator that you can run on your computer to see how an animation or game will end up looking on the window. In the demo video, [Akhil] demonstrates how you can use the Blinken Window to play a version of Pong using your smartphone as the controller. [Akhil] has also provided a few basic animation examples that can be expanded upon. We’d enjoy seeing an implementation of Tetris. There’s so many fun ways to turn regular windows into dynamic displays, we’re starting to look scornfully at our own lazy, air leaking windows.

See the Blinken Window in action after the break.

Continue reading “Use Ruby To Make Any Window A Blinken Window”

Sentiment

Display Your City’s Emotional State With Illuminated Snow

[Hunter] wanted to do something a bit more interesting for his holiday lights display last year. Rather than just animated lights, he wanted something that was driven by data. In this case, his display was based on the mood of people in his city. We’ve seen a very similar project in the past, but this one has a few notable differences.

The display runs off of an Arduino. [Hunter] is using an Ethernet shield to connect the Arduino to the Internet. It then monitors all of the latest tweets from users within a 15 mile radius of his area. The tweets are then forwarded to the Alchemy Sentiment API for analysis. The API uses various algorithms and detection methods to identify the overall sentiment within a body of text. [Hunter] is using it to determine the general mood indicated by the text of a given tweet.

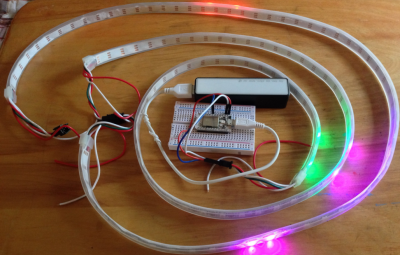
Next [Hunter] needed a way to somehow display this information. He opted to use an LED strip. Since the range of sentiments is rather small, [Hunter] didn’t want to display the overall average sentiment. This value doesn’t change much over short periods of time, so it’s not very interesting to see. Instead, he plots the change made since the last sample. This results in a more obvious change to the LED display.

Another interesting thing to note about this project is that [Hunter] is using the snow in his yard to diffuse the light from the LEDs. He’s actually buried the strip under a layer of snow. This has the result of hiding the electronics, but blurring the light enough so you can’t see the individual LEDs. The effect is rather nice, and it’s something different to add to your holiday lights display. Be sure to check out the video below for a demonstration. Continue reading “Display Your City’s Emotional State With Illuminated Snow”