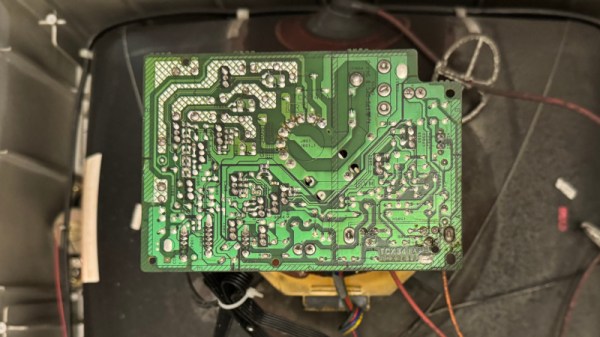
Older consumer electronic devices follow a desirability curve in which after they fall from favour they can’t be given away. But as they become rarer, they reach a point at which everyone wants them. Then, they can’t be had for love nor money. CRT TVs are now in the first stage, they’re bulky and lower-definition than modern sets, and thus thrift stores and dumpsters still have them in reasonable numbers. To retrogamers and other enthusiasts, this can be a bonanza, and when he saw a high-end late-model JVC on the sidewalk [Chris Person] wasted no time in snapping it up. It worked, but there were a few picture issues, so he set about fixing it.
home entertainment hacks804 Articles
Building A Solar-Powered, Supercapacitor-Based Speaker
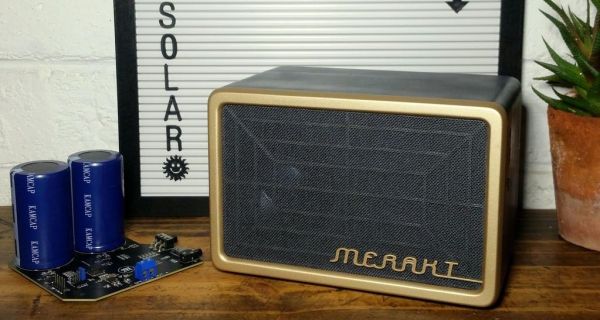
Inspired by many months of hours-long load shedding in South Africa, [JGJMatt] decided to make a portable speaker that can play tunes for hours on a single charge and even charge off the integrated solar panel to top the charge off. None of this should sound too surprising, but what differentiates this speaker is the use of two beefy 400 F, 2.7 V supercapacitors in series rather than a lithium-ion battery on the custom PCB with the Ti TPA2013D1 Class-D mono amplifier.
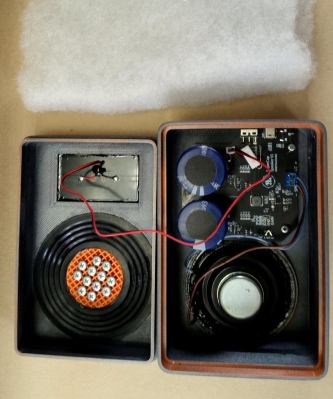
The reason for supercapacitors is two-fold. The first is that their lifespan is much longer than that of Li-ion batteries, the second that they can charge much faster. The disadvantages of supercapacitors come in the form of their lower energy density and linear discharge voltage. For the latter issue the TPA2301D1 amplifier has a built-in boost converter for an input range from 1.8 – 5.5 V, and despite the lower energy density a solid 6 hours of playback are claimed.
Beyond the exquisitely finished 3D printed PETG shell and TPU-based passive bass radiator, the functionality consists out of a single full-range speaker and an analog audio input (TRS jack and USB-C). To add Bluetooth support [JGJMatt] created a module consisting out of a Bluetooth module that connects to the USB-C port for both power and analog audio input.
Charging the speaker can be done via the USB-C port, as well as via the solar panel. This means that you can plug its USB-C port into e.g. a laptop’s USB-C port and (hopefully) charge it and play back music at the same time.
For those feeling like replicating this feat, the Gerbers, bill of materials, enclosure STLs, and everything else needed can be be found in the tutorial.
Continue reading “Building A Solar-Powered, Supercapacitor-Based Speaker”
Big Red Button Puts Toddler In Command Of Chromecast
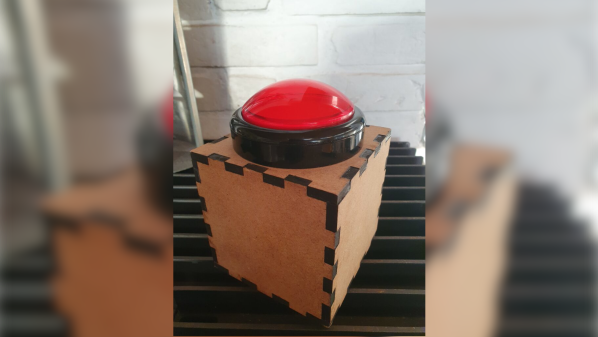
Controversial position: the world needs more buttons. We’ve gotten so far away from physical interfaces like buttons, knobs, and switches in favor of sleek but sterile touch-screen “controls” that when we see something like this big red button so toddlers can start a TV show, we just have to latch onto the story and see what it’s all about.
As it turns out, the big red button itself is probably the least interesting part of [Mads Chr. Olesen] build. The real meat of the project is the reverse engineering effort needed to get Chromecast to start the show. As [Mads] explains, once upon a time a simple GET request to a URL was all it took to do so, but no more; Google has repeatedly nerfed the Chromecast API over the years, enough that [Mads] had some digging to do.
Luckily, pyChromecast is a thing, but using it for DRTV, a streaming service of the Danish Broadcasting Corporation, required figuring out the AppID of the DRTV app. It looks like [Mads] used Wireshark to sniff traffic to and from the Chromecast, and netlog-viewer to analyze the capture. That and a little Developer Tools action in Chrome led to all the information needed to modify pyChromecast to support DRTV. The rest of the project consisted of building a box for the huge red arcade button and wiring it up to a Wemos D1. A Raspberry Pi actually talks to the Chromecast, and now the toddler is able to call up his favorite show and pause and restart it at will, no parent required.
We appreciate the reverse engineering heroics [Mads] displays here, which provide good general lessons for other purposes. It’s been a while since we’ve seen a Chromecast physical interface build, too, so we appreciate the refresher.
Exploring Hidden Lyrics On 1990s DCC Audio Tapes
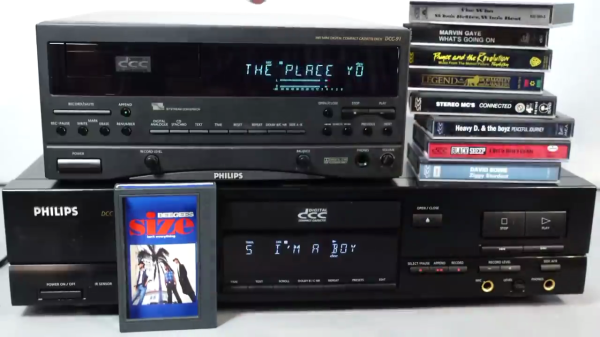
Having a fondness for old and obscure audio and video media formats, [Techmoan] recently revisited the Philips Digital Compact Cassette (DCC) format introduced in 1992. Despite being billed as the successor to Philips’ original analog Compact Cassette format from 1963, DCC was short-lived and slipped away after only four years in 1996. [Techmoan] obtained a unique cassette that purports to be the only known published DCC tape which contains embedded song lyrics that scroll on the DCC player’s tiny screen in sync with the music — “Size Isn’t Everything” by the Bee Gees from 1993. Sure enough, he is able to demonstrate this in the video down below the break.
But, there’s more. For reasons unclear, this only happens on on this one Bee Gees’ album. But it turns out that many DCC tapes did in fact include lots of other metadata, and sometimes lyrics as well. But these were only visible using an unreleased Philips system called Interactive Text Transmission System (ITTS). It just so happens that the folks at the DCC Museum obtained a Philips prototype ITTS box and have been gradually hacking the protocol.

[Techmoan] demonstrates a modernized prototype version from Germany designed by [Thomas Falkner] called the ITTS video box NG. Using this, he runs through a bunch of DCC tapes from his collection, and finds a significant number of them were published with lyrics and metadata, presumably in anticipation of as ITTS launch. It’s interesting to see how some publishers spent a lot of effort to format this information and others seemed to just copy / paste over the bare minimum.
The more elaborate pages resemble what you might see on your teletext screens back in the day. On those albums that do have lyrics, the presentation can be different, as well. Lyrics from the Bee Gees album appear like text scrolling up on a terminal, with current phrases shown in yellow. Another album’s lyrics can be scrolled in different peculiar ways, including a one-word-at-a-time mode.
If this kind of historical dive into technology interests you, check out the talk that [Jac] and [Ralf] gave at the 2022 Supercon about DCC, and this video from 2018 where [Ralf] digs deeper into this topic. Also, [Jac] has some more recent details on hacking the protocol posted over on his Hackaday.io project page. If you want a more basic introduction to DCC, [Techmoan] introduced this format some years ago on his YouTube channel.
Continue reading “Exploring Hidden Lyrics On 1990s DCC Audio Tapes”
Audio, Not Video Over The LKV373 HDMI Extender
[eta] found herself in a flat with several LKV373 HDMI extenders. Find the corresponding transmitter, plug it into your device, and you’ve got a connection to the TV/sound system, no fussing with wires behind the TV. However, [eta] wanted to get rid of the need to plug in a laptop and start sending packets directly to play music. As her flatmate [dan] had already reverse-engineered the receiver, she tested her prototype against their virtualized receiver, de-ip-hmdi.
The actual sending of images was surprisingly straightforward — just a JPEG sliced into 1024 bytes chunks and sent over. However, early testing showed nothing on the receiver. The end of a frame needed marking by setting the most-significant bit of the chunk number to one. Now de-ip-hdmi showed the image, but the actual hardware would not. With something missing, [eta] returned to Wireshark to scan packets. Noticing some strange packets on port 2067, she analyzed the pattern to reveal it sent another packet just before a new frame and included the frame number. With this tweak, it was still not enough. Ultimately, heartbeat packets sent every second synchronize things, but compared to the noise of the video packets, they were easy to miss. Now [eta] had some functioning video streaming rust code.
In theory, audio for the LKV373 followed the same thought process as video. Two channels of 32-bit big Endian integers at 44,100 hz chunked into 992-byte sections and sent as a packet formed the audio stream. With only 992 bytes, two streams, and 4 bytes per sample, each packet only held 2.812 milliseconds of sound. The first tests resulted in no audio output or distorted crunchy sound. Of course, this was every audio engineer’s worst nightmare: jitter. With a spin loop and an efficient ring buffer, the audio packets were soon slinging across the network reliably.
The code is available on a hosted version of GitLab. It’s a beautiful journey through reverse engineering some obscure but relatively cheap hardware. Along the way, there is nicely annotated Rust code, which makes it all the better.
Tivoli Teardown Disappoints
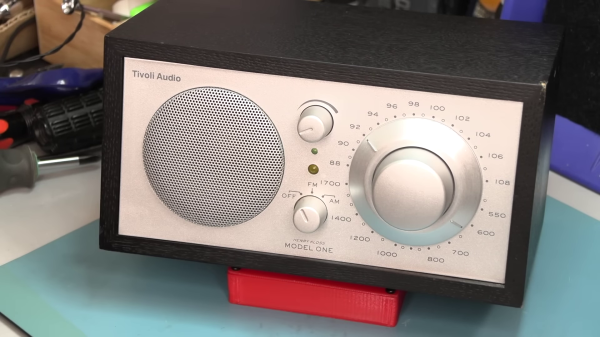
[Fran] has been curious about the innards of Tivoli Audio’s Model One radio, but was reluctant to shell out $200 just to tear it apart. But she found one recently on eBay, won the auction, and proceeded to do a review and teardown. Spoiler alert, she was disappointed.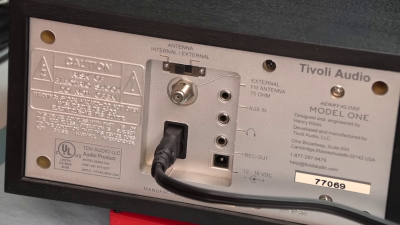
Physically speaking, the radio looks great and has quite an array of I/O connections. The geared tuning knob looks cool, but is heavily damped which [Fran] isn’t keen about. Turning it on, a few more quirks are discovered. The volume control is out-of-whack — it appears they substituted a linear taper potentiometer where a logarithmic taper was called for.
Another problem, at least in the RF-dense metropolitan areas like Philadelphia, is the FM tuner’s station-lock feature. It is so strong that it can be impossible to tune in weak stations. This is especially ironic since, according to Wikipedia, that was one of audio engineer Henry Kloss’s main goals when founding Tivoli Audio back in 2000:
Their first product was the Model One, a simple to use mid-century modern designed table top radio with a high-performance tuner, receiving FM radio in congested urban locations, while maintaining the ability to pick out distant or low power stations. Kloss had noted that the mid 60’s wave of Japanese radios lacked the ability to receive FM stations in congested locations, and this became a defining goal of his radio designs throughout his career.
Interestingly, many folks in the YouTube comments say their Model One radios have none of these issues. We wonder if [Fran] has obtained a damaged radio, or maybe a newer version produced with less attention to detail. If you have a broken Model One radio, before tossing it, consider the hack we wrote about last year, turning it into an internet radio.
Hackaday Prize 2023: OMOTE Universal Remote
A good universal remote can help tame today’s complex home entertainment systems, combining both classic IR and more modern WiFi and Bluetooth connectivity with programmable functions that allow the user to execute multi-step operations with a single button. Unfortunately, programming them often involves the use of clunky proprietary software.
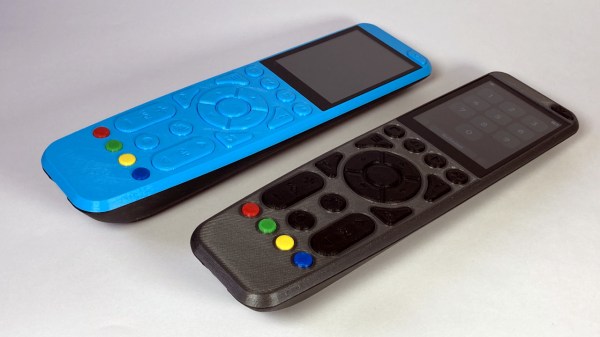
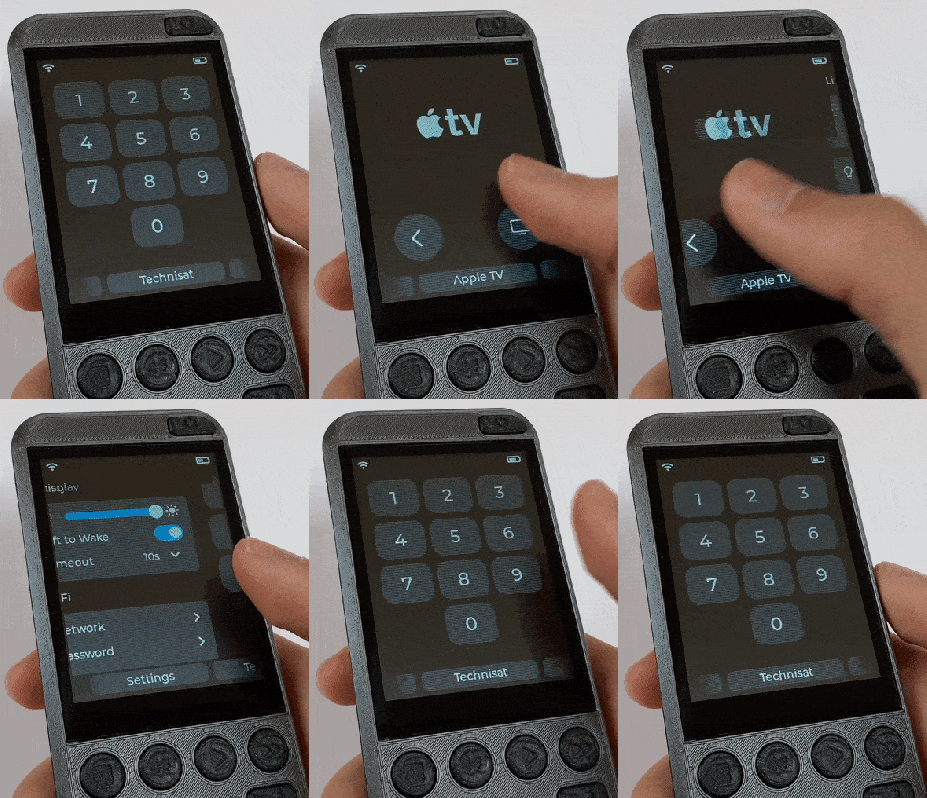 Which is why [Maximilian Kern] has developed the OMOTE. This open source universal remote is powered by the ESP32, and features the usual collection of physical buttons in addition to a 2.8” 320 x 240 touchscreen with a responsive graphical interface that can display more advanced user interfaces. Everything is packed into an ergonomic 3D printed case that gives it an exceptionally professional look.
The remote’s USB-C port can be used to recharge the internal 2,000 mAhA battery, as well as reprogram the ESP32’s firmware via a CH340C serial chip. The battery life is estimated to be about six months given the considerable low-power capabilities of the ESP32, which includes the use of a LIS3DH 3-axis accelerometer to keep the hardware in sleep mode until it’s picked up.
The software side is still in development, so the IR codes for the remote are currently hardcoded and its WiFi capabilities are limited to MQTT. But in the future, [Maximilian] imagines a web-based configuration interface that runs on the ESP32 and lets you add codes and setup the remote via your phone or desktop.
It looks like the hardware is more or less complete, so presumably the focus from here on out will be bringing the software across the finish line. Don’t worry, there’s still plenty of time — since it’s an entry into the Gearing Up challenge of the 2023 Hackaday Prize, the judges won’t pick the finalists until August 8th.
Continue reading “Hackaday Prize 2023: OMOTE Universal Remote”

