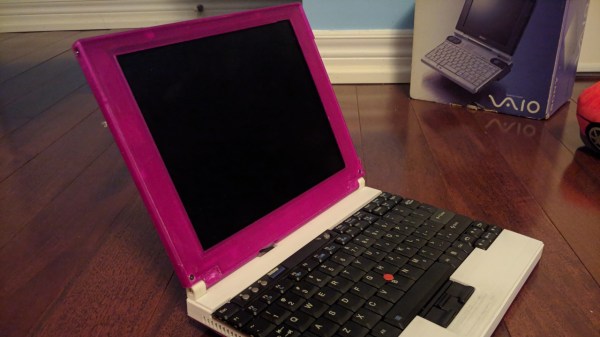
Even among ThinkPads, which are nearly universally loved by hardware hackers and Linux tinkerers alike, the 701c is a particularly rare and desirable machine. Best known for it’s “butterfly” slide out keyboard, the IBM-designed subnotebook from the mid-1990s has gained a following all its own, with active efforts to repair and restore any surviving specimens still out in the wild.
[polymatt] has already taken on a number of 701c restoration projects, but the recent release of a 3D printable case for the vintage laptop is arguably the most impressive to date. After spending an untold number of hours with an original case and a pair of calipers, the final design has been released under the Creative Commons Attribution-NonCommercial license — in other words, you’re free to print one to spruce up your 701c, but don’t run off a stack of them and start trying to move them on Etsy.
Today, we’ll look into yet another standard in the embedded space: MXM. It stands for “Mobile PCI Express Module”, and is basically intended as a GPU interface for laptops with PCIe, but there’s way more to it – it can work for any high-power high-throughput PCIe device, with a fair few DisplayPort links if you need them!
You will see MXM sockets in older generations of laptops, barebones desktop PCs, servers, and even automotive computers – certain generations of Tesla cars used to ship with MXM-socketed Nvidia GPUs! Given that GPUs are in vogue today, it pays to know how you can get one in low-profile form-factor and avoid putting a giant desktop GPU inside your device.
I only had a passing knowledge of the MXM standard until a bit ago, but my friend, [WifiCable], has been playing with it for a fair bit now. On a long Discord call, she guided me through all the cool things we should know about the MXM standard, its history, compatibility woes, and hackability potential. I’ve summed all of it up into this article – let’s take a look!
This article has been written based on info that [WifiCable] has given me, and, it’s also certainly not the last one where I interview a hacker and condense their knowledge into a writeup. If you are interested, let’s chat!
Looking to build a laptop all on your own? Check out the Pinkpad, a DIY laptop project that as if appeared out of nowhere, gives you a based on an off-the-shelf Dell motherboard. This build projects an aura of unabashed competence – the website brings you to a different universe, the documentation is as curt as it is extensive, and the build evidently works.
With a Thinkpad x61 keyboard, a reasonably modern (Dell Vostro 5481, Ryzen possible) motherboard embeddable inside, and a 10″ 1024×768 screen, this ~11″ laptop packs a certain kind of punch for what’s a build-it-yourself project. Most of the value of this design is in the 3D files – which were done in Google SketchUp, and the laptop is small enough that you could print its shell reasonably quickly. Not that you should follow the parts list religiously – the screen in particular might just warrant reconsideration in your eyes. On the other hand, we wish you all the luck on your SketchUp journey if you want to modify the shell. It also isn’t lost on us that the parts list doesn’t list a battery in it.
This is an impressive project to see open-sourced, and we hope it can inspire some hackers in the custom laptop building cohort. One prominent flaw of consumer-facing technology is that you can’t always get your devices in pink, and printing your laptop’s chassis yourself is a surefire way to combat this. If this laptop’s form-factor is too commonplace for you, we’ve seen no shortage of custom laptops grace our pages, from miniature ones to CRT luggable beasts, and click on the tags below if you’d like to see more!
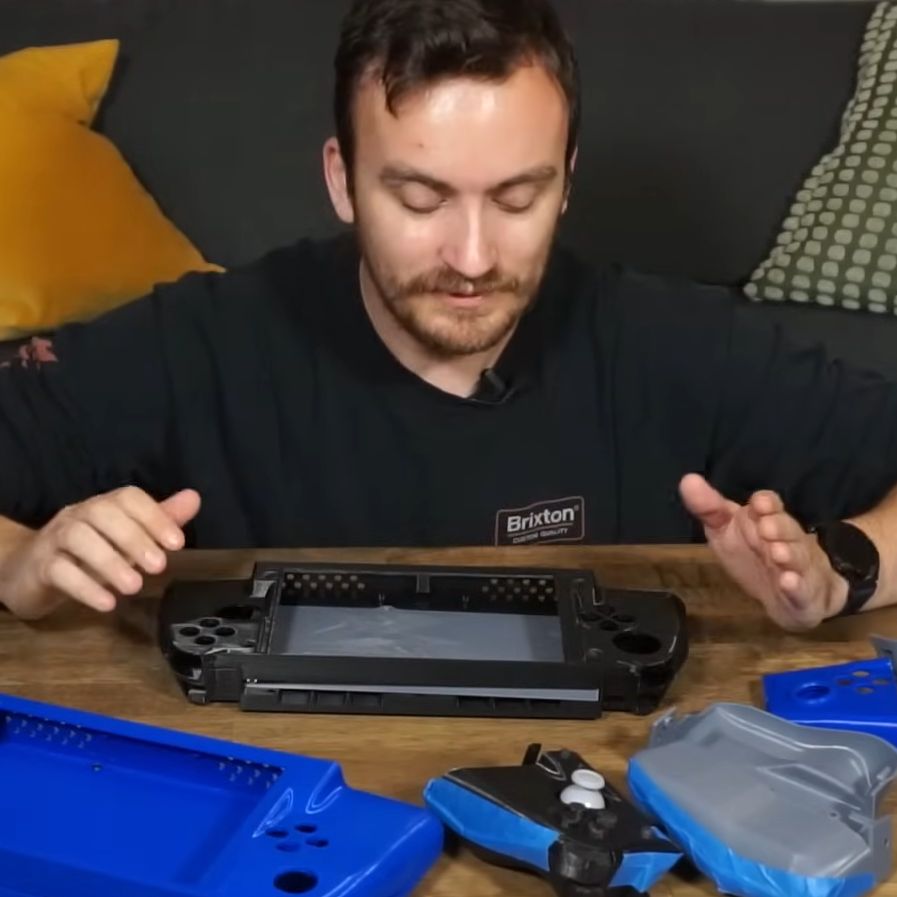
The nearly final prototype case for the handheld Framework-based gaming system. (Credit: TommyB, YouTube)
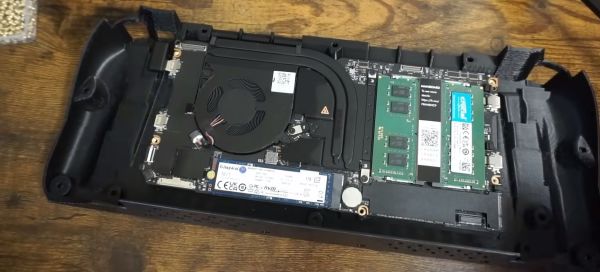
Building your own handheld gaming console has been a popular project for many years, but recently it has become significantly easier to get a lot of power into a small package. Like many others, [TommyB] made his own Raspberry Pi SBC-based handheld in the past, which results in a rather bulky and underpowered package. A more performant solution would be to stuff laptop guts into a handheld case, but until Framework came onto the scene this wasn’t easy and would get you a sloppy one-off solution. With [TommyB]’s current handheld project he uses a standard Framework laptop mainboard, along with the official battery to get a very capable gaming system.
Getting the ergonomics and fit for the components just right took many tries, but eventually a prototype shell was designed that fits the Framework mainboard, the battery, twin Framework speakers, an 8″ LCD panel from Waveshare (connected via USB-C to HDMI) and mechanical switches for the buttons. These switches connect to an RP2040-based board that runs the GP2040-CE firmware, allowing the operating system to detect it as an XBox controller. Although still far from finished, it shows just how beneficial standard laptop parts are, with a massive gap in the market where Framework could make its own handheld shell available. We’re looking forward to [TommyB] demonstrating the finished version of his Framework handheld, and the inevitable upgrade from the 11th-gen Intel mainboard to one of the sparkling new mainboards with even better specs.
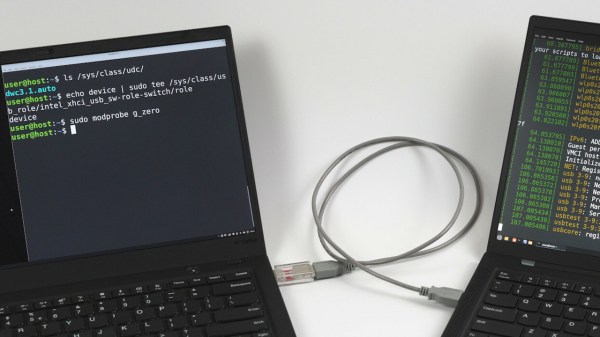
In what’s perhaps one of the most impressive laptop reverse engineering posts in recent memory, [Andrey Konovalov] brings us an incredibly detailed story of how he’s discovered and successfully enabled a USB device controller in a ThinkPad X1 Carbon equipped with a 6th gen Intel CPU.
If you ever wanted to peek at the dirty secrets of a somewhat modern-day Intel CPU-based system, this write-up spares you no detail, and spans dozens of abstraction layers — from Linux drivers and modifying NVRAM to custom USB cable building and BIOS chip flashing, digging deep into undocumented PCH registers for the dessert.
All [Andrey] wanted was to avoid tinkering with an extra Raspberry Pi. While using a PCIe connected device controller, he’s found a reference to intel_xhci_usb_sw-role-switch in Linux sysfs, and dove into a rabbit hole, where he discovered that the IP core used for the laptop’s USB ports has a ‘device’ mode that can be enabled. A dig through ACPI tables confirmed this, but also highlighted that the device is disabled in BIOS. What’s more, it turned out to be locked away behind a hidden menu. Experiments in unlocking that menu ensued, in particular when it comes to bypassing Intel Boot Guard, a mechanism that checks BIOS image signatures before boot.
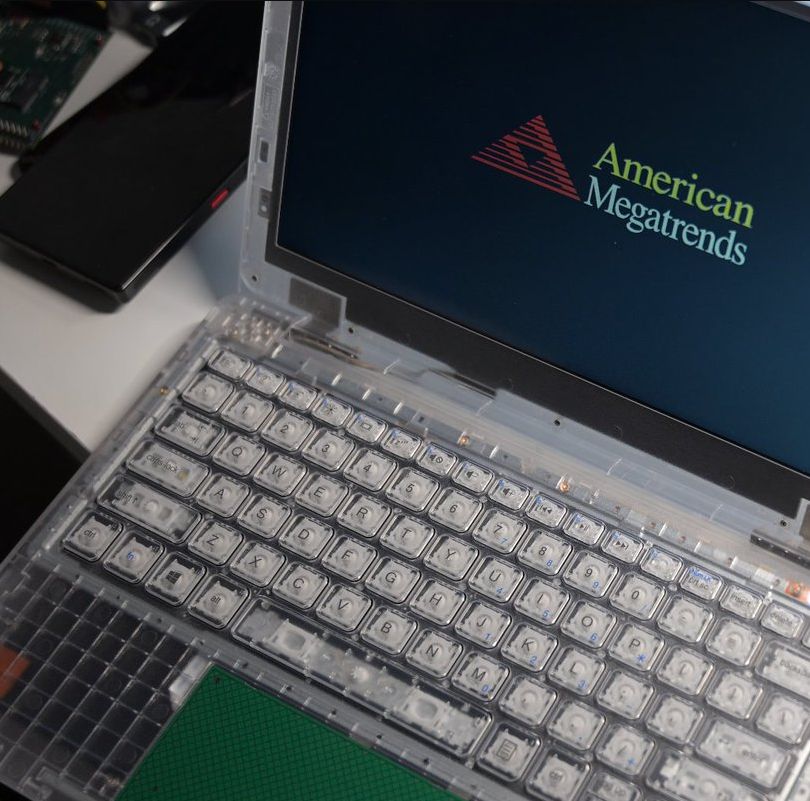
The phenomenon of prison electronics is by now relatively well-documented, with striking transparent radios, televisions, and kin easy to recognize. Yet what about prison laptops? As it turns out, these are a thing as well, and [Zephray Wenting] got one from eBay to investigate, as documented over at Twitter (ThreadReader single page). Much like their audiovisual brethren, these laptops lack basic features in the name of prison security, which in the case of this laptop means for example no USB ports. Even the spacebar stabilizer rod is missing. Weaponized keyboards are apparently a thing in corrections facilities.
The Justice Tech Solutions Securebook 5. (Credit: Zephray Wenting)
Called the Justice Tech Solutions Securebook 5, it has been superseded by the Securebook 6. Inside this earlier unit, you’ll find an Intel N3450 with 4 GB LPDDR3, with SATA for storage and a special dock connector. Some laptops come with WiFi hardware installed, others are unpopulated. It appears that these Securebooks by default have a BIOS password that cannot be erased, even by removing it from the NVRAM (‘CMOS’), as it’ll return on the next boot due to an automatic BIOS reset. This was temporarily bypassed through a hacky external SPI Flash adapter, but the reward for all this trouble was a BIOS setup screen with just the ‘Security’ tab.
It’s now been sleuthed out that the default password is N%(dU32p as reported by Hackaday’s own [Adam Fabio] on Twitter. It turns out the password was available on a (now private) YouTube video. [Techknight] on Twitter has delved into EFI BIOS hacking. He has an alternate BIOS image that does provide access to the full BIOS setup utility. With BIOS access not being necessary to boot the system, the question that [Zephray] went ahead with was how to boot it into an OS since the original HDD or SSD had been removed prior to being sold. The bad news here is that it turned out that the system has a HDD whitelist (which [Sark] found a way to bypass). The good news is that someone has probed the system before, with the storage device being reported as ‘China SATA3 240GB SSD’.
Rather than mess with this, it was attempted to boot from USB, by tapping into the USB lines for the touchpad, which turned out to allow booting into a live image of Ubuntu without fuss. As an ongoing project, it’ll be interesting to see what more functionality can be wrung out of this piece of prison kit, all hopefully from the right side of the prison bars.
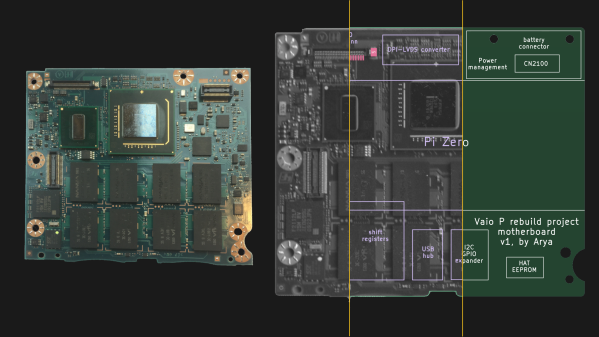
You might remember that KiCad 7 came out this February, with a multitude of wonderful features. One of them was particularly exciting to see, and the KiCad newsletter even had an animated GIF to properly demo it – a feature called “Background Bitmaps”, which is the ability to add existing board images into your board editor, both front and back, and switch between them as you design the board. With it, you can draw traces, recreate the outline and place connectors over these images, giving you a way to quickly to reproduce everything on an existing PCB! I’ve seen some friends of mine use this feature, and recently, I’ve had a project come up that’s a perfect excuse for me to try it.
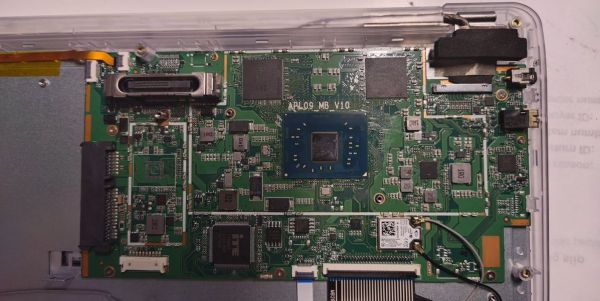
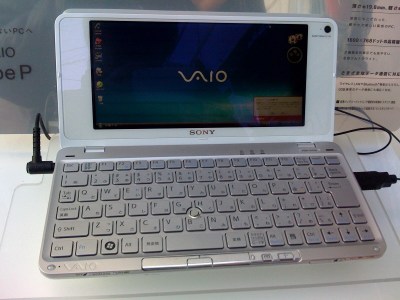
By [Yoggy], CC-BY-2.0Back in 2020, I managed to get a Sony Vaio P from a flea market, for about 20€. It’s a beloved tiny laptop from 2009, now a collectors item, and we’ve covered a few hacks with it! The price was this wonderful only because it was not fit for regular flea market customers – it was in bad condition, with the original DC jack lost and replaced by some Molex-like power connector, no hard drive, and no battery in sight.
In short, something worth selling to a known tinkerer like me, but not particularly interesting otherwise. Nevertheless, about half a year later, when I fed it the desired 10.5 V from a lab PSU and gave the power button a few chances, it eventually booted up and shown me the BIOS menu on the screen! I’ve disassembled and reassembled it a few times, replaced the DC jack with an original one from a different Vaio ultrabook I happened to have parts from, and decided to try to bring it back to original condition.