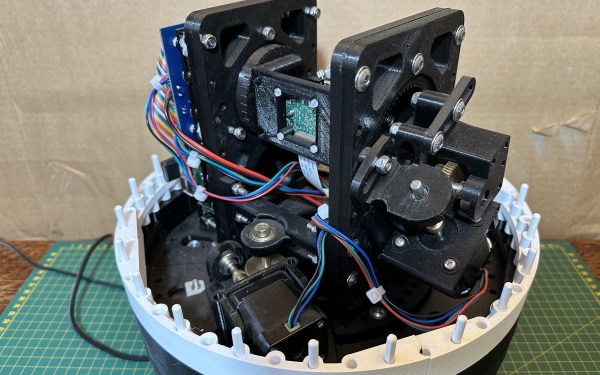
A black motion system with two stepper motors. A green circuit board is fixed in a rotating cage in the center, and the entire assembly is on a white base atop a green cutting mat. Wires wind through the assembly.

Pi-lomar Puts An Observatory In Your Hands

Humans have loved looking up at the night sky for time immemorial, and that hasn’t stopped today. [MattHh] has taken this love to the next level with the Pi-lomar Miniature Observatory.

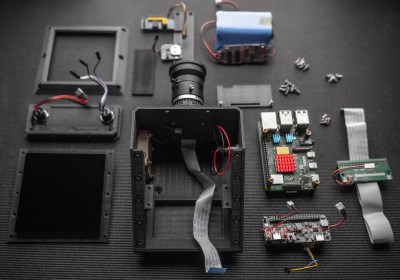
Built with a Raspberry Pi 4, a RPi Hi Quality camera, and a Pimoroni Tiny2040, this tiny observatory does a solid job of letting you observe the night sky from the comfort of your sofa (some assembly required). The current version of Pi-lomar uses a 16mm ‘telephoto’ lens and the built-in camera libraries from Raspbian Buster. This gives a field of view of approximately 21 degrees of the sky.

While small for an observatory, there are still 4 spools of 3D printing filament in the five different assemblies: the Foundation, the Platform, the Tower, the Gearboxes and the Dome. Two NEMA 17 motors are directed by the Tiny2040 to keep the motion smoother than if the RPi 4 was running them directly. The observatory isn’t waterproof, so if you make your own, don’t leave it out in the rain.

If you’re curious how we might combat the growing spectre of light pollution to better our nighttime observations, check out how blinking can help. And if you want to build a (much) larger telescope, how about using the Sun as a gravitational lens?

Continue reading “Pi-lomar Puts An Observatory In Your Hands”

Easy Hackintosh With Docker-OSX: Soon To Be Impossible?

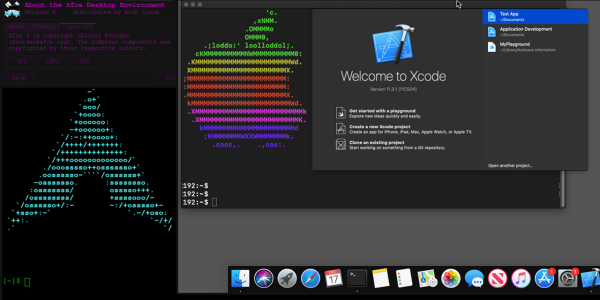
The Docker-OSX project has to be among one of the easiest ways to get a fully functional Hackintosh off the ground on any Linux or Windows (10+) system, with the Docker image handling the heavy lifting of keeping the copy of MacOS happy and satisfied, even as the legality remains questionable, as we previously reported on in 2021. Officially, Apple’s software license for MacOS states that it can only be installed and use on Apple-branded hardware, which precludes the installation in e.g. a Docker container. This has left Docker-OSX in a gray zone where it’s technically illegal, but as it’s being advertised by its developer [Sick Codes] to be for use by security researchers who participate in Apple’s Bug Bounty program (including iOS, which requires XCode, which requires MacOS, etc.), it seems to slip through the cracks.

An obvious issue which may soon spell the end of MacOS-on-x86_64 and with it this use of Docker-OSX is that MacOS is now straddling Apple Silicon and Intel’s x86_64 architecture, with the latter no longer being sold by Apple’s in any of its systems after the recent introduction of its Apple Silicon-based Mac Pro. Although MacOS Sonoma (14) still supports x86_64, this support could be cut in MacOS 15 or 16, at which point running Docker-OSX with an Apple Silicon-only MacOS image would at the very least require an AArch64-based ARM system, though likely with an ISA extension level that matches the lowest-end Apple Silicon (ARMv8.5-A for M1).

Although this should not make it impossible to run Docker-OSX on future Linux (and perhaps Windows) systems on AArch64-based systems, it would make it more complicated and expensive as using one’s existing x86_64-based PC is no longer an option aside from adding a sluggish Qemu layer in between, which would add a significant performance penalty. If you are using Docker-OSX, what are your experiences and plans here?

Continue reading “Easy Hackintosh With Docker-OSX: Soon To Be Impossible?”

DIY Loading Coil Shortens Antenna Lengths

A newly licensed amateur radio operator’s first foray into radios is likely to be a VHF or UHF radio with a manageable antenna designed for the high frequencies in these radio bands. But these radios aren’t meant for communicating more than a double-digit number of kilometers or miles. The radios meant for long-distance communication use antennas that are anything but manageable, as dipole antennas for the lowest commonly used frequencies can often be on the order of 50 meters in length. There are some tricks to getting antenna size down like folding the dipole in all manner of ways, but the real cheat code for reducing antenna size is to build a loading coil instead.

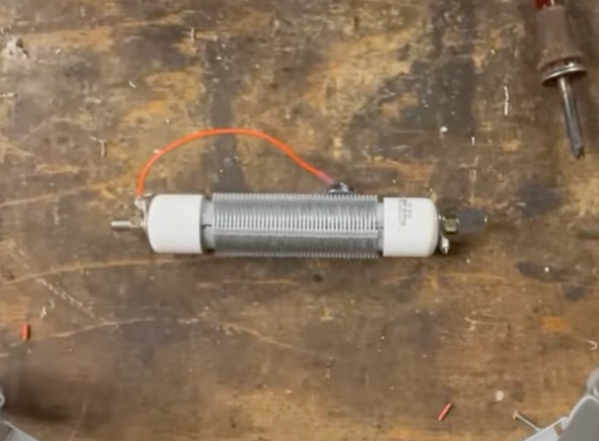
As [VA5MUD] demonstrates, a loading coil is simply an inductor that is placed somewhere along the length of the antenna which makes a shorter antenna behave as a longer antenna. In general, though, the inductor needs to be robust enough to handle the power outputs from the radio. There are plenty of commercial offerings but since an inductor is not much more than a coil of wire, it’s entirely within the realm of possibility to build them on your own. [VA5MUD]’s design uses a piece of PVC with some plastic spacers to wind some thick wire around, and then a customized end cap with screw terminals attached to affix the antenna and feedline to. Of course you’ll need to do a bit of math to figure out exactly how many turns of wire will be best for your specific situation, but beyond that it’s fairly straightforward.

It’s worth noting that the coil doesn’t have to be attached between the feedline and the antenna. It can be placed anywhere along the antenna, with the best performance typically being at the end of the antenna. Of course this is often impractical, so a center-loaded coil is generally used as a compromise. Coils like these are not too hard to wind by hand, but for smaller, lower-current projects it might be good to pick up a machine to help wind the coils instead.

Continue reading “DIY Loading Coil Shortens Antenna Lengths”

CinePi Project Promises Open Source Movie Making

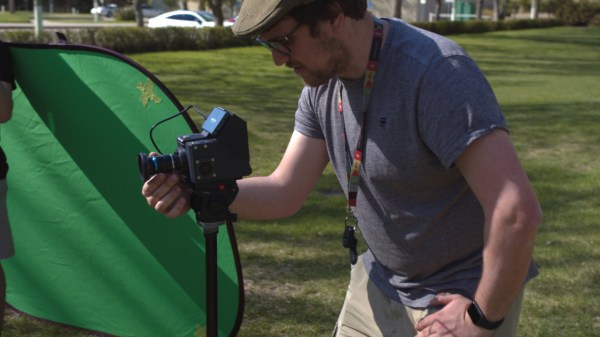
Today, there’s open source options for pretty much anything mainstream, but that doesn’t mean there aren’t still some niches out there that could benefit from the libre treatment. The CinePi project is a perfect example — before today we didn’t even know that an open hardware and software cinema-quality camera was out there. But now that we do, we can’t wait to see what the community does with it.

Inside the 3D printed enclosure of the CinePi, there’s a Raspberry Pi 4 with HQ camera module, a four-inch touch screen, a Zero2Go power supply with four 18650 cells, and a Notcua fan to keep it all cool. The design intentionally favors modules that are easy to source from the usual online sources. You’ll need to be handy with a soldering iron to follow along with the beautifully photographed assembly guide, but there’s nothing that needs to be custom fabricated to complete the build.

The software was clearly developed with the user experience in mind, and in the video below, you can see how its touch interface makes it easy to change settings on the fly. While an amateur auteur might need to enlist the assistance of their geeky friend to build the CinePi, it doesn’t look like they’ll need them around to help operate it.

Of course, the big question with a project like this: what does the video actually look like? Well the technical answer is that, in terms of raw performance, the CinePi is able to capture 3840 x 2160 CinemaDNG video to an external device such as a NVME SSD or a CFExpress Card at 25 frames per second. But what that actually looks like is going to depend on what kind of post-processing you do to it. For the more practical answer, check out the short film TIMEKEEPER which was shot partially on a CinePi.

If this all looks a bit high-tech for your liking, don’t worry. You could always 3D print yourself a 35 mm movie camera instead.

Continue reading “CinePi Project Promises Open Source Movie Making”

A Camera That Signs Off Your Pictures

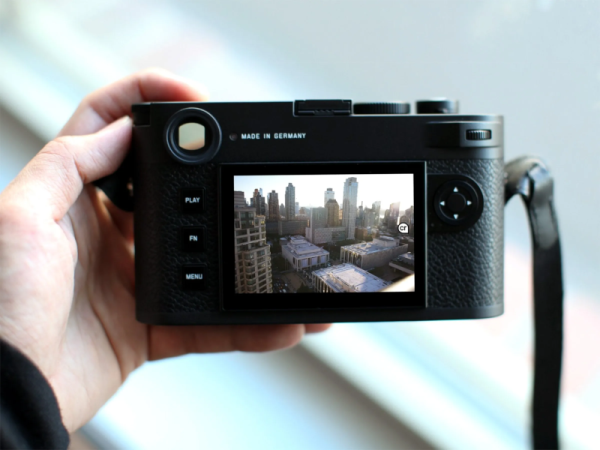
We’ll admit we’ve kicked around the idea of a camera that digitally signs a picture so you could prove it hasn’t been altered and things like the time and place the photo was taken for years. Apparently, products are starting to hit the market, and Spectrum reports on a Leica that, though it will set you back nearly $10,000, can produce pictures with cryptographic signatures.

This isn’t something Leica made up. In 2019, a consortium known as the Content Authenticity Initiative set out to establish a standard for this sort of thing. The founders are no surprise: The New York Times, Adobe, and Twitter. There are 200 companies involved now, although Twitter — now X — has left.

The problem, the post notes, is that software support is limited. There are only a few programs that recognize and process digital signatures. That’ll change, of course, and — we imagine — if you needed to prove the provenance of a photo in court, you’d just buy the right software you needed.

We haven’t dug into the technology, but presumably keeping the private key secure will be very important. The consortium is clear that the technology is not about managing rights, and it is possible to label a picture anonymously. The signature can identify if an image was taken with a camera or generated by AI and details about how it was taken. It also can detect any attempt to tamper with the image. Compliant programs can make modifications, but they will be traceable through the cryptographic record.

Will it work? Probably. Can it be broken? We don’t know, but we wouldn’t bet that it couldn’t without a lot more reading. PDF signatures can be hacked. Our experience is that not much is truly unhackable.

Revive A Sony Vaio P-Series With KiCad’s Background Bitmaps

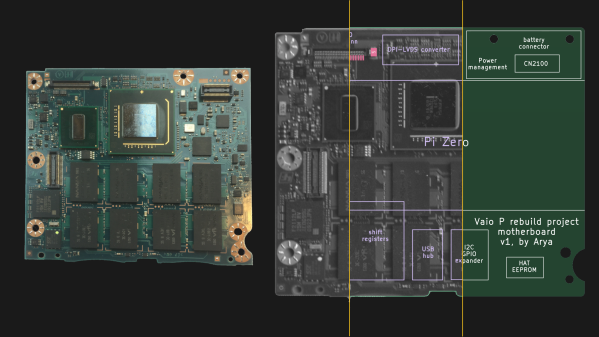
You might remember that KiCad 7 came out this February, with a multitude of wonderful features. One of them was particularly exciting to see, and the KiCad newsletter even had an animated GIF to properly demo it – a feature called “Background Bitmaps”, which is the ability to add existing board images into your board editor, both front and back, and switch between them as you design the board. With it, you can draw traces, recreate the outline and place connectors over these images, giving you a way to quickly to reproduce everything on an existing PCB! I’ve seen some friends of mine use this feature, and recently, I’ve had a project come up that’s a perfect excuse for me to try it.

By [Yoggy], CC-BY-2.0
Back in 2020, I managed to get a Sony Vaio P from a flea market, for about 20€. It’s a beloved tiny laptop from 2009, now a collectors item, and we’ve covered a few hacks with it! The price was this wonderful only because it was not fit for regular flea market customers – it was in bad condition, with the original DC jack lost and replaced by some Molex-like power connector, no hard drive, and no battery in sight.

In short, something worth selling to a known tinkerer like me, but not particularly interesting otherwise. Nevertheless, about half a year later, when I fed it the desired 10.5 V from a lab PSU and gave the power button a few chances, it eventually booted up and shown me the BIOS menu on the screen! I’ve disassembled and reassembled it a few times, replaced the DC jack with an original one from a different Vaio ultrabook I happened to have parts from, and decided to try to bring it back to original condition.

Continue reading “Revive A Sony Vaio P-Series With KiCad’s Background Bitmaps”

CNC Plus Microscope Plus Game Controller Equals Awesome

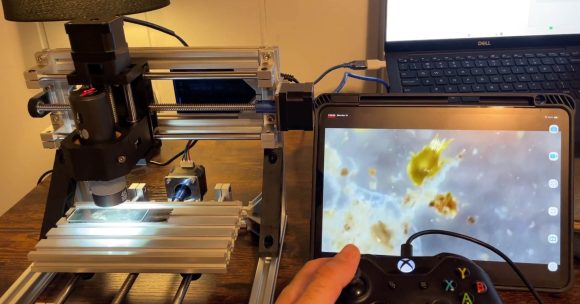
What do you get if you strap a microscope onto a CNC and throw in a gaming controller? The answer, according to Reddit user [AskewedBox] is something kind of awesome: you get a microscope that can be controlled with the game controller for easier tracking of tiny creepy-crawlies.

[ASkewedBox] set up this interesting combination of devices, attaching their Adonostar AD246S microscope to the stage of a no-brand 1610 CNC bought off Amazon, then connected the CNC to a computer running Universal G-Code Sender. This great open source program takes the input from an Xbox game controller and uses it to jog the CNC.

With a bit of tweaking, the game controller can now move the microscope, so it can be used to track microbes and other small creatures as they wander around on the slide mounted below the microscope eating each other. The movement of this is surprisingly smooth: the small CNC and a well-mounted microscope means that there seems to be very little wobble or backlash as the microscope moves.

[Askewedbox] hasn’t finished yet, though: in the latest update, he adds a polarizing lens to the setup and mentions that he wants to add focus control to the system, which is controlled by a remote that comes with the microscope.

There are plenty of other things that could be added beyond that, though, such as auto pan and stitch for larger photos, auto focus stacking and perhaps even auto tracking using OpenCV to track the hideous tiny creatures that live in the microscopic realm. What would you do to make this even cooler?