[styroPyro] liked his Attacknid, but decided it needed just a bit more blue death ray laser. We’ve seen [styroPyro’s] high-powered laser hacks before, but this time he’s taken to hacking one of [Jaimie Mantzel’s] Attacknid robots. According to one of the top comments on [styroPyro’s] video—a comment by Attacknid inventor [Jaimie] himself—the robots were meant to be hacked, and [Jamie] is ecstatic.
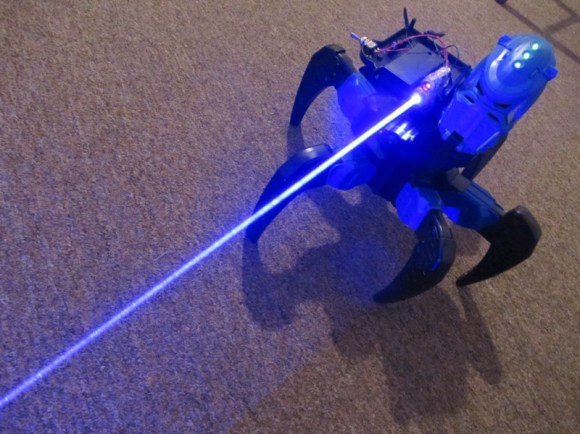
[styropyro] removed the disk shooter from his Attacknid and used the fire control circuit to activate a 2 watt blue laser. A low powered, red laser pointer serves as a laser sight, allowing you to aim at your target before unleashing the beefy blue laser. As the video shows, 2 watts is a heck of a lot of power. The Attacknid easily pops balloons and sets fire to flash paper. As usual, we urge you to use caution when handling 2 watt lasers, which fall under Class 4: aka the most dangerous class of lasers. Goggles, skin protection, and safety interlocks are the order of the day. [styroPyro] has been working with high power lasers for a few years, and seems to know what he’s doing. That said, we’ll leave the burning lasers to the professionals.