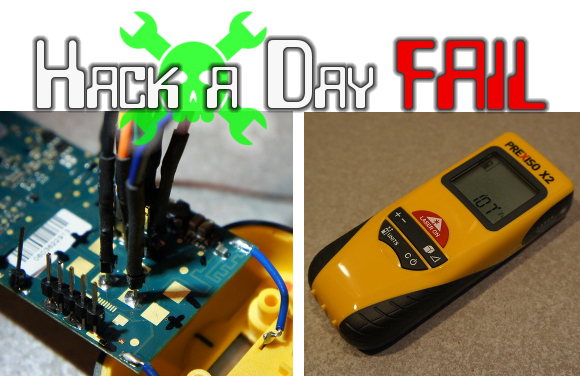
DVD Laser Diode Used To Build A Laser Engraver

[Johannes] has been reading Hackaday for years but this is the first project he’s tipped us off about. It’s a laser engraver built from a DVD burner diode (translated). It turned out so well we wonder what other projects he’s forgotten to tip us off about?

This is the second CNC machine he’s seen through from start to finish. It improves upon the knowledge he acquired when building his CNC mill. The frame is built from pine but also uses bits of plywood and MDF. It can move on the X and Y axes, using drawer sliders as bearings. The pair of blue stepper motors drive the threaded rods which move the platform and the laser mount. Just above the laser he included a small DC fan to keep it from burning up. The control circuitry is made up of an Arduino Nano and a stepper motor driver board. Catch a glimpse of the engraver cutting out some stencil material after the break.

There must be something about Spring that brings out the urge to work with laser diodes. We just saw a similar 1W cutter last week.

Continue reading “DVD Laser Diode Used To Build A Laser Engraver”

DIY Laser Cutter Built To Make Stencils

It was time for some new T-shirts so [Andreas Hölldorfer] built a laser cutter. Wait, what? That’s the excuse he’s going with, and in the end this scratch built laser cutter did come in handy by cutting stencils to use when decorating his garments.

The first thing we thought when looking at the cutter is where’s the tube? [Andreas] didn’t use a CO2 laser, so this ends up being rather low-powered. The cutting head is a 1W blue laser diode which manages to slice the three-ring binder separator pages he’s using for the stencils. The two-axis machine is mounted inside a wooden box to protect his eyes while it’s cutting. He plans to add a drawer later on so that the cutting bed will slide in and out to swap out material for the next project. He already does a lot of 3D printing work and had an old RepRap driver board on hand to use for this projects. He designed and printed the red mounting brackets which make all of the junk-bin components work together. Not bad!

If you’d like to try this out on a smaller scale try using optical drive parts for the axes.

Homebuilt Laser Cutter Ideas

Laser-Cutter

[Wuzabear] wrote in to tell us about this “DIY Laser Cutter for PCB Stencils.” While a full BOM and step-by-step build instructions aren’t provided for the frame, pictures of the build are available, and some different options for construction are discussed. One other option that was especially interesting would be to use a ready-built RepRap or other 3D printer to act as the laser motion controller. Apparently this has been experimented with, and we’d love to see any versions that or readers have come up with!

Besides some different ideas and resources for the moving parts of the cutter, there is some information on how to hook up a laser for this purpose, as well as  for the software and calibration required. It should be noted that you should always wear the appropriate safety goggles if you’re working with a high-powered laser. Although any machine-tool can be dangerous, lasers provide some safety issues that should be treated with extreme caution.

Preserving Locomotives With 3D Laser Scanning And 3D Printing

[Chris Thorpe] is a model railroading aficionado, and from his earliest memories he was infatuated with the narrow gauge locomotives that plied their odd steel tracks in northern Wales. Of course [Chris] went on to create model railroads, but kit manufacturers such as Airfix and Hornby didn’t take much interest in the small strange trains of the Ffestiniog railway.

The days where manufacturing plastic models meant paying tens of thousands of dollars in tooling for injection molds are slowly coming to an end thanks to 3D printing, so [Chris] thought it would be a great idea to create his own models of these small locomotives with 3D laser scanners and high quality 3D printers.

[Chris] started a kickstarter to fund a 3D laser scanning expedition to the workshop where the four oldest locomotives of the Ffestiniog railway were being reconditioned for their 150th anniversary. The 3D printed models he’s able to produce with his data have amazing quality; with a bit of paint and a few bits of brass, these models would fit right in to any model railway.

Even better than providing scale narrow gauge engines to model railway enthusiasts around the world is the fact that [Chris] has demonstrated the feasibility of using modern technology to recreate both famous and underappreciated technological relics in plastic for future generations. There’s a lot that can be done with a laser scanner in a railway or air museum or [Jay Leno]’s garage, so we’d love to see more 3D printed models of engineering achievements make their way onto Kickstarter.

Optical Data Transfer Project At Local School’s Family Science Night

optical-data-at-family-science-night

[Dave] wanted to show off a project at his 4th-grade son’s school during their family science night. We haven’t heard of an event like this before but it sounds like a fabulous idea! He had a new laser he wanted to include in the project, and noticed that his son was learning about how ASCII maps letters to binary number when the idea struck. He ended up building an optical data transfer system that demonstrates binary code.

This presents a fantastic learning opportunity as the project invited the school kids to select encoded strips like the ones seen above to form a secret message. The laser is pointed at a photosensor which is being read by a Raspberry Pi board. The Python code looks for a baseline and then records increases and decreases in intensity. Since the translucent tokens have either holes or black lines for 0 and 1 the baseline approach does away with the need to clock in the data. [Dave] reports that everyone who tried out the experiment was fully engaged at the prospect of pushing pieces of tape through the sensor and watching their secret message appear on a monitor.

He was motivated to write about this project after reading about data transfer using an LCD screen and photosensor.

Laser Kaleidoscope Uses More 3D Printing And Less Scavenging

laser-kaleidoscope

At first we thought that [Pete Prodoehl] was using the wrong term when calling his project a Laser Kaleidoscope. We usually think of a kaleidoscope as a long tube with three mirrors and some beads or glass shards in one end. But we looked it up and there’s a second definition that means a constantly changing pattern. This fits the bill. Just like the laser Spirograph from last week, it makes fancy patterns using spinning mirrors. But [Pete] went with several 3D printed parts rather than repurposing PC fans.

In the foreground you can see the potentiometers which adjust the motor speeds. The knobs for these were all 3D printed. He also printed the mounting brackets for the three motors and the laser diode. A third set of printed parts makes mounting the round mirrors on the motor shaft quite easy. All of this came together with very tight tolerances as shown by the advanced shapes he manages to produce in the video after the break. Continue reading “Laser Kaleidoscope Uses More 3D Printing And Less Scavenging”

Laser Spirograph

laser-spirograph

Here’s a weekend junk bin project if we’ve ever seen one. [Pat] used a quartet of computer fans to make his laser Spirograph. Deciding to try this simple build for yourself will run you through a lot of basics when it comes to interfacing hardware with a microcontroller. In this case it’s the Arduino Nano.

The Spirograph works by bouncing a laser off of mirrors which are attached to the PC fans. When the fans spin the slight alignment changes cause the laser dot to bob and weave in visually pleasing ways. You can catch twenty minutes of the light show in the clip after the break.

Three of the fans have mirrors attached, the housing of the fourth is used to host the laser diode and make assembly easier. A TC4469 motor driver is used to connect the fans to the Arduino. The light show can be manually controlled by turning the trio of potentiometers which are read using the Arduino’s ADC.

If you manage your way through this build perhaps you’ll move on to a setup that throws laser light all over the room.

Continue reading “Laser Spirograph”