Mankind has always looked for ways to light up the night as they walk around. Fires are great for this, but they aren’t very safe or portable. Even kept safe in a lantern, an open flame is still dangerous – especially around cows. Enter the flashlight, or torch if you’re from the other side of the pond. Since its invention in 1899, the flashlight has become a vital tool in modern society. From patrolling the dark corners of the city, to reading a book under the covers, flashlights enable us to beat back the night. The last decade or so has seen the everyday flashlight change from incandescent bulbs to LEDs as a light source. Hackers and makers were some of the first people to try out LED flashlights, and they’re still tinkering and improving them today. This weeks Hacklet focuses on some of the best flashlight projects on Hackaday.io!
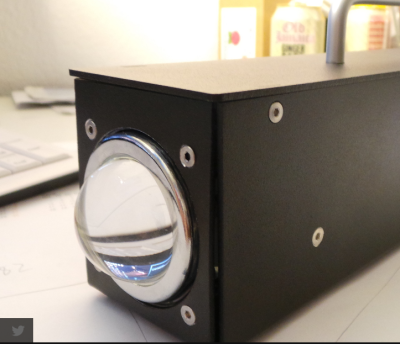 We start with [Norman], and the LED Flashlight V2. Norman built a flashlight around a 100 Watt LED. These LEDs used to be quite expensive, but thanks to mass production, they’ve gotten down to around $6 USD or so. Norman mounted his LED a custom aluminum case. At this power level, even LEDs get hot. An extruded aluminum heatsink and fan keeps things cool. Power is from a 6 cell LiPo battery, which powers the LED through a boost converter. It goes without saying that this flashing is incredibly bright. Even if the low-cost LEDs aren’t quite 100 Watts, they still put many automotive headlights to shame! Nice work, [Norman].
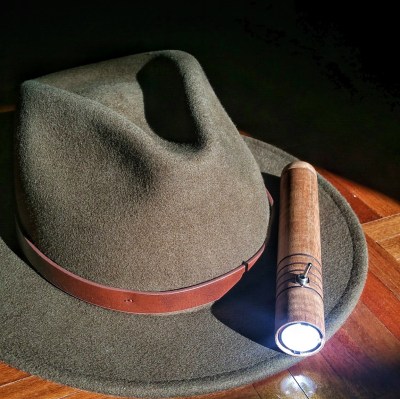 A tip of the fedora to [Terrence Kayne] and his Grain-Of-Light LED LIGHT. [Terrence] loves LED flashlights, be he wanted one that had a bit of old school elegance. Anyone familiar with LEDs knows CREE is one of the biggest names in the industry. [Terrence] used a CREE XM-L2 emitter for his flashlight. He coupled the LED to a reflector package from Carlco Optics. The power source is an 18650 Lithium cell, which powers a multi-mode LED driver. [Terrence] spent much of his time turning down the wooden shell and aluminum tube frame of the flashlight. His workmanship shows! Our only suggestion would be to go with a lower profile switch. The toggle [Terrence] used would have us constantly checking our pockets to make sure the flashlight hadn’t accidentally been activated.
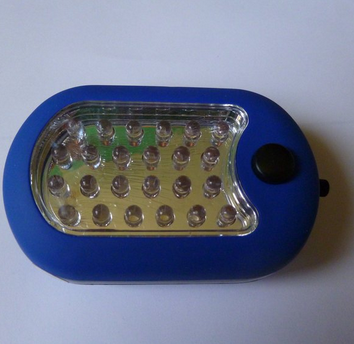 Harbor Freight’s flashlights are a lot like their multimeters: They generally work, but you wouldn’t want to trust your life to them. That wasn’t a problem for [Steel_9] since he needed a strobe/party light. [Steel_9] hacked a $5 “27 LED” light into a stylish strobe light. He started by cutting the power traces running to the LED array. He then added in an adjustable oscillator circuit: two BJTs and a handful of discrete components make up an astable multivibrator. A third transistor switches the LEDs. Switching a load like this with a 2N3906 probably isn’t the most efficient way to do things, but it works, and the magic smoke is still safely inside the semiconductors. [Steel_9] built the circuit dead bug style, and was able to fit everything inside the original plastic case. Rave on, [Steel_9]!
If you want to see more flashlight projects, check out our new list on Hackaday.io! That’s about all the time we have for this week’s Hacklet. As always, see you next week. Same hack time, same hack channel, bringing you the best of Hackaday.io!


 To make FLED more reliable [Ben] sourced strips of the new APA102 LEDs which