Animated Turn Signals Add A Little Bit Of Cylon To Your Automobile

[StarfireMX] churned out a fantastic turn signal replacement for his Mustang. When he switches on his blinker, a chasing pattern of amber LEDs is shown on the front corner of his car. Pretty cool, and as far as we can tell this is still street legal. But once he gets onto private property [StarfireMX] can have a little bit more fun with the replacements. The LEDs are actually fully addressable RGB modules. They can display a variety of colors and patterns, with wireless control from a touch-screen unit he also built.

Both the turn signal unit, and the remote controls are Arduino driven with XBee modules for wireless communications. Pop the hood and you’ll find even more blinky lights to accent the engine, which are also tweaked using the remote control.

Don’t miss the demonstration video after the break. Near the end of the clip you can see how the controller is mounted with heavy-duty Velcro behind the grill. Inside the project box there’s a voltage regulator which drops the 12V down to 5V and can put out a whopping four amps to make sure the LEDs have plenty of current.

Continue reading “Animated Turn Signals Add A Little Bit Of Cylon To Your Automobile”

What Has 114 LEDs And Is Always Running?

The answer, of course, is a word clock. This is actually [Eric’s] second version of a word clock. Like the first one, it uses 114 LEDs to back light the words on the display.

In his first iteration he used an Arduino to drive a Charlieplex array of lights. It was an 11 by 10 grid, plus four LEDs to display the in-between minutes as dots at each corner of the clock face. This time around he’s still using an Arduino, but the lights have seen a huge upgrade. In one of his build pictures you can see the reel of RGB led modules which have two RGB LEDs and an HL1606 driver on each segment. These are SPI controlled, making them easy to hook up, using just a few data and power bus rails. Check out the test video after the break that shows what this grid is capable of.

In case you can’t figure out what time is displayed above, you might check out an English version of a Word Clock face to help in your own build.

Continue reading “What Has 114 LEDs And Is Always Running?”

Making A Simple Addressable Array From LED Strips

led_array_from_led_strips

[Patrick] was prepping for some future projects he had in mind, for which he will need a simple 2D array of addressable LEDs. While it is certainly possible for him to build his own LED array and control hardware, he thought he would try out some off the shelf products to see if something might fit his needs.

He picked up a strip of addressable RGB LEDs from Adafruit, and while they worked very well, they were a bit too pricey for the amount of LEDs he knew he would need. He picked up a strip of similar LEDs without PWM capabilities built-in, and gave those a spin – they worked well enough, so he got to work building his LED array.

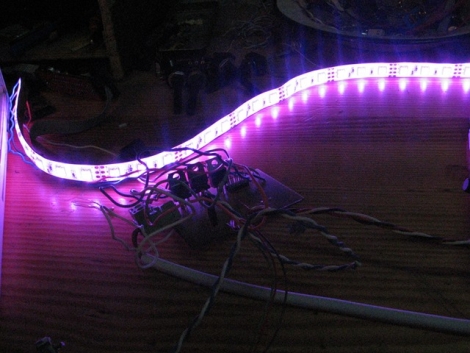
While LED strips might not jump right out as the best way to make an LED array, they can be easily cut and rearranged without any issue, provided you solder in a couple of wires to connect the disjointed strips. [Patrick] did just that, and wrote a small Arduino library that allows for easy control of the grid.

We’re not sure if he plans on scaling these arrays any larger than 8×8, but we are definitely interested to see what he has in store for them.

Check out a quick video of his LED array in action below.

Continue reading “Making A Simple Addressable Array From LED Strips”

Amazing RGB POV Clock

rgb_pov_propeller_clock

We’re no strangers to POV time pieces around here, but something about them never gets old. Whether they use a ring of LEDs to draw clock hands, or an intricately cut HDD platter to replicate LCD segments, we love seeing them. [David] sent in this hard drive POV clock built by a fellow named [Kly], and it’s just beautiful.

[Kly’s] “Propeller” POV clock is named as such due to the design of the circuit board. The board is mounted on the HDD spindle, rotating much like an airplane’s propeller. The construction details are sparse, but from what we can find, it is based around a PIC32MX microcontroller, which is used to control the 66 SMD RGB LEDs mounted on the circuit board.

As you can see in the video below, the tightly packed LEDs result in some pretty amazing visuals.

Aside from watching the video below, be sure to swing by his Youtube channel for a handful of videos showing RGB POV clock in action.

Continue reading “Amazing RGB POV Clock”

Voxel Shield Makes Driving LED Cubes Easy

voxel_shield_led_cube

An Arduino can handle running a small LED cube on its own, but if you’re planning on building something big, eventually you are going to run out of pins. For something like an 8x8x8 cube, odds are you will have to turn to shift registers to get the job done. While you could design a breakout board full of shift registers on your own, [Connor] has done the work for you and produced an easy to use Arduino LED cube shield.

He calls his creation the Voxel Shield, and it incorporates 9 SN74LS595N shift registers and an external power plug for all of your LED cube needs. The shield can handle addressing up to 512 LEDs, making it an easy way to drive an 8x8x8 cube or even a 64×8 LED matrix.

It’s a nice clean and compact way to drive a large number of LEDs, so if you have the need, be sure to swing by his site – he has made his schematics and board layout files available to all comers.

[Thanks, Thomas]

Add Some LED Enhancement To Your Netbook Lid

[Mathieu] needed to open up his Acer Aspire One to do a hard drive replacement and decided to add a bit of pizzazz while he was in there. The image above is the lid of the netbook adorned with RGB LEDs and a spray painted stencil.

He previously purchased a set of surface mount RGB packages on eBay and thought that they were perfect for this hack. after removing the case he found that by using a flex PCB he would be able to fit the LEDs inside, and pass the connections through to the main computer housing. The leads connect to a Teensy board, which is held in place with a liberal application of hot glue. [Mathieu] removed the USB connector and soldered jumper wires to one of the computers ports. In the video after the break you can see that he uses the programming software to write some code to the Teensy, driving the LEDs. We’d like to see it set to listen for serial communications and react accordingly. That way you could use it for notifications, as an audio VU meter, to track torrent progress, etc.

Continue reading “Add Some LED Enhancement To Your Netbook Lid”

ATtiny Hacks: DIY High-speed Photography LED Lighting Rig

ATtiny Hacks Theme Banner

diy_high_speed_photography_led_lighting

[Tom] wanted to try his hand at high-speed photography and needed some equipment to get things rolling. Not wanting to spend a ton of money on a lighting rig or trigger mechanism, he decided to build his own. In a three part series on his blog, he details the construction and testing of his high-speed setup along with the improvements and lessons learned along the way.

His adventures started out with a small off-brand Cree LED clone and an ATiny15L that was collecting dust in his workshop. He built a simple circuit that would trigger the LED to light his subject, which in [Tom’s] case was a bowl of milk. Rather than using a motion or sound trigger, he opted to mount a small piezo to the bottom bowl, firing the LED any time a droplet hits the bowl’s surface.

The pictures he took were decent, but he knew he could get better results. He purchased a new, more powerful Cree LED, and wrote a small terminal program that allows him to tweak his flash parameters using his laptop. The results he gets now are far better – in fact, he has a whole gallery of pictures you can check out.

If you want to delve into high-speed photography as well, all of the schematics and code can be found on his blog.