Light Painting Nyan Cat With An Arduino

You too can paint your favorite meme in light with just a few tools. [Skywodd] brought together a couple of different projects to make this happen. He had already built a large POV display and now uses a DSLR with long exposure to create light paintings (translated).

The Arduino-powered display is built from a strip of 35 RGB LEDs. Now, that’s four pins per LED but one of is ground, leaving just 105 pins that need to be addressable. A couple of things make this manageable. First, he etched his own circuit boards for the LED strips. This breaks out the contacts to the edge of the boards and simplifies the soldering a bit by taking care of the ground bus. Secondly, he’s using M5450 LED display drivers for addressing. After the break you can see the video of the prototype hardware (in French but blinky action starts at about 2:30).

If you’re looking for an easier way to do this, check out the light painting that uses manufactured LED strips.

Continue reading “Light Painting Nyan Cat With An Arduino”

Rear Window LED Display Gives Other Drivers A Piece Of Your Mind

rear_window_led_matrix

[Gagandeep] was sick and tired of discourteous drivers on the highway, so he decided that he would put together a display to let them know what he thought of their poor driving skills. He planned on putting the display up in the rear window of his car, so he had to ensure that it did not obstruct his view while driving.

He decided that an LED matrix would be the best way for displaying images and text while on the go, so he got busy constructing a 40×16 mesh grid for his rear window. Using a wooden template to get the spacing and positioning just right, he spent several days soldering the 600+ LEDs to one another. He used 74HC595 shift registers to manage the LEDs in groups of 5 columns, while an ATmega AT89C51 was tasked with generating the text and images to be displayed. All of the ICs were deadbugged in place, helping achieve [Gagandeep’s] desire of keeping his view unobstructed.

While we’re not well-versed on the legality of such a display, it looks great when animated. There are plenty of pictures of the grid in various stages of construction as well as videos of it in action in his Picasa album, so be sure to check them out. If you are looking for code or Eagle files, you can find those here.

We Want This LED Ball

[Nikolai] has a friend who is into fire and light shows. Her birthday was coming up, so [Nikolai] decided to build something to compliment her performances. He came up with a 10 cm LED ball (Russian, Google translation) that has a matrix of 256 LEDs wrapped around its surface.

The ball’s structural support is its own PCBs. The bottom of the ball is a simple bus – no components needed. The processor module fits into the bus along with the side arcs with LEDs on the edge. The top holds two AA batteries and a MAX1674 step up converter. The view from the inside looks like some sort of bizarre alien device. Very cool.

The central processor module is based around an ATmega88. The microprocessor controls two ‘595 for each of the 16 side panels. So far, four modes of operation have been programmed – a sine graph wrapped around a sphere, a random function, two oscillating circles, and plain old lines. The code for the LED ball is available (offsite link), and thankfully the variables are in English. An impressive piece of engineering and board layout skills.

Check out the video of the LED ball after the break.

Continue reading “We Want This LED Ball”

Christmasqualizer Is The Next Light Switch Rave

[youtube=http://www.youtube.com/watch?v=la1OuczS_wM&w=470]

[Kyle] was looking for a way to spice up his boring brick-wall dorm room. The Christmasqualizer he came up with brightens up his room and would make an awesome place for a rave.

The strings of lights in [Kyle]’s Christmasqualizer are off-the-shelf Christmas lights. A simple circuit for the 7-band equalizer was built following this article. The build uses an MSGEQ7 equalizer chip takes audio from any source. The volume level of the seven EQ bands are output to an Arduino over a serial connection.

After the EQ chip was connected to the Arduino, [Kyle] needed a way to switch the strings of Christmas lights on and off. A few solid state relays later, and he was in business.

All the code for the Christmasqualizer is up on github. The sketch is pretty simple – connect the EQ chip as per the article, then connect the relays to the output pins on the Arduino. It’s a fun and easy project that really livens up a dorm room.

Remote Controlled Glass Block LED Matrix

hive13_remote_controlled_led_matrix

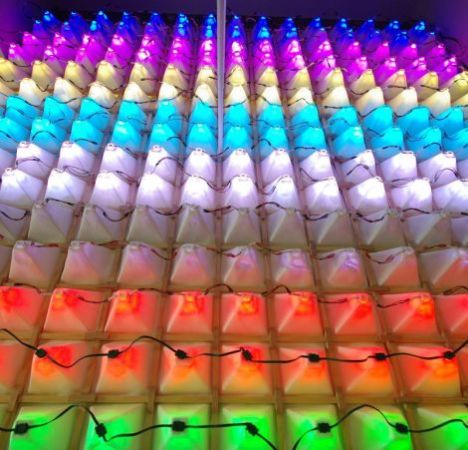
At Hive13, a Cincinnati-based hackerspace, they like to hack everything – even their bathroom. One of the bathroom’s walls faces the street, and is made up of thick glass privacy blocks. A few years ago, they thought it would be a cool idea to install an LED matrix to the back side of the glass wall to spruce things up a bit. After a couple of iterations, they finally had something they were happy to show off, but they wanted to make it even cooler.

While the the Arduino and ShiftBrite shield running the matrix could be controlled over a serial connection, they wanted to use the ProjectBlinkenlights tools to control things over the network. While that didn’t quite work out as planned, it wasn’t necessarily an exercise in futility. While Blinkenlights controls were out of the question, they were inspired to add OSC compatibility to the Processing sketch, which allows them to work the display with an app available for both Android and iOS devices.

The result is pretty slick, as you can see in the video below. Now all they need to do is get Tetris up and running!

Continue reading “Remote Controlled Glass Block LED Matrix”

Halloween Hacks: A Haunted House Project For The Kids


light_up_haunted_house

If the kids have been bugging you to get started with your Halloween decorating, [Dale] from BasicMicro has a neat and interactive project that’s sure to satiate their thirst for ghoulish fun.

His wife was looking for some new decorations for this Halloween, so he took a quick trip to the craft store and found a DIY foam Haunted House kit. After convincing her to do the assembly, he outfitted the display with some Starlite RGB modules, which have all sorts of interesting lighting modes built in. When the lights are turned low, the house jumps to life, as you can see in the video below.

The construction and wiring are not an overly complex job, so it’s a great starting point for little minds and hands that are beginning to develop an interest in electronics. For those kids with a little bit of experience under their belts, the house could easily be modified to use servos to create swinging doors and shaking grave stones.

The limit is truly defined only by their imagination (and your electronics budget), so why not give it a try this weekend? We’d love to see what you and your budding hackers put together!

Continue reading “Halloween Hacks: A Haunted House Project For The Kids”

Candied LEDs Are A Light, Tasty Treat

rock_candy_diffused_leds

[Emily Daniels] recently snagged a free iPad in the Instructables “Play with your food challenge” with an interesting way to work with LEDs. Growing up, most kids attempted to make, or at least have seen rock candy be produced. [Emily] thought it would be interesting to mix LEDs with the stuff to see what she could come up with, and her candied LEDs are the result.

The process is pretty straightforward, and involves mixing up a batch of supersaturated sugar syrup in which LEDs are suspended. The LEDs act as a nucleation point for the crystal formation, growing a nice solid coating of sugar after a couple weeks’ time. After some cleaning up, the LEDs can be connected to a coin cell battery or similar, as you would normally do. The sugar acts as a diffusing medium for the LEDs, giving them a nice soft beam pattern.

Obviously you likely wouldn’t want to use these for any long-term electronics project, but it’s a fun activity for the kids, and it could be a good way to incorporate electronics into baked goods.