It’s not often that we see something so brilliantly simple we’re left reaching for our checkbooks while wondering exactly how we never though of that before. [Jürgen]’s edge-lit Nixie display is one of those builds.
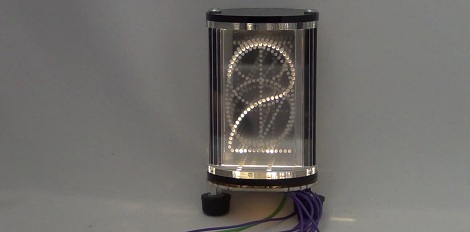
[Jürgen]’s modern take on a Nixie display uses ten laser-engraved pieces of acrylic to emulate a Nixie numerical display. In the base of the display are 10 LEDs, each shining onto the side of a piece of acrylic. When an LED lights up, you can clearly see the corresponding number. Edge-lit displays are old hat, but talking about the possibility of an RGB Nixie-style display is really neat.
The build was inspired by an antique edge-lit display that performed the same function as the ever-popular Nixie tube with 10 miniature light bulbs and light pipes. The ancient edge-lit displays came in a rectangular enclosure that worked very well for panel-mount uses, but [Jürgen] stuck to a more traditional cylindrical orientation. All we want to know is when a manufacturer in China is going to start building these. Check out the demo of the edge-lit Nixie after the break.


