Mac 128K Emulator Gets DIY Ceramic Enclosure

Creative technologist [Joselyn McDonald] wanted to hone her ceramic skills by building an iconic Macintosh 128K sculpture, complete with a fully functional operating system.

At first, she was determined to use Processing to create an interface for her sculpture by recreating the UI visually and adding some touch controls. However, she soon abandoned this tedious task after discovering MacintoshPi, which steps you through installing Mac OS 7, 8, and 9 emulators on a Raspberry Pi. [Joselyn] has also installed several retro games, including DOOM II, Carmen Sandiego, and Sim City, thanks to sites like Macintosh Garden and Macintosh Repository. 

Next, [Joselyn] hopes to set it up to display her and her partner’s schedules, and to let friends play around with nostalgic games. This piece was made using hand building, but other cool ceramic techniques like this slip cast dog bowl and this stone 3D printer have us thinking about what other types of enclosures could be built!

Macintosh Classic II With E-Ink Display

As various antique computers age, it becomes increasingly hard to operate them as hardware begins to physically fail. Keeping these systems up and running often requires scavenging parts from other machines which are only becoming harder to find as time goes on. But if you throw out the requirement of using only era-appropriate components, there are some interesting ways to revive older devices with a few touches of modern tech, like this Mac Classic with a unique display.

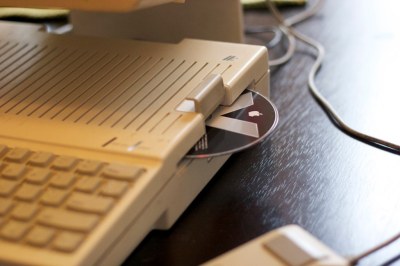
The Macintosh Classic II was the successor to the first Macintosh computer Apple sold that had a price tag under $1000. As such, there were some lower specs for this machine such as the monochrome 512×342 display. This one has been retrofitted with an e-ink display which actually gives it some of the same grayscale aesthetic as the original. The e-ink display is driven by a Raspberry Pi which displays a replica System 7 environment and a set of photos.

While the only part of the computer that’s original is the shell at this point, the project’s creator [Dave] also built in support for the Apple Desktop Bus through an Arduino so the original Apple mouse and keyboard can be used. While it’s largely an illusion of a working Mac Classic, we still appreciate the aesthetic.

If you’re more of a classic Apple purist, though, take a look at this SE/30 which uses almost entirely original parts with the exception of a Raspberry Pi to allow it to communicate with the modern Internet.

Continue reading “Macintosh Classic II With E-Ink Display”

Mac Mini Mini

The Mac Mini has been roughly the same size and shape for 12 years, as the current design was released in June 2010. However, despite being the same general form factor, the internals has shrunk over the years. [Snazzy Labs] took advantage of this to make a miniaturized Mac Mini.

With a donor Mac in hand, they cracked it open and found an oversized power supply, a diminutive logic board, and a good bit of space. Unfortunately, the logic board attaches to a wide IO shield. He removed that, and the fan attached to the heatsink (checking to ensure it still booted). Relocating the WiFi antennas was the trickiest part of the whole build. Given that he wanted to shrink the power supply and the Mac Mini accepts just 12 volts, he devised a clever solution to use MagSafe as a connector. However, Magsafe negotiates over a complex protocol when attached. So, rather than smarten his port up, he dumbed the charger down by replacing it with a Microsoft Surface power supply spliced into the MagSafe connector.

With his mini Mac Mini board ready to go, he began designing a case to fit what was now a single-board computer. A fan of the channel offered a design reminiscent of the 2019 Mac Pro. Unfortunately, FDM printing struggled with the cheese-grater pattern, so [Snazzy Labs] printed it in resin with some mica powder. As a result, the mini mini looks fantastic while taking up just 28% of the volume of the original.

They’ve posted the STL files online with detailed instructions and a parts list if you want to recreate it at home. Perhaps with the smaller motherboard, it might be worth revisiting the Mac Mini inside a PowerBook hack from a few years ago. Video after the break.
Continue reading “Mac Mini Mini”

On the left, the Thunderbolt chip as mounted on the motherboard originally. On the right, the shim installed in place of a Thunderbolt BGA chip, with the IPEX connector soldered on

Macbook Gets NVMe SSD With Help Of A BGA-Imitating PCB

Recently, we stumbled upon a video by [iBoff], adding an M.2 NVMe port to a 2011-2013 MacBook. Apple laptops never came with proper M.2 ports, especially the A1278 – so what’s up? The trick is – desoldering a PCIe-connected Thunderbolt controller, then soldering a BGA-like interposer PCB in place of where the chip was, and pulling a cable assembly from there to the drive bay, where a custom adapter PCB awaits. That adapter even lets you expose the PCIe link as a full-sized PCIe 4x slot, in case you want to connect an external GPU instead of the NVMe SSD!

The process is well-documented in the video, serving as an instruction manual for anyone attempting to install this specific mod, but also a collection of insights and ideas for anyone interested in imitating it. The interposer board ships with solder balls reballed onto it, so that it can be installed in the same way that a BGA chip would be – but the cable assembly connector isn’t installed onto the interposer, since it has to be soldered onto the mainboard with hot air, which would then melt the connector. The PCB that replaces the optical drive makes no compromises, either, tapping into the SATA connector pins and letting you add an extra 2.5mm SATA SSD.

Adding an NVMe drive is an underappreciated way to speed up your old laptop, and since they’re all PCIe under the hood, you can really get creative with the specific way you add it. You aren’t even limited to substituting obscure parts like Thunderbolt controllers – given a laptop with a discrete GPU and a CPU-integrated one, you could get rid of the discrete GPU and replace it with an adapter for one, or maybe even two NVMe drives, and all you need is a PCB that has the same footprint as your GPU. Sadly, the PCB files for this adapter don’t seem to be open-source, but developing a replacement for your own needs would be best started from scratch, either way.

We’ve seen such an adapter made for a Raspberry Pi 4 before, solderable in place of a QFN USB 3.0 controller chip and exposing the PCIe signals onto the USB 3 connector pins. However, this one takes it up a notch! Typically, without such an adapter, we have to carefully solder a properly shielded cable if we want to get a PCIe link from a board that never intended to expose one. What’s up with PCIe and why is it cool? We’ve talked about that in depth!

Continue reading “Macbook Gets NVMe SSD With Help Of A BGA-Imitating PCB”

A small round NRF51822 board glued to the underside of a mailbox lid, with a small vibration sensor attached

Check Your Mailbox Using The AirTag Infrastructure

When a company creates an infrastructure of devices, we sometimes subvert this infrastructure and use it to solve tricky problems. For example, here’s a question that many a hacker has pondered – how do you detect when someone puts mail into your mailbox? Depending on the availability of power and wireless/wired connectivity options, this problem can range from “very easy” to “impractical to solve”. [dakhnod] just made this problem trivial for the vast majority of hackers, with the FakeTag project – piggybacking off the Apple’s AirTag infrastructure.

This project uses a cheap generic CR2032-powered NRF51822 board, sending the mailbox status over the FindMy system Apple has built for the AirTag devices. For the incoming mail detection, he uses a simple vibration sensor, glued to the flap lid – we imagine that, for flap-less mailboxes, an optical sensor or a different kind of mechanical sensor could be used instead. Every time someone with a FindMy-friendly iPhone passes by [dakhnod]’s mailbox, he gets an update on its status, with a counter of times the sensor has been triggered. [dakhnod] estimates that the device could run for up to a year on a single battery.

Continue reading “Check Your Mailbox Using The AirTag Infrastructure”

90s Apple Computer Finally Runs Unsigned Code

Back in the 90s, the console wars were in full swing. Nintendo vs Sega was an epic showdown at first, but when Nintendo seemed sure to clench the victory Sony came out of nowhere with the PlayStation. While these were the most popular consoles at the time, there were a few others around that are largely forgotten by history even if they were revolutionary in some ways. An example is the Pippin, a console made by Apple, which until now has been unable to run any software not signed by Apple.

The Pippin was Apple’s only foray into gaming consoles, but it did much more than that and included a primitive social networking system as well as the ability to run Apple’s Macintosh operating system. The idea was to be a full media center of sorts, and the software that it would run would be loaded from the CD-ROM at each boot. [Blitter] has finally cracked this computer, allowing it to run custom software, by creating an authentication file which is placed on the CD to tell the Pippin that it is “approved” by Apple.

The build log goes into incredible detail on the way these machines operated, and if you have a Pippin still sitting around it might be time to grab it out of the box and start customizing it in the way you probably always wanted to. For those interested in other obscure Apple products, take a look at this build which brings modern WiFi to the Apple Newton, their early PDA.

Continue reading “90s Apple Computer Finally Runs Unsigned Code”

Bringing IMessage To The Mac

If you’ve invested in the Apple ecosystem, the joys of iMessage likely illuminate your life. Your phone and desktop and laptop all sync your messages. But what if your desktop is running Mac OS 9 or System 2? This is where [CamHenlin’s] MessagesForMacintosh comes in.

Unfortunately, it does require a more modern Mac to act as an access point into the wider iMessage network. The modern Mac sets up a GraphQL database that can be accessed. Then a serial cable connects your “retro daily driver” to a translation layer that converts the serial commands into GraphQL commands. This could be something simple and network-connected like an ESP32 or a program running on your iMessage Mac. [CamHenlin] has a second Mac mini in his demo, seen above.

[CamHenlin] leverages his library known as CoprocessorJS. It allows older machines to hand off complex workloads to more modern machines, allowing modern machines to act as a coprocessor. Getting a single binary to run across many different versions of Mac OS and System is tricky and there were a few tricks involved. Retro68 is a C++17 compiler that targets PowerPC and 68k architectures. Additionally, Nuklear Quickdraw is used to provide a GUI in a performant manner.

It is always a joy to see older hardware do new tricks, often with the help of a bit of modern hardware. Connecting your Mac to the internet can be as easy as Pi.