Fix Broken Buttons On Your ASUS Computer Monitors

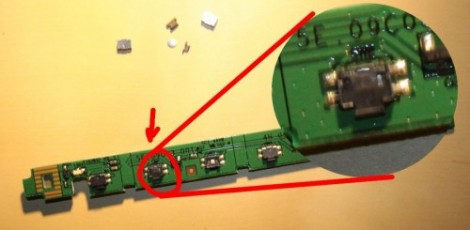
One of the perks of writing for Hackaday is that we often find hacks that we’ve been meaning to do ourselves. Here’s one that will let us fix our borked ASUS computer monitor buttons. [Silviu] has the same monitor we do, an ASUS VW202, and had the same problem of stuck buttons. We already cracked ours open and realized that the buttons are not easily replaced (you’ve got to source the right one). We just unstuck the offender and vowed not to press that button again, but [Silviu] actually figured out how to disassemble and repair the PCB mount switches.

As with most consumer electronics these days the worst part of the process is getting the monitor’s case apart. The plastic bezel has little spring tabs all around it that must be gently pried apart. Once the PCB which hosts the buttons was removed, he took the metal housing off of the broken switch. Inside he found that a bit of metal particulate (leftovers from manufacturing?) were causing the problem. A quick cleaning with a cotton swab removed the debris and got the tactile switch working again.

Tutorial: Replacing Bad Capacitors

[glytch] sent in a tutorial on replacing dying capacitors on a motherboard, and we honestly can’t think of a better subject for an introductory tutorial. There’s nothing like having your friends think you’re a wizard for bringing broken electronics back from the grave.

For the repair a dead motherboard was [glytch]’s quarry. After taking a look at the board, he found a few bulging caps that were ready to burst. After ordering a few caps with the same voltage, capacitance, and dimensions (trust us, you want the same size cap), [glytch] took an iron and desoldering braid to the board and replaced a few caps.

Sooner or later, all capacitors are going to go break down. This isn’t always a bad thing – we picked up quite a few “broken LCD monitors” in the years after the capacitor plague and repaired them with a few dollars worth of caps. A lot of the caps in our late 80s computers have been replaced, and these machines are still chugging along.

Replacing An Overheating Tablet Power Supply

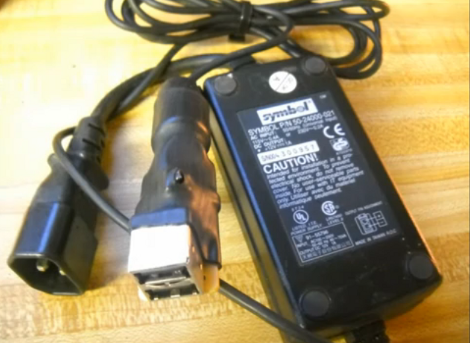
[Dave] has an ASUS tablet PC with a little problem. The device is charged via the docking connector’s USB cable when plugged into a special wall transformer. The problem is that the wall unit tends to overheat, and is shut down by a thermister inside to avoid permanent damage. The word on the Internet is to drop it in a zipper bag and chill it in the freezer for a bit. Although this works, it’s not the permanent solution that he was looking for. Instead, he hit the parts bin and built his own power supply replacement without buying anything.

The device is simply looking for 12V on the power pin (pin 1) of the USB cable. [Dave] dug through his mountain of unused AC adapters and found one that fit the voltage and current specs of the stock unit. He also grabbed a dusty old motherboard and plucked the USB ports off of the back. A bit of protoboard makes for a good base to connect the AC adapter wires to the ports, which was then covered with one big shrink tube. The result is seen above, and demonstrated in the clip after the break.

Continue reading “Replacing An Overheating Tablet Power Supply”

Got Dead Bugs In Your Stereo?

It happens to the best of designers, spending untold amounts of time designing a complex device just to find out that you missed a trace, or you couldn’t rout something to something else. As time marches on its becoming a bit less common to pop open a commercially produced device and see a little jumper wire or 2 flying across a pcb, or a resistor straddling an IC.

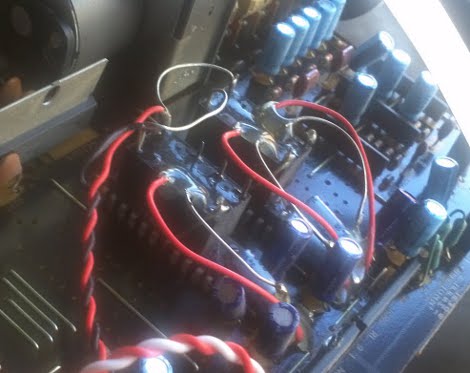
But when [Ilektron] opened up a Yamaha Dolby Pro Logic receiver to scavenge for parts he saw a very big “oops” and a even wilder fix. The maker took a pair of relays, flipped them “belly up” and hot glued them into place on top of a pair of ICs. Then the mess was “dead bug” wired to the circuit using insulated and uninsulated bus wire, contacts were then reinforced / insulated using more hot glue.

This is one of the most hacky fix we have seen in a commercially produced product, but we would love to hear your amusing horror stories of “WTH did they do?” So join us in the comments after the break.

Focus Fix For Non-reflex 35mm Camera

For camera fanatics the acquisition of an old camera is a thrilling event. But if you’re going to collect them, you’d better have some repair skills so that you can also use them. [Fernando’s] latest find was this Minox 35mm camera. The aperture needed cleaning, and after reassembling the unit he realized the he had not marked the focus ring when taking it apart. This is not a reflex camera, so you can’t look in the view finder to adjust focus. He came up with his own method to get the focus ring calibrated.

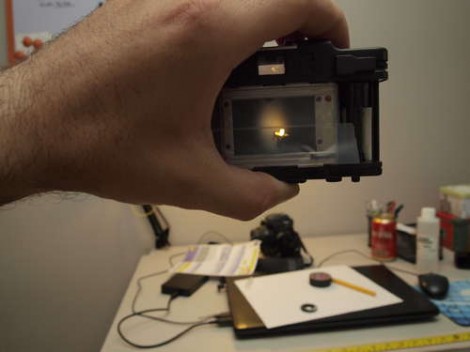
The focal point needs to focus on the film. He simulated this plane using some magic tape, which removes easily without leaving a residue. When the shutter is open, you can see the image projected on this translucent surface. He then set up the camera with the lens 90 cm from a bright light bulb. By adjusting the focus to create a sharp image on the temporary screen, he knows the focus is calibrated, and can reset the focus ring to the 0.9m mark.

Need some help developing that exposed film? You could always give the coffee and vitamin C hack a try.

Relighting A Gauge Cluster

When a few lights in the dashboard of  [Garrett]’s truck burned out, he was looking at a hefty repair bill. The repair shop would have to replace the huge PCB to change a few soldered light bulbs, so he was looking at a $500 repair bill. Lighting up a LED is everyone’s first project, so [Garrett] decided to change out the bulbs with LEDs and save a few dollars.

The repair was very simple – after removing the dials and needles, [Garrett] found a huge PCB with a few burnt out bulbs on board. He took a multimeter to each bulb’s solder pad and replaced each one with an LED and resistor. The finished project looks like it came out of a factory and is a huge improvement over the ugly amber bulbs originally found in his truck.  [Garrett] also posted a nice Instructable of his build showing the nicely soldered lamp replacements.

Repairing A Commercial-grade Pick And Place Machine

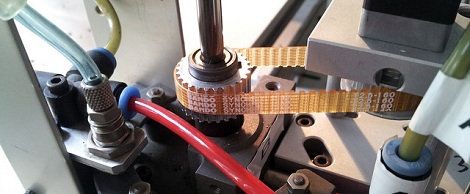
It looks like Null Space Labs has a new pick and place machine. This immense repair job began when [Charliex] and [Gleep] found a JukiPlacemat 360 pick and place machine. The idea of having their very own pick and place machine proved intoxicating, possibly too much so because the didn’t return the machine when they found out it wasn’t working.

After a ton of work that involved adding a camera, [Charliex] and the rest of the builders at Null Space Labs finally have their own pick and place machine that works. This was a complete rebuild from the ground up. So many things didn’t work on the machine, they might have been better off building one from scratch. Aside from the massive effort that went into turning the shell of a machine into a working unit, we really have to commend everyone who worked on it.

The team added a nice GUI to control the machine. The guys have already run a successful test and ovened a few boards, so everything works as it should have at purchase. It’ll be great for making next year’s LayerOne conference badges.