Review: Centre For Computing History

With almost everything that contains a shred of automation relying on a microcontroller these days, it’s likely that you will own hundreds of microprocessors beside the obvious ones in your laptop or phone. Computing devices large and small have become such a part of the fabric of our lives that we cease to see them, the devices and machines they serve just work, and we get on with our lives.

It is sometimes easy to forget then how recent an innovation they are.  If you were born in the 1960s for example, computers would probably have been something spoken in terms of the Space Race or science fiction, and unless you were lucky you would have been a teenager before seeing one in front of you.

Having seen such an explosive pace of development in a relatively short time, it has taken the historians and archivists a while to catch up. General museums have been slow to embrace the field, and specialist museums of computing are still relative infants in the heritage field. Computers lend themselves to interactivity, so this is an area in which the traditional static displays that work so well for anthropological artifacts or famous paintings do not work very well.

There's the unobtrusive sign by the level crossing, Cambridge's version of the black mailbox.
There’s the unobtrusive sign by the level crossing, Cambridge’s version of the black mailbox.

Tucked away next to a railway line behind an industrial estate in the city of Cambridge, UK, is one of the new breed of specialist computer museum. The Centre for Computing History houses a large collection of vintage hardware, and maintains much of it in a running condition ready for visitors to experiment with.

Finding the museum is easy enough if you are prepared to trust your mapping application. It’s a reasonable walk from the centre of the city, or for those brave enough to pit themselves against Cambridge’s notorious congestion there is limited on-site parking. You find yourself winding through an industrial park past tile warehouses, car-parts shops, and a hand car wash, before an unobtrusive sign next to a railway level crossing directs you to the right down the side of a taxi company. In front of you then is the museum, in a large industrial unit.

Pay your entrance fee at the desk, Gift Aid it using their retro green screen terminal application if you are a British taxpayer, and you’re straight into the exhibits. Right in front of you surrounding the café area is something you may have heard of if you are a Hackaday reader, a relatively recent addition to the museum, the Megaprocessor.

The Megaprocessor, playing Tetris

If we hadn’t already covered it in some detail, the Megaprocessor would be enough for a long Hackaday article in its own right. It’s a 16-bit processor implemented using discrete components, around 42,300 transistors and a LOT of indicator LEDs, all arranged on small PCBs laid out in a series of large frames with clear annotations showing the different functions. There is a whopping 256 bytes of RAM, and its clock speed is measured in the KHz. It is the creation of [James Newman], and his demonstration running for visitors to try is a game of Tetris using the LED indicators on the RAM as a display.

To be able to get so up close and personal with the inner workings of a computer is something few who haven’t seen the Megaprocessor will have experienced. There are other computers with lights indicating their innermost secrets such as the Harwell Dekatron, but only the Megaprocessor has such a clear explanation and block diagram of every component alongside all those LED indicators. When it’s running a game of Tetris it’s difficult to follow what is going on, but given that it also has a single step mode it’s easy to see that this could be a very good way to learn microprocessor internals.

The obligatory row of BBC Micros.

The first room off the café contains a display of the computers used in British education during the 1980s. There is as you might expect a classroom’s worth of Acorn BBC Micros such as you would have seen in many schools of that era, but alongside them are some rarer exhibits. The Research Machines 380Z, for example, an impressively specified Z80-based system from Oxford that might not have the fame of its beige plastic rival, but that unlike the Acorn was the product of a company that survives in the education market to this day. And an early Acorn Archimedes, a computer which though you may not find it familiar you will certainly have heard of the processor that it debuted. Clue: The “A” in “ARM” originaly stood for “Acorn”.

The LaserDisc system, one you won't have at home.
The LaserDisc system, one you won’t have at home.

The rarest exhibit in this froom though concerns another BBC Micro, this time the extended Master System. Hooked up to it is an unusual mass storage peripheral that was produced in small numbers only for this specific application, a Philips LaserDisc drive. This is one of very few surviving functional Domesday Project systems, an ambitious undertaking from 1986 to mark the anniversary of the Norman Domesday Book in which the public gathered multimedia information to be released on this LaserDisc application. Because of the rarity of the hardware this huge effort swiftly became abandonware, and its data was only saved for posterity in the last decade.

The main body of the building houses the bulk of the collection. Because this is a huge industrial space, the effect is somewhat overwhelming, as though the areas are broken up by some partitions you are immediately faced with a huge variety of old computer hardware.

The largest part of the hall features the museum’s display of home computers from the 1980s and early 1990s. On show is a very impressive collection of 8-bit and 16-bit micros, including all the ones we’d heard of and even a few we hadn’t. Most of them are working, turned on, and ready to go, and in a lot of cases their programming manual is alongside ready for the visitor to sit down and try their hand at a little BASIC. There are so many that listing them would result in a huge body of text, so perhaps our best bet instead is to treat you to a slideshow (click, click).

Definitely not Pong, oh no.

Beyond the home micros, past the fascinating peek into the museum’s loading bay, and there are a selection of arcade cabinets and then a comprehensive array of games consoles. Everything from the earliest Pong clones to the latest high-powered machines with which you will no doubt be familiar is represented, so if you are of the console generation and the array of home computers left you unimpressed, this section should have you playing in no time.

One might be tempted so far to believe that the point of this museum is to chart computers as consumer devices and in popular culture, but as you reach the back of the hall the other face of the collection comes to the fore. Business and scientific computing is well-represented, with displays of word processors, minicomputers, workstations, and portable computing.

The one that started it all

On a pedestal in a Perspex box all of its own is something rather special, a MITS Altair 8800, and a rare example for UK visitors of the first commercially available microcomputer. Famously its first programming language was Microsoft BASIC, this machine can claim to be that from which much of what we have today took its start.

In the corner of the building is a small room set up as an office of the 1970s, a sea of wood-effect Formica with a black-and-white TV playing period BBC news reports. They encourage you to investigate the desks as well as the wordprocessor, telephone, acoustic coupler, answering machine and other period items.

UK phone afficionados would probably point out that office phones were rearely anything but black.
UK phone aficionados would probably point out that office phones were rarely anything but black.

The museum has a small display of minicomputers, with plenty of blinkenlight panels to investigate even if they’re not blinking. On the day of our visit one of them had an engineer deep in its internals working on it, so while none of them were running it seems that they are not just static exhibits.

Finally, at various points around the museum were cabinets with collections of related items. Calculators, Clive Sinclair’s miniature televisions, or the evolution of the mobile phone. It is these subsidiary displays that add the cherry to the cake in a museum like this one, for they are much more ephemeral than many of the computers.

This is one of those museums with so many fascinating exhibits that it is difficult to convey the breadth of its collection in the space afforded by a Hackaday article.

There is an inevitable comparison to be made between this museum and the National Museum of Computing at Bletchley Park that we reviewed last year. It’s probably best to say that the two museums each have their own flavours, while Bletchley has more early machines such as WITCH or their Colossus replica as well as minis and mainframes, the Centre for Computing History has many more microcomputers as well as by our judgement more computers in a running and usable condition. We would never suggest a one-or-the-other decision, instead visit both. You won’t regret it.

The Centre for Computing History can be found at Rene Court, Coldhams Road, Cambridge, CB1 3EW. They are open five days a week from Wednesday through to Sunday, and seven days a week during school holidays. They open their doors at 10 am and close at 5 pm, with last admissions at 4 pm. Entry is £8 for grown-ups, and £6 for under-16s. Under-5s are free. If you do visit and you are a UK tax payer, please take a moment to do the gift aid thing, they are after all a charity.

Hands-On Nvidia Jetson TX2: Fast Processing For Embedded Devices

The review embargo is finally over and we can share what we found in the Nvidia Jetson TX2. It’s fast. It’s very fast. While the intended use for the TX2 may be a bit niche for someone building one-off prototypes, there’s a lot of promise here for some very interesting applications.

Last week, Nvidia announced the Jetson TX2, a high-performance single board computer designed to be the brains of self-driving cars, selfie-snapping drones, Alexa-like bots for the privacy-minded, and other applications that require a lot of processing on a significant power budget.

This is the follow-up to the Nvidia Jetson TX1. Since the release of the TX1, Nvidia has made some great strides. Now we have Pascal GPUs, and there’s never been a better time to buy a graphics card. Deep learning is a hot topic that every new CS grad wants to get into, and that means racks filled with GPUs and CUDA cores. The Jetson TX1 and TX2 are Nvidia’s strike at embedded deep learningor devices that need a lot of processing power without sucking batteries dry.

Continue reading “Hands-On Nvidia Jetson TX2: Fast Processing For Embedded Devices”

Antenna Analyzer Is A Lab In A Box

There was a time when the measure of a transmitting radio antenna was having it light an incandescent bulb. A step up was a classic SWR/Power meter that showed you forward and reflected power. Over the years, a few other instruments have tried to provide a deeper look into antenna performance. However, the modern champion is the antenna analyzer which is a way of measuring vector impedance.

[Captain Science] did a review of an inexpensive N1201SA analyzer. This device is well under $200 from the usual Chinese sellers. The only thing a bit odd is the frequency range which is 140 MHz to 2700 MHz. For some extra money (about $80 or $100 more) you can drop the low-end frequency to just under 35 MHz.

Continue reading “Antenna Analyzer Is A Lab In A Box”

Review: Antex TCS 50W Digital Temperature Controlled Soldering Iron.

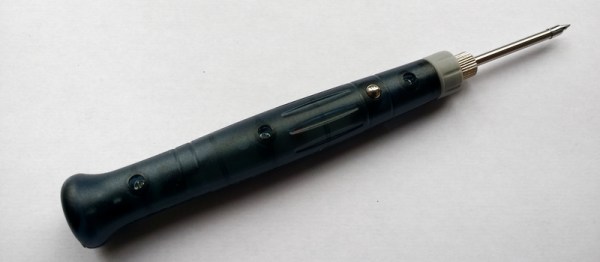
Sometime last summer, I suffered a very sad loss indeed. My soldering iron failed, and it was not just any soldering iron, but the Weller Magnastat temperature-controlled iron that had been my iron of choice since my student days. It was time to buy a replacement, and a whole world of soldering equipment lay before me. In the end I settled on a choice that might seem unexpected, I bought an Antex TCS 50W temperature controlled iron with a digital temperature controller and LCD display in its handle.

No room for a poor iron

When looking at a new iron it’s worth considering for a moment what requirements you might have.  After all, while we’d all love to own a top-of-the range soldering station it’s sometimes necessary to target your purchase carefully for an acceptable blend of affordability, reliability, and performance. It’s possible to find temperature controlled irons for astoundingly low prices these days, thanks to the wonders of globalised manufacturing. But the irons themselves will not be of good quality, their bits will be difficult to replace, and sometimes they are better described as variable temperature rather than temperature controlled. If I was to escape a poor choice I’d have to set my sights a little higher.

Antex are a perennial in the world of British electronics, their signature yellow-handled irons have been around for decades. They aren’t priced at the top end of the market yet they have a pretty good reputation, but could their all-in-one temperature controlled iron be a good alternative to a unknown-name iron that came with a soldering-station-style controller? I parted with my £55 (about $68) before taxes, and waited for the delivery.

All-in-one, win or bin?

The iron I chose is the latest in a long line of their all-in-one temperature controlled irons, and so the blurb tells me, the first with digital control. Previous models had an analogue adjustment which if I recall correctly was achieved by means of a screw, while this one has an LCD display with up and down buttons on its handle.

I haven't bothered with the supplied stand, as you can see.
I haven’t bothered with the supplied stand, as you can see.

In the box are the iron, a rather useless stand made from metal sheet, and an instruction leaflet. Fortunately my requirements included a decent stand, so I’d already ordered the more substantial companion product with a sponge. Out went the sponge and in went a bundle of brass turnings, but the stand itself is fine.

The iron has the usual Antex bit that fits as a sleeve over the cylindrical element. I bought a range of bits of different sizes, it’s never a bad thing to have choice. The handle is bigger than their standard irons as you might expect, but has a flattened and curved profile that’s easy on the hand. It’s noticeably lighter than the Magnastat, which along with its extra-flexible silicone cable makes it easier to use than its predecessor.

In use, the extra length of the handle doesn’t compromise soldering ability. In the time since purchase it has been used to construct multiple projects, and everything from the smaller surface-mount components upwards are taken in its stride. The 50 W element has plenty of power for soldering to PCB planes that suck away the heat, though you probably wouldn’t use it to solder heavy-gauge copper.

The temperature range of 200 to 450 Celcius is ample for my requirements, in fact once I’d set it to my normal 360 degrees I’ve never changed it. Time from power-on to full working temperature is about 45 seconds, which isn’t the fastest on the block, but then again since I turn it on when I sit down it’s not ever been an issue.

A match made in heaven

So, based on quite a few months of regular use, I’m happy with my iron. The question is though, was it the best choice? I think so, given that the competition at the price would almost certainly not come with such readily available support. There’s almost an instinctive distrust of all-in-one temperature-controlled irons that I haven’t found to be justified by the reality. An alternative might have been to build one of the clever designs that adds a temperature controller to a Weller tip, but given that this is an iron I sometimes use to earn a living I’d rather be working for cash than working on my iron. There are certainly cheaper irons and there are probably better irons, but for me this one hits the sweet spot between the two sets of being a good enough iron without being too expensive.

First Look: Macchina M2

In the past few years, we’ve seen a growth in car hacking. Newer tools are being released, which makes it faster and cheaper to get into automotive tinkering. Today we’re taking a first look at the M2, a new device from the folks at Macchina.

The Macchina M1 was the first release of a hacker friendly automotive device from the company. This was an Arduino compatible board, which kept the Arduino form factor but added interface hardware for the protocols most commonly found in cars. This allowed for anyone familiar with Arduino to start tinkering with cars in a familiar fashion. The form factor was convenient for adding standard shields, but was a bit large for using as a device connected to the industry standard OBD-II connector under the dash.

The Macchina M2 is a redesign that crams the M1’s feature set into a smaller form factor, modularizes the design, and adds some new features. With their Kickstarter launching today, they sent us a developer kit to review. Here’s our first look at the device.

Continue reading “First Look: Macchina M2”

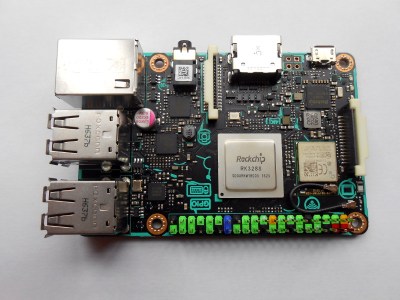
Review: The Asus Tinker Board (Updated)

In the years since the launch of the original Raspberry Pi we have seen the little British ARM-based board become one of the more popular single board computers in the hobbyist, maker, and hacker communities. It has retained that position despite the best efforts of other manufacturers, and we have seen a succession of competitor boards directly copying it by imitating its form factor. None of them have made a significant dent in the sales figures enjoyed by the Pi, yet they continue to appear on a regular basis.

We recently brought you news of the latest challenger in this arena, in the form of the Asus Tinker Board. This is a board that has made us sit up and take notice because unlike previous players this time we have a product from a giant of the industry. Most of us are likely to own at least one Asus product, indeed there is a good chance that you might be reading this on an Asus computer or monitor. Asus have made some very high quality hardware in their time, so perhaps this product will inherit some of that heritage. Thus it was with a sense of expectation that we ordered one of the first batch of Tinker Boards, and waited eagerly for the postman.

Update:

A member of the Asus Marketing team read this review and contacted Hackaday with some updated information. According to our discussion, the Tinker Board has not officially launched. This explains a lot about the current state of the Tinker Board. As Jenny mentions in her review below, the software support for the board is not yet in place, and as comments on this review have mentioned, you can’t source it in the US and most other markets. An internal slide deck was leaked on SlideShare shortly after CES (which explains our earlier coverage), followed by one retailer in the UK market selling the boards ahead of Asus’ launch date (which is how we got our hands on this unit).

Asus tells us that they are aiming for an end of February launch date, perhaps as soon as the 26th for the United States, UK, and Taiwan. Other markets might have some variation, all of this contingent on agreements with and getting stock to regional distributors. With the launch will come the final OS Distribution (TinkerOS based on Debian), schematics, mechanical block diagrams, etc. Asus tells Hackaday it is a top priority to deliver hardware video acceleration for the Rockchip on the Tinker Board. The Board Support Package which hooks the feature into Linux is not yet finished but will come either on launch day or soon after. This is the end of the update, please enjoy Jenny List’s full review below.

Continue reading “Review: The Asus Tinker Board (Updated)”

Books You Should Read: Making A Transistor Radio

When a Hackaday article proclaims that its subject is a book you should read, you might imagine that we would be talking of a seminal text known only by its authors’ names. Horowitz and Hill, perhaps, or maybe Kernigan and Ritchie. The kind of book from which you learn your craft, and to which you continuously return to as a work of reference. Those books that you don’t sell on at the end of your university career.

Ladybird books covered a huge range of topics.

So you might find it a little unexpected then that our subject here is a children’s book. Making A Transistor Radio, by [George Dobbs, G3RJV] is one of the huge series of books published in the UK under the Ladybird imprint that were a staple of British childhoods for a large part of the twentieth century. These slim volumes in a distinctive 7″ by 4.5″ (180 x 115 mm) hard cover format were published on a huge range of subjects, and contained well written and informative text paired with illustrations that often came from the foremost artists of the day. This one was published at the start of the 1970s when Ladybird books were in their heyday, and has the simple objective of taking the reader through the construction of a simple three transistor radio. It’s a book you must read not because it is a seminal work in the vein of Horrowitz and Hill, but because it is the book that will have provided the first introduction to electronics for many people whose path took them from this humble start into taking the subject up as a career. Including me as it happens, I received my copy in about 1979, and never looked back. Continue reading “Books You Should Read: Making A Transistor Radio”