Unlocking A Rigol Scope Once Again

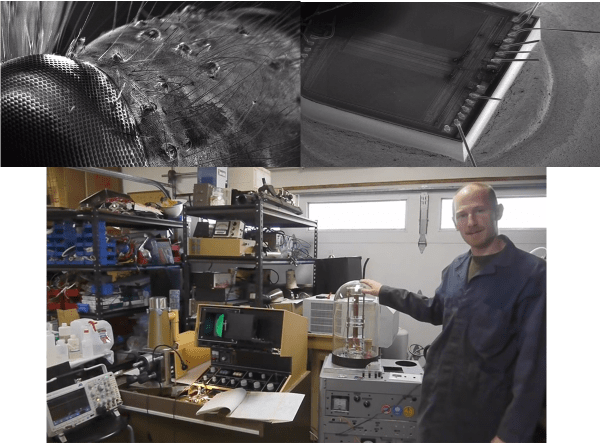
Rigol scopes are finding their way onto the workbenches of makers the world over. There’s a reason for that – they’re so easily upgraded. With a simple software update, you can turn the 50 MHz Rigol o’scope into a model with 100 MHz of bandwidth. Design decisions in one model are sometimes carried over to different product lines, so eventually someone would figure out how to turn the 70 MHz DS2072 scope into the 200 MHz DS2202. A great mod that turns an $800 oscilloscope into one with the features of a $1600 scope.

There’s no internal modifications necessary for this mod; it works simply by sending a few engineering unlock codes to the scope over USB, a simple task that [Blair] implemented with a Raspberry Pi and a bit of Python code. The only fault of the hack is the scope resetting each time it’s powered off. This can, in fact, be accomplished with just about any microcontroller with a Python interpreter.

A fairly uninformative demo video is available below, or you could check out the EEVBlog thread where this mod was conceived here.

We here at Hackaday expect a small, cheap USB/microcontroller dongle thingy that automagically updates the DS2072 to show up in our inbox any day now. We thank whoever sends that in.

Continue reading “Unlocking A Rigol Scope Once Again”

The Definitive Guide To Solder Stencils

Yes, we’ve seen our share of tutorials for making solder paste stencils, but [Felix] hit it out of the park with this one. It’s the definitive guide to making solder stencils at home, with quality as good as you would find in any professionally made stencil.

The material for the stencils comes from the same source as so many other DIY solder stencils – aluminium cans. The interior plastic coating and the exterior paint job are both removed with heat, acetone, and patience. After laying out the cream layer of his board in a PDF file, [Felix] used a fairly interesting transfer medium to get the toner onto the aluminum; cheap vinyl shelving paper attached to a piece of paper apparently makes for an ideal surface to transfer toner.

After transfer, the board is etched with HCl and peroxide. [Felix] is getting some very good results with his method, including a few very fine pitch IC footprints. It’s just as good as a professionally made, laser cut stainless stencil, and you probably already have all the necessary ingredients lying around your house. That’s a win anytime.

Turning Grandpa’s O-scope Into A Clock

clock

Around 1960, [Aaron]’s grandfather decided to try his hand at a new career in electronics repair. It didn’t pan out, but before he gave up he built a beautiful Heathkit oscilloscope, a model OR-1. Grandpa’s electronics career never took off, but years later it would serve as the impetus for [Aaron]’s own career in electronics. Now [Aaron] has too many oscilloscopes, but still wanted a way to preserve his grandfather’s legacy. An oscilloclock was just the project to do that.

Of course to turn an oscilloscope into a clock requires some interesting control circuitry, and [Aaron] didn’t skimp on his build. He created a custom control board that is able to draw any shape on the CRT screen using just circles; squashing circles to draw a line, and cutting the beam entirely to slice a circle in half.

This isn’t [Aaron]’s first oscilloclock by a long shot. He previously created this amazing clock completely from scratch. Still, using Grandpa’s old tools is a great way to make this oscilloscope useful again, even if [Aaron] is already up to his gills in test equipment.

A Folding Knife Made From Scratch

thisisaknife


[bobasaurus] over on reddit had a go at making a knife from scratch. It was his first attempt, but we’re thinking the result is fabulous and a wonderful example of what can be done with minimal tools at home.

The blade and folding mechanism was crafted out of an O1 tool steel bar. [bob] didn’t have any fancy machines like a bandsaw to cut these metal parts out; he used a jeweler’s saw and went through many blades in the process.

After the basic shape of the metal parts took form, [bob] turned to the scales. They’re made of a beautiful figured wood, bocote, native to Central America.

One interesting part of [bob]’s knife is the electrochemical etching he did on the blade. After applying a mask for the etching with the toner transfer process, the blade was grounded to a battery charger and a paintbrush wired up to the positive side was dipped in salt water. It’s certainly an easy way to engrave metal without investing in expensive tools or a CNC router.

Finally, the scales were shaped and oiled and the blade and bolster mechanism installed. A lot of work went into this knife, especially with the bare minimum of tools [bob] used. The results are worth it, though, and he ended up with a beautiful knife.

Giving Digital Calipers Bluetooth

[Fede]’s wife uses a pair of digital calipers to take measurements of fruits, leaves, and stems as part of her field research. Usually this means taking a measurement and writing it down in a log book. All things must be digitized, so [Fede] came up with a way to wirelessly log data off a pair of cheap Chinese calipers with a custom-made Bluetooth circuit.

Most of these cheap Chinese digital calipers already have a serial output, so [Fede] only needed to build a circuit to take the serial output and dump it in to an off-the-shelf Bluetooth module. He fabbed a custom circuit board for this, and after seeing the increased battery drain from the Bluetooth module, decided to add an external battery pack.

In addition to etching his own board for sending the serial output of the calipers to a Bluetooth module, [Fede] also put together a custom flex circuit to connect the two boards. It’s just a small bit of brass glued to a transparency sheet etched with ferric chloride, but the end result looks amazingly professional for something whipped up in a home lab.

Using An Angle Grinder As A Bench Grinder

angle-grinder-bench-grinder

[Saeid Momtahan] made a couple of attachments that let him use his angle grinder as a bench grinder. It may be better to refer to it as a bench motor, as he uses both a grinding wheel and a wire brush while showing off his project.

The attachments come in two parts. The first is a piece of square tube that runs parallel to the body of the grinder on the side opposite the handle. This doubles as a larger gripping area when using it as an angle grinder, as well as giving him something to clamp in his bench vise. The second attachment serves as a rest for the work piece. Above you can see him brushing some rusty stock clean with the wire attachment.

It’s nice to have the option of doubling up a tool’s tasks rather than buying yet another item that may not get used all that much. We also love the idea of building your own tools. If you don’t have a welding rig to fabricate these add-ons here’s a li-ion battery based system to get you thinking.

Continue reading “Using An Angle Grinder As A Bench Grinder”

Machining Beer Can Solder Stencils

This is a solder paste stencil machined from a beer can. [Simon Ludborzs] spent quite a bit of time dialing in his process to get to this point. Note the nice crisp edges of the openings. That’s a big change from his first attempt.

When looking for a way to make his own stencils he considered two options: plastic and aluminum. He produced both (more about the plastic stencil and his reflow process is discussed in this post). Plastic is a bit easier to work with since it lays flat. But it proves to be too thick. After applying paste with a squeegee there’s way too much solder on the pads. Aluminum beverage can walls are much thinner, depositing less paste.

We’ve seen soda cans used in the past, but they were produced through an etching process. [Simon] cut these holes using a CNC mill. This required a bit of futzing to figure out the right settings. For instance, he used Altium to produce CAM files from his circuit design. But the program is set up to mill the outside of traces, resulting in openings that are too large. He fixed this by setting the pasted expansion rule in the program to a negative value. The other advantage to using a mill is that he can cut precision tooling holes to ensure proper alignment. You can see them in the upper corners of this image.