Fixing A Malfunctioning Keithley Model 179 Digital Multimeter

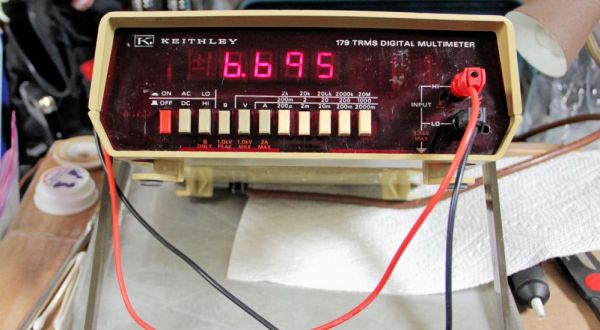
Inspired by electronics repair videos on YouTube, [Steven Leibson] recently found himself hunting down something to fix on eBay. This ‘something’ ended up being a  certified classic: a Keithley Model 179 digital multimeter from 1978. Listed as non-functional, the unit arrived at his door for less than $50. There weren’t any exciting pops or smoke when he powered it on, but the display seemed to be showing nothing but random nonsense.

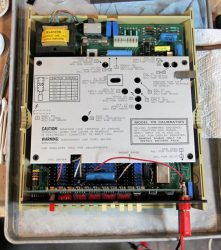
The Keithley Model 179 multimeter has a convenient calibration sequence printed on its electrostatic shield cover and a deadly exposed ac line fuse in the upper left part of the photo. (Image credit: Steven Leibson)
The meter has a convenient calibration sequence printed on its electrostatic shield cover and a deadly exposed AC line fuse in the upper left part of the photo.

Ultimately reviving this little piece of history was quite simple, with the main issue turning out to be a dodgy inter-board connector between the main and display boards. After admiring an old repair attempt made on the component, he removed both the male and female connectors, replacing them with new ones.

This uncovered issues with the PCB, as the FR4 material and the traces on it had begun to delaminate, probably due to the old adhesive giving up due to age. With pretty low trace density this wasn’t anything that a bit of care couldn’t work around, fortunately.

Before finding this dodgy connector, [Steven] first tried to clean the front mechanical connectors, which took multiple sessions. This was followed up by oiling the mechanism. With the connector fixed and some cleaning, the meter’s display now read correctly. It still has some issues with starting up though, which [Steven] reckons are due to the old capacitors in the device.

Presumably some recapping will round off this fun device revival experience, but for the time being a Keithley Model 179 has been saved from e-waste, to inspire generations to come.

In Praise Of The DT830, The Phenomenal Instrument You Probably Don’t Recognise For What It Is

If we had to make a guess at the single piece of electronic bench equipment owned by the highest proportion of Hackaday readers, it would not be a budget oscilloscope from Rigol, nor would it be a popular portable soldering iron like the TS100. Instead we’re guessing that it’s a multimeter, and not even the most accomplished one.

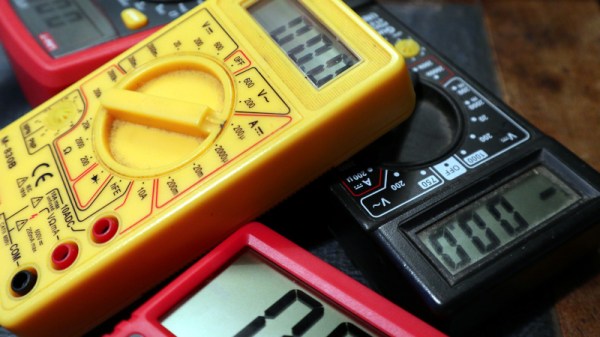
The DT830 is a genericised Chinese-manufactured 3.5 digit digital multimeter that can be had for an astonishingly low price. Less than a decent hamburger gets you an instantly recognisable plastic case with a chunky rotary range selector switch, and maybe a socket for some kind of transistor or component tester. Make sure that there is a 9 volt battery installed, plug in the pair of test leads, and you’re in business for almost any day-to-day electrical or electronic measurement. They’ve been available in one form or another for decades and have been the subject of innumerable give-aways and loss-leader offers, so it’s a reasonsble guess that you’ll have one somewhere. I have three as far as I know, they make great on-the-go instruments and have proved themselves surprisingly reliable for what they are. Continue reading “In Praise Of The DT830, The Phenomenal Instrument You Probably Don’t Recognise For What It Is”

Faded Beauty DMM Gets An OLED Makeover

When a fine piece of lab instrumentation crosses your bench, you’ve got to do your best to put it to work. But even in the highest quality devices no component lasts forever, especially vacuum tubes. For some vintage instruments with vacuum fluorescent displays, that means putting up with less-than-perfect digits in order to get that sweet, sweet precision. Or not – you can always reverse engineer the thing and add a spanking new OLED display.

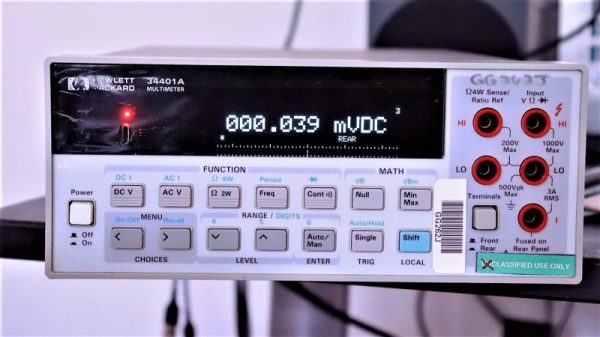
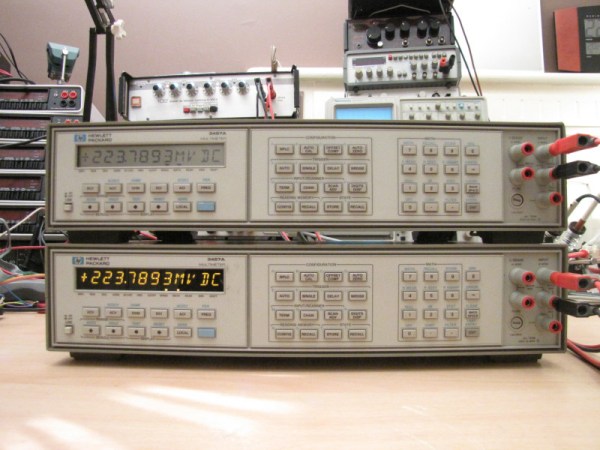
The Hewlett-Packard 34401A digital multimeter that fell into [qu1ck]’s lap was a beauty, but it had clearly seen better days. The display was full of spuriously illuminated dots and segments, making it hard to use the 6.5 digit DMM. After a futile bit of probing to see if a relatively easy driver fix would help, and with a replacement display being made of solid unobtanium, [qu1ck] settled in for the long process of reverse engineering the front panel protocol. As luck would have it, H-P used the SPI protocol to talk to the display, and it wasn’t long before [qu1ck] had a decent prototype working. The final version is much more polished, with a display sized to fit inside the original space occupied by the VFD. The original digits and annunciator icons are recreated, and he added a USB port and the bargraph display show in the clip below.

We think it looks fabulous, and both the firmware and hardware are on Github if you’d like to rescue a similar meter. You may want to check our guide to buying old test gear first, though, to get the most bang for your buck.

Continue reading “Faded Beauty DMM Gets An OLED Makeover”

LEDs Give HP 3457A DDM’s LCD Display The Boot

Have you ever been so frustrated with a digital display that you wanted to rip the whole thing out and create a better one? That is exactly what [xi] did. Replacing their constantly used HP 3457A multimeter’s LCD display with a brighter LED one was a necessary project — and a stress reducing one at that.

While this digital multimeter is well-known for its reliability, its standard display is rather lacking. In fact, there are several mods already out there that simply add a backlight. However, as [xi] notes, LCD screens always have a certain angle where they still don’t quite show properly. So this hack reverses the LCD’s protocol and details the process of creating new LED display.

The issue of dim displays that comes with traditional digital multimeters is not a new one. One solution to this that we have seen before is a hack where someone decided to add a backlight onto their cheap multimeter. [Ken Kaarvik] got around the dimness altogether by giving his multimeter a wireless remote display of his choosing. It is interesting to see the different solutions that are made to the same nuisance. The first item on the agenda of [xi]’s hack was to successfully analyze the HP LCD protocol. With the aid of an ATmega32, the digits were decoded throughout the transmission frames.

Continue reading “LEDs Give HP 3457A DDM’s LCD Display The Boot”

Ask Hackaday: What Tools Do You Reach For First?

Let’s face it, in your workshop there are convenient tools, and there are quality tools, but so often they aren’t both. Think back to the tools you reach for first. Very often for me, speed and convenience win out. I don’t want to look too hard for that drill or saw, and want them to work as expected when I reach for them. At the same time, there are some tools that simply must be stored away, and can’t perch on my workbench forever or sit on a shelf.

It really is a balancing act sometimes. I don’t have a sure fire formula for when to break out the expensive tools, and what jobs are easy with the less expensive. I’ll lay out some of my most-often utilized tools in my arsenal, then I want to hear from you on your own faves.

Continue reading “Ask Hackaday: What Tools Do You Reach For First?”

Fluke 12E+ Multimeter Hacking Hertz So Good

It kind of hurts watching somebody torturing a brand new Fluke multimeter with a soldering iron, even if it’s for the sake of science. In order to find out if his Fluke 12E+ multimeter, a feature rich device with a price point of $75 that has been bought from one of the usual sources, is actually a genuine Fluke, [AvE] did exactly that – and discovered some extra features.

fluke_12E_CDuring a teardown of the multimeter, which involved comparing the melting point of the meter’s rubber case with other Fluke meters, [Ave] did finally make the case for the authenticity of the meter. However, after [AvE] put his genuine purchase back together, the dial was misaligned, and it took another disassembly to fix the issue. Luckily, [AvE] cultivates an attentive audience, and some commenters noticed that there were some hidden button pads on the PCB. They also spotted a little “C”, which lit up on the LCD for a short moment during the misalignment issue.

The comments led to [AvE] disassembling the meter a third time to see if any hidden features could be unlocked. And yes, they can. In addition to the dial position for temperature measurement, [AvE] found that one of the hidden button contacts would enable frequency and duty cycle measurement. Well, that was just too easy, so [AvE] went on checking if the hidden features had received their EOL calibration by hooking the meter up to a waveform generator. Apparently, it reads the set frequency to the last digit.

The 12E+ is kind of a new species of Fluke multimeter: On the one side, it has most of the functionality you would normally expect from a “multi”-multimeter – such as measuring both AC and DC voltage, current, capacitance and resistance – and on the other side it costs less than a hundred dollars. This is made possible by the magic of international marketing, and Fluke seems to distribute this crippleware product exclusively in the Chinese market. Therefore, you can’t buy it in the US or Europe, at least not easily. A close relative of the 12E+ which should be a bit easier to obtain is the Fluke 15B+; the meter we saw earlier today when [Sprite_TM] hacked it to share measurements via WiFi. The 15B+ seems to be identical to the 12E+ in appearance and features, although it’s unknown if the two are hackable in the same ways.

https://www.youtube.com/watch?v=FUmbsBYVTQ0

Thanks to [jacubillo] for the tip!

Need A Nano-Ammeter? You Already Have One!

[Dannyelectronics] sometimes needs to measure tiny currents. Really tiny, like leakage currents through a capacitor. He’s built a few setups to make the measurements, but he also knew he’d sometimes want to take readings when he didn’t have his custom gear available. So he decided to see what he could do with an ordinary digital meter.

dmm-nano-ammeterAs you might expect, a common digital meter’s current scales aren’t usually up to measuring nano- or pico-amps. [Danny’s] approach was not to use the ammeter scale. Instead, he measures the voltage developed across the input impedance of the meter (which is usually very high, like one megaohm). If you know the input characteristics of the meter (or can calibrate against a known source), you can convert the voltage to a current.

For example, on a Fluke 115 meter, [Danny] found that he could read up to 60nA with a resolution of 0.01nA. A Viktor 81D could resolve down to 2.5pA–a minuscule current indeed.

We’ve looked at the difficulties involved in reading small currents before. If tiny currents aren’t your thing, maybe you’d like to try charging an iPhone with 3 KA, instead.