It takes a lot of power and energy to keep grass levels down to an appropriate level; especially when it’s hot out. If cool glasses of lemonade aren’t around, the task at hand may not be completed any time soon causing the unkempt blades of green (or yellow) vegetation outside to continue their path of growth towards the sun.
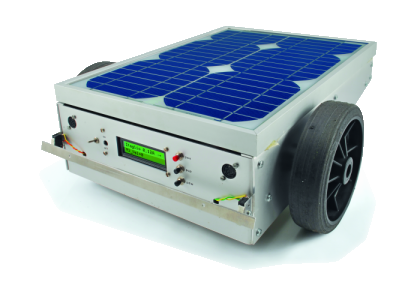
Instead of braving the oven-like temperatures which will inevitably drench the person in sweat, this solar powered robot has been created ready to take on the job. With the heart of an Arduino, this device shaves down the grass on a regular basis, rather than only chopping down the material when it gets too long. This helps to save electricity since the mower is only dealing with young and soft plants whose heads are easily lopped off without much effort.
Internally, the robot’s circuitry interfaces with an underground wiring system that defines the cutting zones within the lawn, and proves to be a simple, accurate, and reliable approach to directing the robot where to go. If the device travels under a shaded area, a battery kicks in supplying energy to the engine. When sunlight is available, that same battery accumulates the electricity, storing it for later.
Continue reading “Solar Powered Lawn Mower Cuts The Grass So You Don’t Have To”
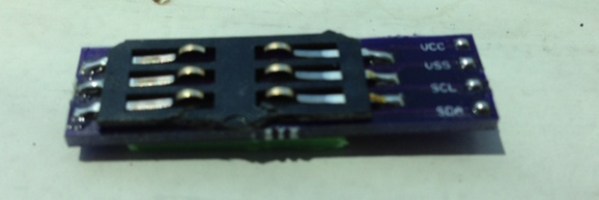
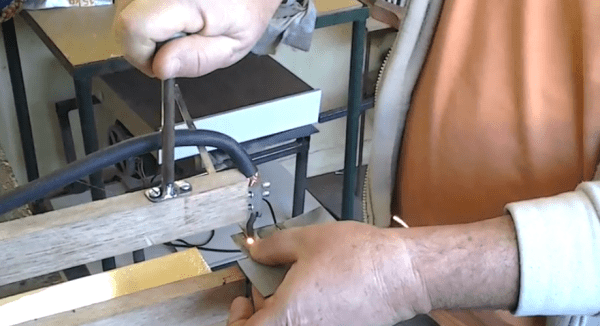
 [K.C. Lee] is busy working on his entry to The Hackaday Prize, and right now he’s dealing with a lot of assembly. For his entry, that means tiny SMD parts, and the vacuum pen he ordered from DealExtreme hasn’t come in yet. The solution?