TI Launchpad Adds Computer Control To A Robot Arm

[Eric Gregori] had an OWI535 toy robotic arm. Although cheap (coming it at around $30) the arm is only set up to be used via a wired control box. [Eric] knew he could do better by adding computer control via a TI Launchpad and motor driver peripheral.

The arm has shoulder, elbow, and wrist joints, a rotating base, and a gripper. All of these are actuated by 3V DC motors and have just two control wires. [Eric’s] motor driver add-on for the Launchpad works great in this case. It’s got three FAN8200 dual motor driver chips on board so it can control up to six motors. Once he made the hardware connections it’s just a matter of sending the commands to the Launchpad via its USB interface, but you will also need to use a larger microcontroller than comes with the Launchpad. Here he’s chosen an MSP430G2553.

In order to make things a little bit more fun he also wrote a GUI for controlling the arm from the computer. He used RobotSee, a programming language that lets you use an image of the hardware, and overlay the controls on top of it. Now he just needs to make this into a web interface and he can have a smartphone controlled crane game.

Don’t forget to check out the video after the break. Continue reading “TI Launchpad Adds Computer Control To A Robot Arm”

mykeepon-hacking

Reverse Engineering MyKeepon

[qDot] recently got his hands on a MyKeepon toy and after messing with it a bit, decided to tear it down to see what was inside. He had hopes of easily modding the toy, but like most adventures in hacking, things might take a while longer than he first imagined.

In his teardown you can see the various components that make up the MyKeepon, including a trio of motors for movement, along with a series of buttons and a microphone used to interact with the toy. Of course, the part that interested him the most was MyKeepon’s circuit board, since that’s where the real work would begin.

There, he discovered two main processor Padauk processor chips, described as “Field Programmable Processor Arrays” in their data sheets. He says that the brand is well known for lifting text verbatim from PIC data sheets, so he doesn’t have a ton of faith in what’s printed there. Sketchy documentation aside, he poked around on the I2C bus connecting the two chips and was able to sniff a bit of traffic. He is documenting his findings as he goes along, which you can see more of on his Github project site.

He has made a few simple modifications to the toy already, but there’s plenty more to do before he has complete control over it. His work is bound to make tons of MyKeepon fans happy, including our own [Caleb Kraft], whose love for the toy can be seen in the video below taken at last year’s CES.

Continue reading “Reverse Engineering MyKeepon”

magic-wand

Hacking A “magic Wand” To Remotely Control Light Displays

Hackaday reader [Kieran] volunteers at an outdoor haunted house attraction called the “Disenchanted Forest”. Attendees are lead through the haunted forest by a volunteer, who helps keep everyone on the predetermined trail. The trail is usually lit by small LED fixtures that the group constructed, but the organizers wanted to make the lights more interactive this time around.

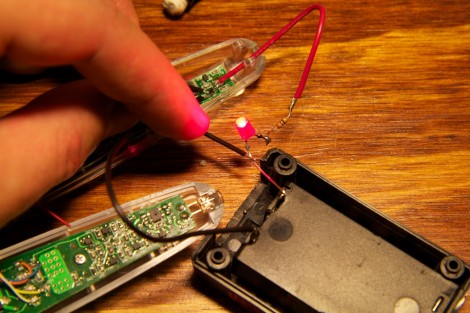
A fellow organizer gave [Kieran] a [Harry Potter] Magic Candle, which allows him to light the toy with the wave of his IR-enabled wand. He was told to “make it do something cool”, so he took a closer look at it to determine how everything worked.

Using an Arduino clone and some borrowed IR code he was able to get the wand to work with the forest’s trail lighting, but there was a lot of lag between waving the wand and triggering the light. Taking a second stab at it, [Kieran] was able to replicate the IR protocol used by the toy, speeding things up and increasing the wand’s range considerably. Now, the tour guides can light and extinguish the trail lighting with a simple flick of the wrist.

Take a look at the video below to see how things worked out for [Kieran], and be sure to swing by his site for more details if you have the urge to modify your Magic Candle.

Continue reading “Hacking A “magic Wand” To Remotely Control Light Displays”

Bomb Disposal Robot With Lego Gripper

[Krash] had a lot of fun hacking up his Spy Gear TRAKR; we’re just lucky he was able to move a suspicious Shrek doll before it detonated.

The now discontinued Spy Gear TRAKR serves as the basis for [Krash]’s build. This tiny remote-controlled toy transmits video back to its remote and makes us very jealous of the awesome toys our nephew has. Thankfully, the engineers behind the TRAKR made it extremely hackable, as proved by Hack A Day’s very own [Phil Burgess].

[Krash] began his build by putting a few male headers in the GPIO pins on the TRAKR’s board. After that, the TRAKR SDK was downloaded. He used a few Snap Circuits to verify his TRAKR software was working, then set off to build a Lego gripper arm. The arm is powered through an H-bridge IC [Krash] found alongside the rest of his Snap Circuits stuff.

Not a bad build for what amounts to a pile of toys. Check out [Krash]’s video of his bomb disposal bot after the break.

Continue reading “Bomb Disposal Robot With Lego Gripper”

Toy Car Fitted With Lights And Sirens Is A Children’s Delight

police_car_lights_and_sirens

[Nathan], a member of the DangerousPrototypes forums, was looking for a project he could use to enter the 7400 logic competition they are holding. His kids had a small ride on police car, but the light bar on top contained no lights, and the car made no sounds when his children were in pursuit of baddies around the house. [Nathan] had all the inspiration he needed, and took to his workshop in order to fix this glaring oversight by the toys’ creators.

He designed a circuit based loosely around a Cylon-style light that he saw a while back at the Evil Mad Scientist Labs, which employed an oscillator and a 4107 decade counter to control the lights. His design uses a 74HC04 hex inverter as the oscillator, while the decade counter is used to modulate the siren’s frequency and control the rotating LED beacons.

The final result is great if you ask us. An “unnamed adult female” in the house was not nearly as impressed by the additions based upon how much time [Nathan] spent on the project, but his children were absolutely thrilled.

Continue reading to see a quick video of the revamped police car in action.

Continue reading “Toy Car Fitted With Lights And Sirens Is A Children’s Delight”

Powering Kids’ Toys By Hand

hand_cranked_toy_piano

[Dominik’s] daughter had an old toy piano that she loved, but when the batteries started to die down, it played awful tones and sounded generally out of tune. While this is likely something our circuit bending friends might be interested in, [Dominik] preferred when things sounded more cheery.

He considered simply replacing the batteries, but it seemed like a far better idea to do away with them altogether. he hunted around for a solution, and eventually found one at the local IKEA store. He grabbed a LJUSA hand-powered flashlight and disassembled it, saving the crank and circuitry.

He installed the crank on the back side of his daughter’s piano, and mounted the electronic bits inside the toy’s shell. The crank spins a brushless motor, generating an AC current which is rectified to DC before being stored in a capacitor. He says that a 30 second crank will play just a few tunes, which isn’t ideal, though it is better than frequently replacing batteries.

[Thanks, Roger]

Halloween Hacks: Transform That Annoying Dancing Santa Into A Halloween Mummy!

Halloween Hacks Banner

santa_mummy

If you have one of those annoying dancing (Santa/Elvis/Frankenstein) decorations sitting around collecting dust, you could always repurpose it like [mischka] did. He originally wanted to enter our Santa-Pede challenge and purchased a dancing Santa, but time eventually got the best of him. With no other use for it in mind, he decided to make his dancing Christmas toy into a fun Halloween decoration.

An electronic rendition of “Jingle Bells” isn’t exactly the scariest thing around, so he dismantled the dancing toy and started fiddling with the sound board. A few well placed resistors later, his circuit-bent Santa Claus started to sound like he had five too many egg nogs, which was perfect for the dancing mummy [mischka] had in mind.

He transplanted some LEDs from Santa’s base into his head, and masked it off with some electrical tape so that only the eyes were visible. He then wrapped the mummy in the requisite bloodied bandages and set him out for the kids to enjoy.

Since it’s hard to find someone who genuinely likes these dancing toys, we think this is a great way to make them useful again. If you’ve got a few of these things kicking around, we suggest reenacting the dance routine from Thriller using an army of Santa-zombies and sending a video our way.

Continue reading to see a video of [mischka’s] mummy in action.

Continue reading “Halloween Hacks: Transform That Annoying Dancing Santa Into A Halloween Mummy!”