Building The Second Tiniest Tetris

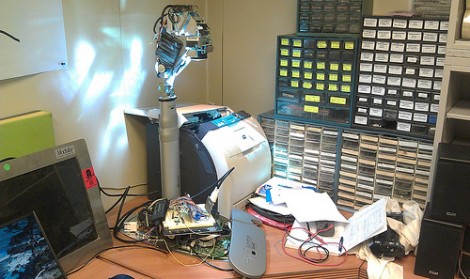
A few years ago, [Richard] pulled a crushed camcorder out of a junk box at a hamfest. After pulling the half-inch CRT out of the viewfinder, he needed to find a project. [Richard] ended up building the second tiniest game of Tetris we’ve ever seen.

After futzing around with the CRT, [Richard] discovered that one of the pins would accept an NTSC input. He also found a similar project that used a dime-sized CRT to play Tetris. With ready to go code, [Richard] started assembling his project into a handsome wooden box.

There are two PCBs for the build – a CRT driver circuit, and a small custom board that handles the game and controller code. The circuit for the game board was found on this site, but the featured boards there were too large for the project. A stripped-down board was fabricated by BatchPCB and put into the box.

There aren’t any controls on the console itself, for that a standard DB-9 connector was installed so a vintage Atari joystick could be used. For a more ergonomic Tetris experience, a Sega Genesis controller could be used. For something that looks like it comes out a steampunk laboratory, playing Tetris is a bit unexpected. Check out the demo video of the screen at 20x magnification after the break.

Continue reading “Building The Second Tiniest Tetris”

Building A Multidimensional Display From Trash

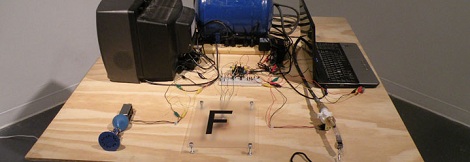
Here’s a simple concept that will let you turn any LCD screen into a multidimensional display (translated). [Herdek] used bits of that impossible to open clear plastic packaging to construct this add-on for the smart phone seen above. Three pieces of the material have been mounted at a 45 degree angle between the screen and viewer. The material is both reflective and transparent, depending on the angle at which light hits it. This allows it to reflect the light from the screen toward the viewer, but let light from the baffles behind it pass through unimpeded. The three baffles allow the LCD to be partitioned into three different sections whose images will appear to be at different depths according to the viewer’s vantage point. After the break we’ve embedded a demonstration video, as well as the how-to that shows the construction technique for the add-on.

This follows the same concept at the pyramidal volumetric display, which is still one of our favorite LCD hacks.

Continue reading “Building A Multidimensional Display From Trash”

Structured Light 3d Scanner

After futzing around with a cheap pico projector, a webcam and a little bit of software, [Jas Strong] built herself a 3d scanner.

In spite of the dozens of Kinect-based scanner projects, we’ve seen structured light 3d scanners before. This method of volumetric scanning projects a series of gradient images onto a subject. A camera captures images of the patterns of light and dark on the model, math happens, and 3d data is spit out of a computer.

[Jas] found a Microvision SHOWWX laser pico projector on Woot. The laser in the projector plays a large part in the quality of her 3d models – without a focus, [Jas] can get very accurate depth information up close. A Logitech webcam modified for a tighter focus handles the video capture responsibilities. The software side of things are a few of these structured light utilities that [Jas] melded into a single Processing sketch.

The results are pretty remarkable for a rig that uses woodworking clamps to hold everything together. [Jas]’ 3d model of her cat’s house looks very good. She’s got a few bugs to work out in her setup, but [Jas] plans on releasing her work out into the wild very soon. We’ll update this post whenever that happens. made her code available here. The code requires the ControlP5 and PeasyCam libraries.

A Masochistic Video Card

Have a penchant for pain? Why not destroy your fingertips with a wire-wrap tool building a video card made entirely out of discrete components.

When [Chris] decided to build an entry for the Dangerous Prototypes 7400 logic competition he already had his hands full. The 74xx chips he had on hand had a maximum clock frequency of 25MHz, but the VGA pixel clock runs at 40MHz. dividing the H sync timing by 4 means the maximum speed required of the video card is only 10MHz, albeit with a reduced resolution.

The video card was constructed on perfboard with wirewrap sockets. An 8-bit DAC was included, allowing the card to display 256 separate colors but only the three primary lines were wired up to the VGA cable. As is, the card cycles through 8 different colors in a constant loop, not bad for a pile of chips.

VGA out has been done on everything from an ARM to an ATtiny, but rarely, if ever, has VGA been done with discrete components. While this video card may not be our first choice for bitcoin mining, it’s still a very impressive build. Check out the walk through video after the break.

Continue reading “A Masochistic Video Card”

Hack A Watchman

I have been on the hunt in our local thrift and random junk stores lately for a small TV to hopefully modify into a decent enough computer monitor for my Apple //C and Trash80. While there are TONS of TV’s out there, none were really striking me in tube size or picture quality. Roaming around the last resource I happened to find this tiny Sony Watchman Color LCD TV.

Of course this thing is way too tiny for a computer monitor. I thought it would be a great thing to have around the bench for when I am repairing a video game system, or messing about with the TV out Arduino library (the 3 buck price tag on half off day didn’t help either). Directly out of the store this thing is totally useless as there are no inputs and its tuner is for analog “over the air” stations which no longer exist.

Join me after the break to see how I turned this buck fifty paperweight into a functional bench tool!

Continue reading “Hack A Watchman”

Get Digital Plastic Surgery Thanks To OpenFrameworks And Some Addons

[Kyle McDonald] is trying out a new look, at least in the digital world, with the help of some openFrameworks video plugins. He’s working with [Arturo Castro] to make real-time facial substitution as realistic as possible. You can see that [Arturo’s] own video has a different take on shading and color of the facial alterations that makes them a bit less realistic than what [Kyle] was able to accomplish (see that clip after the break).

The setup depends on some facial tracking software developed by [Jason Saragih]. That package is wrapped in ofxFaceTracker (already linked at the top of this article) which makes it play nicely with openFrameworks. From there, it’s just a matter of image processing. If you think you’re up to the challenge, grab your own copies of the source code and get to work. We’re shocked by how real this looks, even when [Kyle] grabs his cheeks and stretches them out. If someone can fix some of the artifacts around the edges of the sampled faces this would be ready to use when video-conferencing.

It kind of makes us think of technology seen in The Running Man.

Continue reading “Get Digital Plastic Surgery Thanks To OpenFrameworks And Some Addons”

Video: Soldering Our PIC Development Board

For those of you who followed along with our Eagle CAD series, here is the final payoff where we assemble the circuit board that was designed. In this video, [Jack] explains where things will go on the board and then shows you how to solder the parts. For the advanced folks out there who haven’t moved to solely surface mount parts when you can get away with it, he shows an easy way to solder the processor, which is a TQFP-44 part. This can seem like a daunting task but it really isn’t.

If you would like to make your own board like this, you can find the files here. Please note that although this board shouldn’t have any issues, we haven’t tested it ourselves yet. [Jack] is going to do some videos about a different topic for a few weeks but will pick back up with this board again when they are done.

Video is after the break. Continue reading “Video: Soldering Our PIC Development Board”