There’s something magical about volumetric displays. They really need to be perceived in person, and no amount of static or video photography will ever do them justice. [AncientJames] has built a few, and we’re reporting on his progress, mostly because he got it to run a playable port of DOOM.
As we’ve seen before, DOOM is very much a 3D game viewed on a 2D display using all manner of clever tricks and optimizations. The background visual gives a 3D effect, but the game’s sprites are definitely very solidly in 2D land. As we’ll see, that wasn’t good enough for [James].
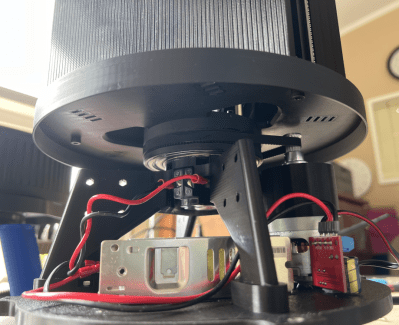
The basic concept relies on a pair of 128 x 64 LED display matrix modules sitting atop a rotating platform. The 3D printed platform holds the displays vertically, with the LEDs lined up with the diameter, meaning the electronics hang off the back, creating some imbalance.
Lead, in the form of the type used for traditional window leading, was used as a counterbalance. A Raspberry Pi 4 with a modified version of this LED driver HAT is rotating with the displays. The Pi and both displays are fed power from individual Mini560 buck modules, taking their input from a 12 V 100 W Mean-Well power supply via a car alternator slip ring setup. (Part numbers ABH6004S and ASL9009 for those interested.) Finally, to synchronise the setup, a simple IR photo interrupter signals the Pi via an interrupt.
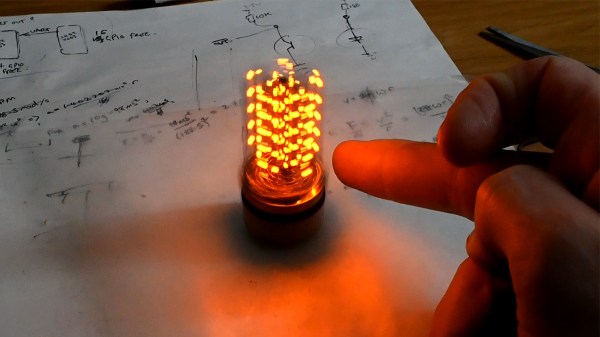
Just when you think the POV thing has run out of gas, along comes [mitxela] to liven things up. In this, he’s taken the whole persistence of vision display concept and literally spun up something very cool: a tiny volumetric “electric candle” display.
As he relates the story, the idea came upon him on a night out at the pub, which somehow led to the idea of an electric candle. Something on the scale of a tea light would fit [mitxela]’s fascination with very small and very interesting circuits, so it was off to the races. Everything needed — motor, LIR2450 coin cell, RP2040, and the vertical matrix of LEDs — fits into the footprint of the motor, which was salvaged from a CD drive. To avoid the necessity of finding or building a tiny slip-ring, he instead fixed everything to the back of the motor and attached its shaft to a Delrin baseplate.
The 8×10 array of surface-mount LEDs stands atop the RP2040 with the help of some enameled magnet wire, itself a minor bit of circuit sculpture. There’s also a 3D-printed holder for a phototransistor and IR LED, which form a sensor to trigger the display; you can see [mitxela] using a finger to turn the display off and move it back and forth. It goes without saying that these things always look better in person than they do in stills or even on video, but we still think it looks fantastic. There’s also a deep dive into generating volumetric data in the write-up, as well as an unexpected foray into the fluid dynamics calculations needed to create a realistic flame effect for the candle.
All in all, this is a fantastic if somewhat fragile project. We love the idea of putting this in a glass enclosure to make it look a little like a Nixie tube, too.
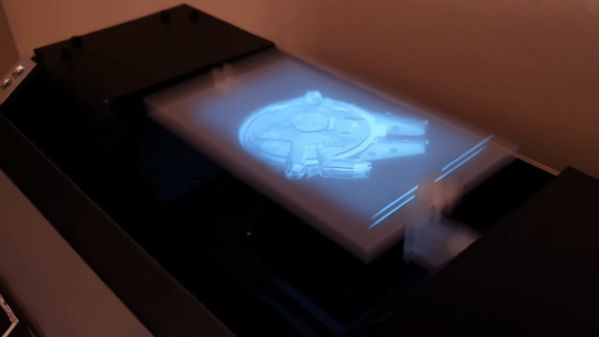
It may not exactly be what [Princess Leia] used to beg [Obi-Wan] for help, but this Star Wars-inspired volumetric display is still a pretty cool hack, and with plenty of extra points for style.
In some ways, [Maker Mac]’s design is a bit like a 3D printer for images, in that it displays slices of a solid model onto closely spaced planar surfaces. Sounds simple enough, but there are a lot of clever details in this build. The main component is a lightly modified LCD projector, a DLP-based machine with an RGB color wheel. By removing the color wheel from the projector’s optical path and hooking its sync sensor up to the control electronics, [Mac] is able to increase the framerate of the display, at the cost of color, of course. Other optical elements include a mirror to direct the projected images upwards, and a shutter harvested from an old pair of 3D TV glasses. Continue reading “A Volumetric Display With A Star Wars Look And Feel”→
There seem to be two camps when it comes to recipes: those based on volume-based measurements, and those based on the weight of ingredients. Gravimetric measurements have the advantage of better accuracy, but at the price of not being able to quickly scoop out a bit of this and a dash of that. It would be nice to get the convenience of volumetric measurements with the accuracy of weighing your ingredients, wouldn’t it?
It would, and that’s just what [Penguin DIY] did with this digital kitchen spoon scale. The build started with, perhaps not surprisingly, a large mixing spoon and a very small kitchen scale. The bowl of the spoon got lopped off the handle and attached to the strain gauge, which was removed from the scale along with its LCD display and circuit board. To hold everything, a somewhat stocky handle was fabricated from epoxy resin sandwiched between aluminum bolsters. Compartments for the original electronics parts, as well as a LiPo battery and USB charger module, were carved out of the resin block, and the electronics were mounted so that the display and controls are easily accessible. The video below shows the build as well as the spoon-scale in action in the kitchen.
We think this is not only a great idea but a fantastic execution. The black epoxy and aluminum look amazing together on the handle, almost like a commercial product. And sure, it would have been easy enough to build a scale from scratch — heck, you might even be able to do away with the strain gauge — but tearing apart an existing scale seems like the right move here.
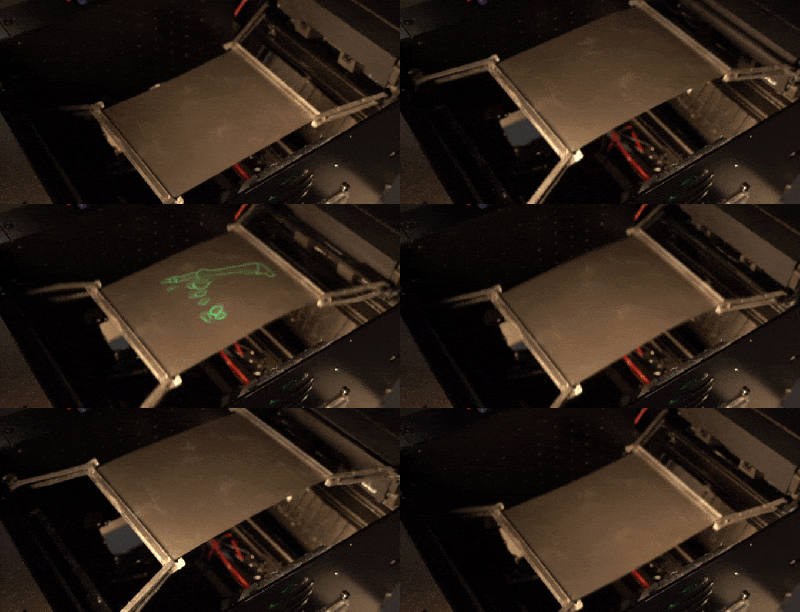
It seems like the world is ready for a true 3D display. We’ve seen them in sci-fi for decades now, with the ability to view a scene from any angle and inspect it up close. They’ve remained elusive, but that might just be changing thanks to this open-source persistence-of-vision volumetric display.
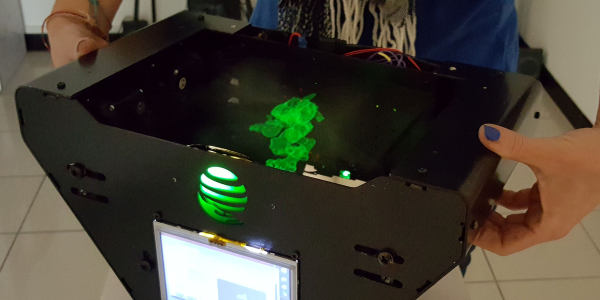
If the VVD, as it has been named by its creator [Madaeon], looks somewhat familiar, perhaps it’s because editor-in-chief [Mike Szczys] ran into it back in 2019 at Maker Faire Rome. It looks like it has progressed quite a bit since then, but the basic idea is still the same. A thin, flexible membrane, which is stretched across a frame, is attached to articulated arms. The membrane can move up and down rapidly, fast enough that a 1,000-fps high-speed camera is needed to see it move. That allows you to see the magic in action; a digital light processor (DLP) module projects slices of a 3D image onto the sheet, sending the correct image out for each vertical position of the membrane. Carefully coordinating the images creates the POV illusion of a solid image floating in space, which can be observed from any angle, requires no special glasses, and can even be viewed by groups.
With displays like this, we’re used to issuing the caveat that “it no doubt looks better in person”, but we have to say in the GIFs and videos included the VVD looks pretty darn good. We think this is a natural for inclusion in the 2021 Hackaday Prize, and we’re pleased to see that it made it to the semi-finals of the “Rethink Displays” round.
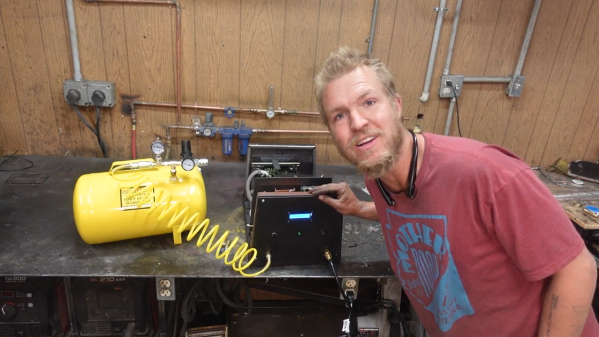
[Lucas] over at Cranktown City on YouTube has been very busy lately, but despite current appearances, his latest project is not a welder. Rather, he built a very clever gas mixer for filling his homemade CO2 laser tubes, which only looks like a welding machine. (Video, embedded below.)
We’ve been following [Lucas] on his journey to build a laser cutter from scratch — really from scratch, as he built his own laser tube rather than rely on something off-the-shelf. Getting the right mix of gas to fill the tube has been a bit of a pain, though, since he was using a party balloon to collect carbon dioxide, helium, and nitrogen at measuring the diameter of the ballon after each addition to determine the volumetric ratio of each. His attempt at automating the process centers around a so-called AirShim, which is basically a flat inflatable bag made of sturdy material that’s used by contractors to pry, wedge, lift, and shim using air pressure.
[Lucas]’ first idea was to measure the volume of gas in the bag using displacement of water and some photosensors, but that proved both impractical and unnecessary. It turned out to be far easier to sense when the bag is filled with a simple microswitch; each filling yields a fixed volume of gas, making it easy to figure out how much of each gas has been dispensed. An Arduino controls the pump, which is a reclaimed fridge compressor, monitors the limit switch and controls the solenoid valves, and calculates the volume of gas dispensed.
Judging by the video below, the mixer works pretty well, and we’re impressed by its simplicity. We’d never seriously thought about building our own laser tube before, but seeing [Lucas] have at it makes it seem quite approachable. We’re looking forward to watching his laser project come together.
Bad news, Martian helicopter fans: Ingenuity, the autonomous helicopter that Perseverance birthed onto the Martian surface a few days ago, will not be taking the first powered, controlled flight on another planet today as planned. We’re working on a full story so we’ll leave the gory details for that, but the short version is that while the helicopter was undergoing a full-speed rotor test, a watchdog timer monitoring the transition between pre-flight and flight modes in the controller tripped. The Ingenuity operations team is going over the full telemetry and will reschedule the rotor test; as a result, the first flight will occur no earlier than Wednesday, April 14. We’ll be sure to keep you posted.
Anyone who has ever been near a refinery or even a sewage treatment plant will have no doubt spotted flares of waste gas being burned off. It can be pretty spectacular, like an Olympic torch, but it also always struck us as spectacularly wasteful. Aside from the emissions, it always seemed like you could at least try to harness some of the energy in the waste gasses. But apparently the numbers just never work out in favor of tapping this source of energy, or at least that was the case until the proper buzzword concentration in the effluent was reached. With the soaring value of Bitcoin, and the fact that the network now consumes something like 80-TWh a year, building portable mining rigs into shipping containers that can be plugged into gas flaring stacks at refineries is now being looked at seriously. While we like the idea of not wasting a resource, we have our doubts about this; if it’s not profitable to tap into the waste gas stream to produce electricity now, what does tapping it to directly mine Bitcoin really add to the equation?
What would you do if you discovered that your new clothes dryer was responsible for a gigabyte or more of traffic on your internet connection every day? We suppose in this IoT world, such things are to be expected, but a gig a day seems overly chatty for a dryer. The user who reported this over on the r/smarthome subreddit blocked the dryer at the router, which was probably about the only realistic option short of taking a Dremel to the WiFi section of the dryer’s control board. The owner is in contact with manufacturer LG to see if this perhaps represents an error condition; we’d actually love to see a Wireshark dump of the data to see what the garrulous appliance is on about.
As often happens in our wanderings of the interwebz to find the very freshest of hacks for you, we fell down yet another rabbit hole that we thought we’d share. It’s not exactly a secret that there’s a large number of “Star Trek” fans in this community, and that for some of us, the way the various manifestations of the series brought the science and technology of space travel to life kick-started our hardware hacking lives. So when we found this article about a company building replica Tricorders from the original series, we followed along with great interest. What we found fascinating was not so much the potential to buy an exact replica of the TOS Tricorder — although that’s pretty cool — but the deep dive into how they captured data from one of the few remaining screen-used props, as well as how the Tricorder came to be.
And finally, what do you do if you have 3,281 drones lying around? Obviously, you create a light show to advertise the launch of a luxury car brand in China. At least that’s what Genesis, the luxury brand of carmaker Hyundai, did last week. The display, which looks like it consisted mostly of the brand’s logo whizzing about over a cityscape, is pretty impressive, and apparently set the world record for such things, beating out the previous attempt of 3,051 UAVs. Of course, all the coverage we can find on these displays concentrates on the eye-candy and the blaring horns of the soundtrack and gives short shrift to the technical aspects, which would really be interesting to dive into. How are these drones networked? How do they deal with latency? Are they just creating a volumetric display with the drones and turning lights on and off, or are they actually moving drones around to animate the displays? If anyone knows how these things work, we’d love to learn more, and perhaps even do a feature article.