Fancy Telemetry Control Display For A Quadcopter

Most of the quadcopter projects that we’ve seen use a joystick-based control system. This lets you fly the thing around like any RC vehicle. But [Saulius] is augmenting his control system by pulling and displaying telemetry data. It doesn’t really change the way the vehicle is controller, but it lets the craft roam much further away because the operator can watch the computer screen and forego the need for the quadcopter to be within sight.

A Carambola board (also used in this weather station project) is used to provide connectivity. This is WiFi based, which helps us understand the range it can travel. The quadcopter carries a camera, which is shown in the lower right box of the image above. There is also an artificial horizon, and feedback dials which display the telemetry data.

It looks like there’s a satellite view in between those two dashboard widgets. We don’t see anything coming up right now, but it’s possible this is meant to overlay a virtual marker for the aircraft’s position based on GPS data. That last part is really just conjecture though. Catch the 80-second test flight after the jump.

Continue reading “Fancy Telemetry Control Display For A Quadcopter”

Monitoring The Status Of A Unisex Bathroom

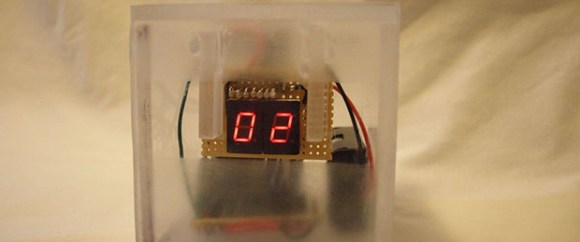
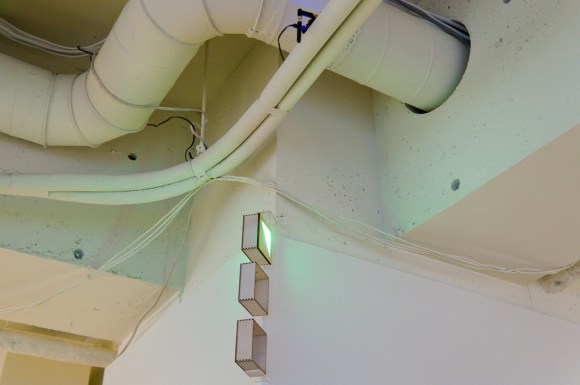
Years ago, someone at [Chuck]’s job came up with the brilliant solution of an indicator to display if the unisex bathroom is currently vacant, a men’s bathroom, or a women’s bathroom. The old system worked well, but [Chuck] thought it would be a great idea to display the current status of the bathroom on the large TV in the office, saving his coworkers from getting up only to wait in line until the bathroom became vacant.

Like the previous paper sign, [Chuck]’s build has three statuses: a men’s room, a women’s room, and vacant with a manual dial that is turned whenever someone is entering or leaving. The new build vastly improves on the paper-based indicator by using a laser cut indicator on a rotary switch.

The electronics are dead simple; just an XBee and a Explorer USB board. Whenever the switch state is changed, the XBee sends a bit of data off to a mac mini and displays the status on the office TV. It may be funny to our immature sense of humor, but it’s still a very nice project.

Controlling A Propeller Wirelessly With Bluetooth

[Jeff] from Gadget Gangster sent in a great tutorial on connecting a cheap Bluetooth module to a Parallax microcontroller. In addition to getting a terminal to the Propeller up and running from his computer, [Jeff] was able to toggle IO pins and even control servos and Android devices – perfect for your next wireless robot.

Connecting the Bluetooth module to the Propeller dev board was easy enough – just two wires for power and two for transmitting and receiving. The computer side of the setup was easy as well; just entering a Bluetooth passcode. Once that was done, the Propeller could talk to the computer and vice versa.

Of course, without the ability to control pins on the microcontroller wirelessly the build was for naught. [Jeff] wrote a simple blinking LED demo. After that, a servo was connected and the build finished off by connecting to an Android terminal.

Although it’s a relatively simple build, we’ve noticed the Propeller doesn’t get much love around the Internet. While it may not have won the microcontroller holy war, it’s nice to see an underrated mcu getting some attention.

Extending The Range Of Wireless Weather Stations With Walkie Talkies

[Roel] wanted to put a wireless weather station in his greenhouse. Even though the weather station was supposed to transmit over fairly long distances, the geometry of his back yard and a few stone walls killed the radio signal even after putting a good antenna on the receiving side of his wireless weather station setup. Wanting to get his weather station working, [Roel] did the sensible thing and built a packet radio setup out of a pair of walkie talkies, greatly increasing the range of his weather station.

This build comes after [Roel] spent a great deal of time reverse engineering the wireless protocol of his Thierry Mugler weather station. With a little bit of code, [Roel] is able to get the current temperature and humidity reading into his Linux box. This system relies on the transmitter inside the weather station, so the system falls apart over any sufficiently large distance.

To increase the range of his weather station, [Roel] took his existing hardware and added a pair of inexpensive FRS walkie talkies. The build uses the hardware from his previous build to get the radio data from the weather station. This data is sent over to an ATmega88 where it’s converted to packet radio and sent over the walkie-talkie. On the receiving side, the output of a second walkie-talkie is piped into the Linux soundmodem app (link, but it’s down as of this writing) where it’s decoded. Sending the received data to gnuplot makes a very nice graph of the temperature and humidity.

[Roel] put the code for both the tx and rx sides of the build up on his build page. Very nice work that uses very inexpensive hardware.

Harvesting And Graphing Wireless Household Utility Meter Info

Both our electrical meter and our gas meter are located in the basement of our house (we recently had the gas meter moved outside though). When people see this they always ask if the meter readers have to come inside once a month. The answer is no, these meters broadcast usage data which is picked up once a month when a utility company vehicle drives down the street. If you have wireless meters in your house, here’s a way to harvest and graph the wireless data so that you can analyze your usage patterns.

The hardware used here is a special USB dongle. This has a 900 MHz radio which picks out the packets from a reasonably large list of meter types, and pushes them through the USB interface. In the image above you can see that an Arduino with a USB host shield is used, but there are also drivers if you want to connect this directly to your computer.

We looked around and didn’t find any specifics on the hardware used on that board. But it can’t be all that hard to make one of these at home… the populated board seems to have just two ICs and a few passive components. Anyone up to the challenge of hacking together their own packet sniffer? We wonder if the Next HOPE badge could pull down the data?

[Thanks Chris]

Wireless Camera Mount Offers Pan And Tilt Functions

[Chris] put together a bunch of common components to create this wireless pan and tilt system for a security camera or a robot.

The motorized base is simple enough, using two servos to make up a mount for the digital camera. In this case he used a parts package which is designed to mount the servos perpendicular to each other. You could also 3D print, our build your own brackets quite easily. The control circuitry consists of a pair of PIC 18LF4520 microcontrollers and a set of Xbee modules. This is where the wireless connectivity comes in.

On the transmitter side, a pair of potentiometers are read by the microcontroller’s ADC and translated into position values. The receiver takes those values and drives the servo motors accordingly. In the clip after the break [Chris] is using micro trimpots which require a screw driver to adjust. You might want to hit the parts bin and see if you can get some that have a more user-friendly shaft or knob.

Unfortunately this system doesn’t transmit video. But WiFi webcams are getting quite affordable so that might be a good option in this case. Continue reading “Wireless Camera Mount Offers Pan And Tilt Functions”

Wireless Solar Water Heater Controller Ensures Hot Water Every Time

water-heater-controller

[Peter Sobey] had a solar hot water heater installed in his home, which worked great until he relocated his kitchen to a neighboring room. Now a good bit further from the tank, the hot water reaching his sink was tepid at best due to the increased distance and temperature limiting mixer valve in the new heater.

He installed a salvaged solar panel and water tank solely for use in his kitchen, but as the panel was located above the tank, he had to find a way to actively monitor and control the water temperature. His pump and valve system was originally driven with an off the shelf PICAXE-based controller, but he eventually got the urge to add a wireless display and control panel to the mix.

A pair of Arduino Nanos run the show now, one of which resides in the pump controller box, while the other is used in the temperature display box in his kitchen. He uses a set of Bluetooth modules to link the Arduinos together, relaying temperature data and allowing him to send the pump controller manual commands if needed.

He says the system works a treat, and he’s much happier with his homebrew controller than the one he used originally.