NASA is going back to the Moon! We’ll follow the crew of Artemis II every step of the way.
Continue reading “Following Artemis II’s Journey Around The Moon”

NASA is going back to the Moon! We’ll follow the crew of Artemis II every step of the way.
Continue reading “Following Artemis II’s Journey Around The Moon”

In a move that’s no doubt going to upset and confuse many, Espressif has released its newest microcontroller — the ESP32-S31. The confusing part here is that the ESP32-S series was always the one based on Tensilica Xtensa LX7 cores, while the ESP32-C series was the one using RISC-V cores.
That said, if one looks at it as a beefier -S3 MCU it does have some appealing upgrades. The most obvious improvements are with the use of WiFi 6, as well as Bluetooth Classic and LE 5.4, including LE Audio. There is also Thread and Zigbee support for those who are into such things.
The Ethernet MAC got a bump from the 100 Mbit RMII MAC in previous MCUs and is now gigabit-rated, while the number of GPIO is significantly higher at 60 instead of 45 on the -S3. On the RAM side, things are mostly the same, except for DDR PSRAM support, with octal SPI offering up to 250 MHz compared to 80 MHz on the -S3.
On the CPU side the up-to-320 MHz RISC-V cores are likely to be about as powerful as the 240 MHz LX7 cores in the -S3, based on the ESP32-C series performance in terms of IPC. Overall it does seem like a pretty nice MCU, it’s just confusing that it doesn’t use LX7 cores with the series it was put into. When this MCU will be available for sale doesn’t seem to be known yet, with only samples available to select customers.

Hackaday Europe is the continental version of the Ultimate Hardware Conference, taking place May 16th and 17th, and you need to be there! We’ll continue to announce speakers and workshops over the next couple weeks, because we got so many more great talks than we had anticipated that we’re negotiating for extra time.
This year, we’re moving to a new venue in Lecco, Italy, and it’s sure to be fantastic. Get your tickets now before it’s too late. And stay tuned for another round of talk reveals next week!
Continue reading “2026 Hackaday Europe: First Round Of Speakers Announced!”

From outer space to down here on Earth, there are many places where ionizing radiation levels are high enough that they effectively bar access for humans, but also make life miserable for anything containing semiconductor technology. This is especially true for anything involving wireless communications, such as Wi-Fi. However, recently Japanese researchers have created a Wi-Fi chip that is claimed to be so radiation-hardened that it can be used even in gamma ray-rich environments, such as in the worst contaminated depths of the Fukushima Daiichi nuclear reactor.
The indicated dose exposure of 500 kilograys that the chip survived during testing is quite significant. A single gray (Gy) is the absorption of one joule of energy per kilogram of matter. In radiation therapy, a solid epithelial tumor can receive as much as 60 to 80 Gy in a single dose, for example.
Continue reading “Exposing A Radiation-Hardened 2.4 GHz Wi-Fi Receiver To 500 Kilograys”

Today, fireplaces, their cozy glow once a household staple, are mostly a thing of the past. In fact, a decent amount of old fireplaces are completely blocked up! [David Capper] brings back the atmosphere without the actual flames, with his RP2040-based fireplace glow simulator.
It’s not just a string of LEDs with some PWM brightness control, either. No, [David] goes into detail about the black body radiation that gives these fires their colors. He then uses the theory of black-body radiation to determine the colors that the LEDs glow to simulate the colors of a real fire.
But the colors alone don’t make for a good simulated fire, so [David] adds the heat equation. It starts with a grid wherein each cell has a temperature. Over time, cells are randomly selected to have heat added to them (increasing the cell’s temperature), then he applies the heat equation to diffuse and decay the heat within the grid for a nice simulated crackling fire. Add in a custom PCB and a nice little 3D-printed case and you’re ready for a cozy hacker time.

The humble NE555 has been around for over five decades now, and while during that time we’ve seen a succession of better and faster versions of the original, the circuits which surround it are pretty well known. There can’t be anything new in the world of 555s, can there? [Stephen Woodward] claims he’s made a novel 555 circuit, with his 1 MHz linear voltage to frequency converter. Since he’s been in love with the 555 since 1974, we’re inclined to trust him on this part.
It’s visibly the 555 astable oscillator we’re all familiar with, given the addition of a current source in place of the normal charging resistor. This makes for a much more linear sawtooth waveform, but it still doesn’t fix the linearity of the voltage to frequency curve. The novel bit comes in adding an extra resistor between the threshold and discharge pins, with a value calculated for a time constant with the capacitor to match the 555’s own switching delay. This provides the necessary compensation, and gives the circuit its linearity.
This is so brilliantly simple that it’s almost a shock that it’s new, but it’s also a great example of the old-school electronic engineer’s art. We can’t think of an immediate need for a 555 voltage to frequency converter on the Hackaday bench at the moment, but you can bet we’ll come back to this one if we do.
We had someone pushing a newer 555 variant to its limit, when we ran our component abuse challenge.

There are plenty of drones (and other gadgets) you can buy online that use proprietary control protocols. Of course, reverse-engineering one of these protocols is a hacker community classic. Today, [Zac Turner] shows us how this GPS drone can be autonomously controlled by a simple Arduino program or Python script.
What started as [Zac] sniffing some UDP packets quickly evolved into him decompiling the Android app to figure out what’s going on inside. He talks about how the launch command needs accurate GPS, how there’s several hidden features not used by the Android app, et cetera. And it’s not like it’s just another Linux SoC in there, either. No, there’s a proper Real-Time Operating System (RTOS) running, with a shell and a telnet interface. The list of small curiosities goes on.
After he finished reverse-engineering the protocol, he built some Python scripts, through which you can see the camera feed and control the drone remotely. He also went on to make an Arduino program that can do the latter using an Arduino Nano 33 IoT.

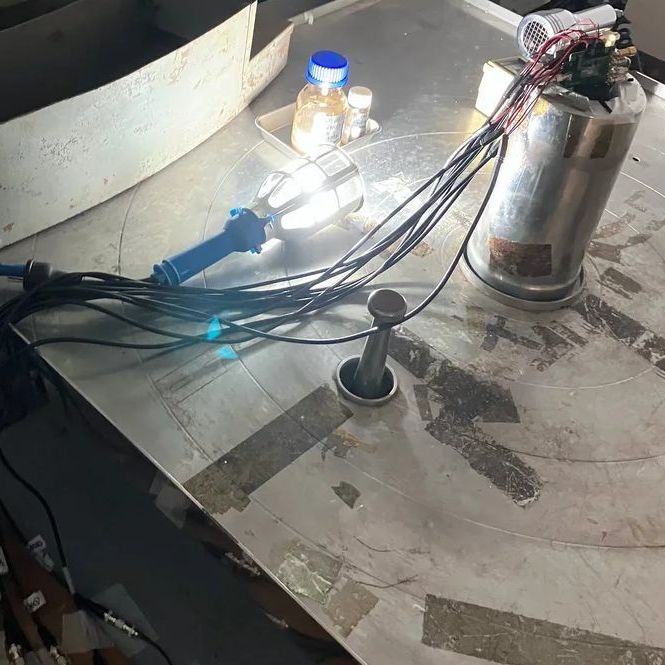
Whether it’s a new couch or a rare piece of hardware picked up on eBay, we all know what it feels like to eagerly await a delivery truck. But the CERN researchers involved in a delivery earlier this week weren’t transporting anyone’s Amazon Prime packages, they were hauling antimatter.
Moving antimatter, specifically antiprotons, via trucks might seem a bit ridiculous. But ultimately CERN wants to transfer samples between various European laboratories, and that means they need a practical and reliable way of getting the temperamental stuff from point A to B. To demonstrate this capability, the researchers loaded a truck with 92 antiprotons and drove it around for 30 minutes. Of course, you can’t just put antiprotons in a cardboard box, the experiment utilized a cryogenically cooled magnetic containment unit that they hope will eventually be able to keep antimatter from rudely annihilating itself on trips lasting as long as 8 hours.
Speaking of deliveries, anyone building a new computer should be careful when ordering components. Shady companies are looking to capitalize on the currently sky high prices of solid-state drives by counterfeiting popular models, and according to the Japanese site AKIBA PC Hotline, there are some examples in the wild that would fool all but the most advanced users. They examine a bootleg drive that’s a nearly identical replica of the Samsung 990 PRO — the unit and its packaging are basically a mirror image of the real deal, the stated capacity appears valid, and it even exhibits similar performance when put through a basic benchmark test.


