Laser Cutter Doubles As A 3D Printer

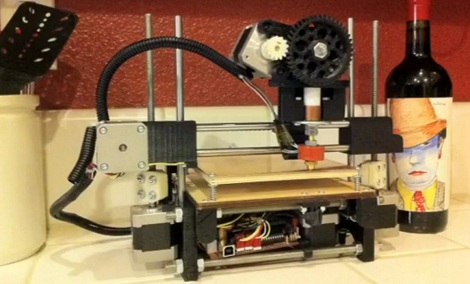
[Bart] figured out how to use his laser cutter as a 3D printer. We’ve checked in on his open source laser cutter in the past and we’re happy to see he’s now done with the build. But rather than stop there he took it a step further. For less than $200 he built an extruder head and added RepRap circuitry. You can see in the image above the laser tube is in the background and the extruder head with a line of black filament is mounted on the gantry. [Bart] has other plans for extensibility as well, including a knife cutter, a pen plotter, and a Dremel mount.

From RepStrap To RepRap; A 3D Printer Is Born

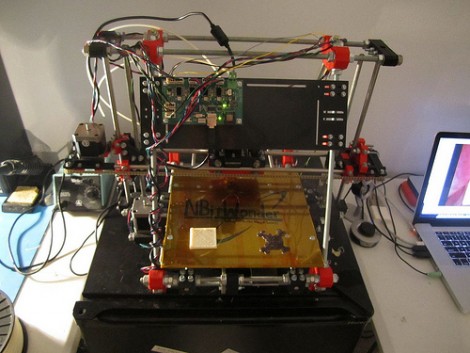
[Gavilan Steinman] just printed and assembled his own RepRap machine and filmed the process. This isn’t news but we found it very interesting to watch. He started with a RepStrap, a rapid-prototyping 3D printer that as built by hand instead of printed by a similar machine. This is the seminal step in the self-replicating process.

From there he prints an extruder head which improves the quality of the parts the RepStrap can produce. We then see time-lapse footage of the printing process for a Mendel unit, the second generation of RepRap machines. We’ve embedded the video after the break. It’s a great way to spend ten minutes on a Sunday afternoon.

Continue reading “From RepStrap To RepRap; A 3D Printer Is Born”

3D Printed MakerBot

[Webca] has made a 3D printed MakerBot with his MakerBot. Using five pounds of plastic, the design replaces all of the plywood used to create a regular MakerBot. This complements the existing designs for the 3D printed extruders, dinos, and other parts already on Thingiverse. An interesting mile marker in the history of 3D printing. We might make one after we make a Mendel and tons of Hack a Day Badges. We also look forward to improvements people will contribute to the design such as using less plastic or a parameterized design to make a really big (or small) MakerBot.

Heated Aluminum Bed For MakerBot

[Keith] built this aluminum-plate heated build stage for his MakerBot 3D printer. We just saw a different MakerBot heated build stage yesterday that relied on glass as the printing surface. Keith’s design is similar to the aluminum RepRap bed but scaled down for the MakerBot. He had a piece of aluminum machined the to correct dimensions, and perfectly flat to use as the printing surface. The yellow surface is caused by Kapton tape applied to the top of the plate. This heat-resistant covering is perfect to print on, resulting in glossy smooth surfaces that are easy to remove once the printed part has cooled. He’s working on improving his mounting technique to achieve prefect level so that he can print without a raft.

[Keith’s] writeup is phenomenal. He’s sharing knowledge in a way that is useful even if you’re not building the exact same kind of project. Follow his lead with your own write-ups, then let us know once you’ve posted them.

[Thanks Marty]

Sarrus Linkage 3d Printer

[fdavies] has been working on his own 3d printer. He is using printed parts, but unlike the RepRap he’s purposed Sarrus linkages in his design. If it works, this should remove the need for precision rods in building these types of CNC based machines. He’s also recovered DC motors and optical encoders from some inkjek printers. Given that many retailers require you to take junky inkjets home when you purchase a computer we’re betting you’ll find friends happy to part with their unused hardware. We’re impressed with the motion of the prototype seen after the break. Let’s hope this leads to the next generation of affordable 3d printers.

Continue reading “Sarrus Linkage 3d Printer”

RepRap Wedge

reprap_wedge

Generation 2.0 of RepRap, the self replicating 3d printer, is approaching realization. Code named “Mendel”, the new design will be wedge shaped rather than a box which offers a few benefits. The overall design is smaller than the original RepRap but the printable area is larger. This means more functionality with less building material. With each new generation of this project the assembly gets easier and total parts price drops making the RepRap available to a much wider audience.

The RepRap blog has put forth some design specs, a picture of the assembled prototype, and has links for general assembly information (ZIP). We won’t see a finished version of this released for a few months but so far it looks like a big leap forward.

Printing A RepRap

repstrap

The RepRap project has been working on bringing 3D printing to the masses by creating a extrusion printer that can also make the majority of its own parts. For the most part, these print ABS or HDPE plastics which are strong and recyclable. In order to create these replicating printers, similar machines called RepStraps are built out of either laser-cut parts or machined elements. They are functionally equivalent to RepRap printers, but are not made of printed parts. [nophead] documented his RepStrap, HydraRaptor, that is based off a milling machine. He had already printed a set of RepRap parts, and he documented printing a second set. The machine worked for about 100 hours over the course of 2 weeks, printing about 1.5 kg of parts. He made a few adjustments, such as replacing ABS bearings with HDPE to reduce friction. The parts are for Factor e Farm so they can get started with 3D printing.

Related: RepRap pinch wheel extruder