An Open Source Modular Flexure Construction Set

Flexures are one of those innocent-looking mechanisms that one finds inside practically any kind of consumer device. Providing constrained movements with small displacements, complete with controlled tension, they can be rather tricky to design. GrabCAD designer [Vyacheslav Popov] hails from Ukraine, and due to the current situation there, plans to sell a collection of flexure building blocks became difficult. In the end, [Vyacheslav] decided to generously release his work open source, for all to enjoy. This collection is quite extensive, looking like it could solve a huge variety of flexure design problems. (Links to the first three sets: Set00Set01Set02 but check the author’s collection page for many others)

It’s not just those super-cheap mechanisms in throw-away gadgets that leverage flexures, it’s much more. The Mars rovers use flexure-based suspension, scientific instruments (interferometers and the like) make use of them for small motions where specific axis constraints are needed, and finally, MEMS accelerometers and gyroscopes are based entirely upon them. We’re not even going to try to name examples of flexures in the natural world. They’re everywhere. And, now we’ve got some more design examples to use, so why not flex your flexure muscles and send one to the 3D printer and have a play?

We see flexures here quite a bit, like this nice demonstration of achievable accuracy. Flexures can make some delicious mechanisms, and neat 3D printable input devices.

Thanks to [Addison] for the tip!

See The Forbidden Cigarette Machine In Action

[Fraens] has been designing a number of fantastic 3D printed machines and making great videos that demonstrate how they work. The last installment was an automatic cigarette stuffing machine, and it’s got a number of pretty complex motions, and somehow manages to get the job done.

While [Fraens] usually uploads STL files for all of his machines, this one is forbidden! Selling automatic cigarette loaders is illegal in Europe, and it’s not clear how close to the legal edge posting them up on Thingiverse is. So until the legal dust settles, you’re going to have to be content with the fantastic video, also embedded below.

But honestly, the devil’s sticks aren’t good for your health anyway, and you’re probably just in it for the mechanicals. Think for a moment about the problem – you’ve got a hopper of tobacco fibers that all like to stick together, and you need to pack them into an easily squished lightweight paper tube. These tubes aren’t easy to handle either. The solution to both of these calls for solenoid-powered tappers that agitate both into place.

There’s also a 3D printed rack and pinion to do the pushing, and a cool stepper-driven revolver mechanism to put the empty papers into just the right place. The machine leans heavily on 3D printing, but also on simple hardware-store parts like aluminum and brass tubes. [Fraens]’s builds are always simple but simultaneously very slick, and you’ll learn a lot from watching it all go together.

And when you’re done, check out some others from [Fraens]. We’ve been impressed by his sewing machine, braiding machine, and even a power loom.

Continue reading “See The Forbidden Cigarette Machine In Action”

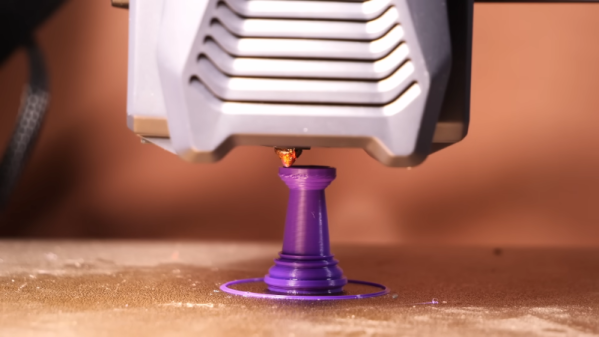
Art of 3D printer in the middle of printing a Hackaday Jolly Wrencher logo

Brainstorming

One of the best things about hanging out with other hackers is the freewheeling brainstorming sessions that tend to occur. Case in point: I was at the Electronica trade fair and ended up hanging out with [Stephen Hawes] and [Lucian Chapar], two of the folks behind the LumenPnP open-source pick and place machine that we’ve covered a fair number of times in the past.

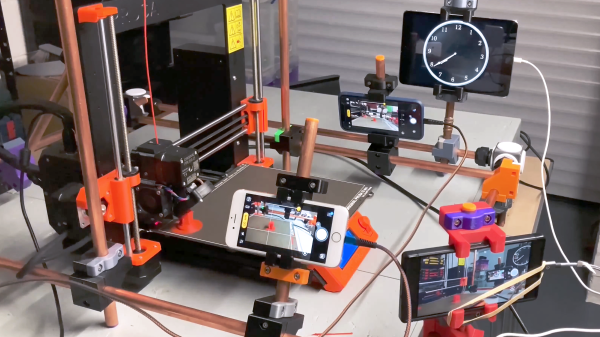
Among many cool features, it has a camera mounted on the parts-moving head to find the fiducial markings on the PCB. But of course, this mean a camera mounted to an almost general purpose two-axis gantry, and that sent the geeks’ minds spinning. [Stephen] was talking about how easy it would be to turn into a photo-stitching macrophotography rig, which could yield amazingly high resolution photos.

Meanwhile [Lucian] and I were thinking about how similar this gantry was to a 3D printer, and [Lucian] asked why 3D printers don’t come with cameras mounted on the hot ends. He’d even shopped this idea around at the East Coast Reprap Festival and gotten some people excited about it.

So here’s the idea: computer vision near extruder gives you real-time process control. You could use it to home the nozzle in Z. You could use it to tell when the filament has run out, or the steppers have skipped steps. If you had it really refined, you could use it to compensate other printing defects. In short, it would be a simple hardware addition that would open up a universe of computer-vision software improvements, and best of all, it’s easy enough for the home gamer to do – you’d probably only need a 3D printer.

Now I’ve shared the brainstorm with you. Hope it inspires some DIY 3DP innovation, or at least encourages you to brainstorm along below.

3D Printer Z Sensor Claims 0.01 Mm Resolution

Early 3D printers usually had a microswitch that let you know when the Z axis was at the zero point. There was usually an adjustment screw so you could tune for just the right layer height. But these days, you most often see some sort of sensor. There are inductive sensors that work with a metal bed and a few other styles, as well. However, the most common is the “BL touch” style sensor that drops a probe below the nozzle level, measures, and then retracts the probe. However, nearly all of these sensors work by detecting a certain height over the bed and that’s it.

A new probe called BDsensor is inductive but can read the height over the bed in real time. According to information from the developer, it achieves a resolution of 0.01 mm and a repeatability of +/- 0.005mm. We don’t know if that’s true or not, but being able to take real-time soundings of the nozzle height leads to some interesting possibilities such as real-time adjustments of Z height, as seen in the video below.

Continue reading “3D Printer Z Sensor Claims 0.01 Mm Resolution”

Scratch Built Wind Turbine Makes Power And Turns Heads

If you’ve ever aspired to live off the grid, then it’s likely that one of the first things you considered was how to power all of your electrical necessities, and also where to uh… well we’ll stick to the electrical necessities. Depending on your location, you might focus on hydroelectric power, solar power, or even a wind turbine. Or, if you’re [Kris Harbor], all three. In the video below the break, we get to watch [Kris] as he masterfully rebuilds his wind turbine from scratch and reconfigures his charging solution to match.

The Rotors Are Built With a 3d Printed Rotor Jig

A true hacker at heart, [Kris] has used a everything from 3d printing to broken car parts in order to build his new wind turbine. The three phase generator is constructed from scratch.  A hand wound stator is held firmly between two magnetic rotors, where 3d printed jigs hold the magnets in place.

A CNC cut backing plate holds everything together while also supporting the automatically furling vane that keeps the entire turbine from self destructing in inclement weather. A damaged wheel hub from [Kris]’ Land Rover provides the basis for a bearing so that the entire turbine can turn to face the wind, and various machined parts round out the build. The only things we didn’t see in the build were hot glue and zip ties, but we remain hopeful. Continue reading “Scratch Built Wind Turbine Makes Power And Turns Heads”

Oh Snap! 3D Printing Snapping Parts Without Breakage

One of the great things about plastic is that it can be relatively flexible. We see things all the time that snap together, but when 3D printing, you don’t often run into snap fit designs. [Engineers Grow] has a video to help you design snap fittings that don’t break.

In the first video that you can see below, he covers three parameters that can help. The first is the length of the snap element. Secondly, the undercut size can be reduced. You can also try making the snap; as thin as possible, although in the example he went too thin and wound up breaking the snap anyway.

The final suggestion, covered in detail in the second video below, is to change the material you use. The key parameter is known as elongation at break. For PLA the typical value for this is 8%. ABS is 10%, PETG is 24% and Nylon is 100%. Simplistically, you could assume that a PETG piece could deform up to 25% before breaking. That may be true, but it will permanently deform long before that. The video suggests using 10 or 15% of the value to assure the part doesn’t lose its shape.

In the third video, you’ll learn, too, that print orientation counts. Making the hooks grow off the build plate leads to a weak hook as you might expect.

We’ve looked at the mechanics behind these before. You can find a lot of detailed technical data about joints, too.

Continue reading “Oh Snap! 3D Printing Snapping Parts Without Breakage”

A profile view of a medical training mannequin with a tube down its "throat." A ventillation bag is in the gloved hand of a human trainee.

Making Medical Simulators Less Expensive With 3D Printing And Silicone

Medical training simulators are expensive, but important, pieces of equipment. [Decent Simulators] is designing simulators that can easily be replicated using Fused Deposition Modeling (FDM) printers and silicone molds to bring the costs down.

Each iteration of the simulators is sent out for testing by paramedics and doctors around the world, and feedback is integrated into the next revision. Because the trainers are designed to be easily replicated, parts can easily be replaced or repaired which can be critical to keep personnel trained, especially in remote areas.

While not open source, some models are freely available on the [Decent Simulators] website like wound packing trainers or wound prostheses which could be great if you’re trying to get a head start on next year’s Halloween costumes. More complicated models will be on sale starting in January as either just the design files or a kit containing the files and the printed and/or silicone parts.

Interested in more medical hacks? Check out this Cyberpunk Prosthetic Eye or this Arduino Hearing Test Device.