All About Accelerometers

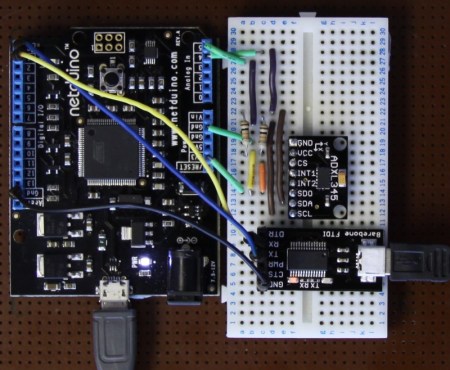
If you’ve ever wondered about the use of or theory behind or the use of accelerometers, this tutorial by Love Electronics is a very good resource. In this article, Love takes one through how to hook up an ADXL345 accelerometer and use it with a Netduino processor. Before the subject of hooking everything up is broached, a very good discussion is given on the general theory and operation of accelerometers.

Information is given about installing all the required software and libraries. Additionally, a mini tutorial about writing a “hello” application using the .NET framework is given. Finally, the application gives the [Windows Presentation Foundation] tools necessary to visualize the raw data that the Netduino produces.

One could really start using this processor and accelerometer from scratch with this tutorial and some basic electronics knowledge.  This could add a great new feature to your next robot or allow measurement that couldn’t be done with simpler sensors.

Red Bull Creation Contest Results

72 hours of hacking came to a head with the completion of the Red Bull Creation. This years challenge was to build something out of junk that moves a human. It’s hard to pull all the aspects of the event together in one place, so here’s some links you’ll want to check out if you weren’t able to attend.

Tech Crunch has an overview of all the event winners. One of our favorites is pictured above. The spinning see-saw is not your average playground toy. Its built-in accelerometer waits for the forces to peak, then snaps a picture for later enjoyment. Techshop, a San Francisco hackerspace, took the team prize for their work on it. Don’t miss the video after the break

The overall winner was a team from Minneapolis called 1.21 Jigawatts. They produced a human-sized hamster wheel that pulled a small follower behind it. As you walk, the follower prints incoming text messages on the sidewalk, kind of like the chalkbot. We searched around for video of it, the best we could find is this one.

Continue reading “Red Bull Creation Contest Results”

On-dash G-meter Project Is Another Way To Distract Drivers

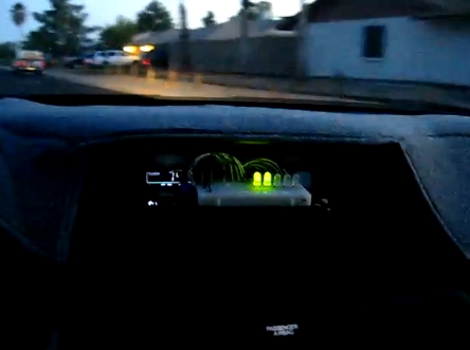
[PJ Allen] built a meter to display gravitation force in an easy to read way. Good thing it’s easy to read, because he’s added it to the dashboard of his car. That way he gets instant feedback when he puts the pedal to the metal. We’re hoping this encourages safe driving practices. But since it appears that not only is he watching the meter while he drives, he’s also holding a camera at the same time, we’d say this makes him a menace on the road.

But we do like the hardware concept. He used five Red/Green LEDs to show what the accelerometer is sensing. A green display reflects acceleration, while a red display shows deceleration. Inside the project box you’ll find a Parallax 2-axis accelerometer and an SX28 micrcontroller. This is an 8-bit Parallax chip family that was discontinued a few years back.

Watch Out Segway, Here Comes Tilto

tilto_demo

While the Segway enjoyed a few years of fame before falling off the radar, [Marcelo Fornaso] is hoping his creation has quite a bit more staying power. Inspired by the Segway’s ability to balance itself, he started thinking about how the concept could be improved. He felt that one of the Segway’s shortcomings arose out of the fact that the base platform was rigid and required the user to lean back and forth outside the device’s frame in order to turn it. He thought that this made the riding experience uncomfortable as well as risked causing the rider to fall over.

His creation, the Tilto, aims to both improve on the turning ability of the Segway while eliminating the need for handlebars. Based on a tilting mountain board design he had been tossing around for a while, the Tilto uses accelerometers and gyros to keep its balance, much like the Segway. His goal was to keep the vehicle balanced while traveling forwards and backwards, but also allowing the device to tilt from side to side without tipping over. This design keeps the rider mostly upright, allowing the user to direct the vehicle by leaning much like you would on a bicycle.

As you can see in the video below, the Tilto works pretty well, even in its prototype form.

Finally, a people mover that lets us get our gangsta lean on!

Continue reading “Watch Out Segway, Here Comes Tilto”

Android Controlled Labyrinth

[Pcdevltd] pulled an all-nighter to get his first Android Developer Kit project up and running. Basing the project off of the example that Google used when unveiling the new accessory development hardware, he set to work controlling a marble labyrinth game using his smart phone. What began at 7pm was wrapped up by 5am to produce the results seen in the video after the break.

These ball mazes use two knobs to pivot the playing surface, changing gravity’s pull on the ball to get it to go where you want. [Pcdevltd] pulled off the bottom on his labyrinth and installed two small servo motors. These connect to the Android Open Accessory Development Kit via a small cable. Connect that to the phone and you can then use the internal accelerometer to play the game. If you have an Android phone and an Arduino this should be pretty easy to replicate since we know you can already use the ADK with Arduino. Get to work on your own projects and don’t forget to send us a link to your project log.

Continue reading “Android Controlled Labyrinth”

Motion Controlled Reddit Vote Sign.


A little while back I attended the largest east coast gathering of folks from the ever popular social news site, Reddit.com. Those of you familiar with Reddit already know that it is all about link aggregation. Users post links to interesting websites and material, and can then vote up or vote down content based on interest or relevance. Through the magical site algorithms original and interesting content is, as implied, aggregated up to the front page.  The whimsical nature of this big DC event lead many people to furnish signs of all types based on the culture of the site, internet memes, etc… The signs that really caught my attention were based primarily on the stylistic site layout, blowing up mail icons and other Reddit specific graphics.

The concept of using site graphics gave me the idea of being able to personally vote up or down other peoples’ signs. It was far too easy to just make a cardboard arrow, and I don’t have a color printer. I happened to have a shelved coffee table project involving orange and blue LEDs. Same colors as the arrows! Sweet. To make this project work I would have to work entirely from my project pile, there simply was no time to order anything from the internet. I managed to crank out a functional up/down voting sign in 3 days leading up to the gathering (and the morning of), here is what I did:

Continue reading “Motion Controlled Reddit Vote Sign.”

Small POV Device Shows Off Some Big Features

We’ve already added the components needed to build [Rucalgary’s] tiny POV device to our next parts order. The little device sets a new standard for tiny persistence of vision boards. Instead of relying on the user to find the best speed and timing for swinging the board around, [Rucalgary] used an accelerometer. This is the point at which we’d usually groan because of the cost of accelerometers. We’re still groaning but this time it’s for a different reason.

The accelerometer used here is a Freescale MMA7660. It’s an i2c device at a super low cost of less than $1.50. The reason we’re still groaning is that it comes in a DFN-10 package that is a bit harder to solder than SOIC, but if you’ve got patience and a good iron it can be done. An ATmega48 drives the device, with 8 LEDs and one button for input. On the back of the board there’s a holder for a CR2032 coin cell battery and a female SIL pin header for programming the device.

Check out the video demonstration embedded after the break. We love it that the message spells and aligns correct no matter which way the little board is waved.

Continue reading “Small POV Device Shows Off Some Big Features”