Did Microsoft Steal The Kinect?

In 2009, while Microsoft was busy designing and marketing what would become the Kinect, [Carlos Anzola], an inventor, tinkerer, and self-ascribed geek from Bogotá, Colombia, had been working for years on a nearly identical gesture interface for the PC. His creation, the Human interface Electronic Device, or HiE-D – pronounced ‘Heidi’ – was capable of gesture recognition years before Microsoft would release the Kinect.

After developing his gesture recognition device in 2007, Microsoft showed interest in [Carlos]’ device – going so far as to request a prototype. Microsoft suggested that he should apply for a patent on his technology. [Carlos] did just that, sending in patent applications to both the United States Patent and Trademark Office and the World Intellectual Property Organization a mere two days before the announcement of Project Natal and a full seven months before Microsoft applied for their Kinect patent.

Since the release of the Kinect, [Carlos] has been showing the HiE-D around Bogotá and has put a few videos of his technology up on Youtube, one of which can be seen below. You can also check out his Youtube channel for some great demos.

[youtube=http://www.youtube.com/watch?v=f5jfOJ3TwyI&w=470]

Continue reading “Did Microsoft Steal The Kinect?”

Adding Extra Buttons To A Cintiq Drawing Pad

wacom_cintiq_game_pad_addon

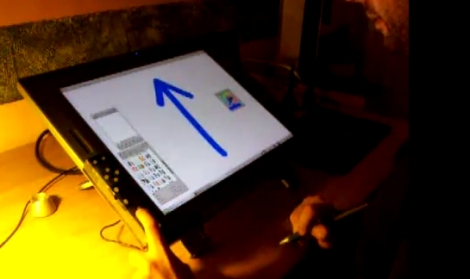
[David Revoy] recently picked up a brand new Cintiq 21UX, and while he liked the drawing pad overall, he was less than impressed with the tablet’s buttons. He says that most 2D linux apps require a good bit of keyboard interaction, and the built-in buttons just were not cutting it.

After seeing a fellow artist use a joypad to augment his tablet, [David] thought that he might be able to do something similar, but he wanted to add a lot more buttons. He dug out an old Logitech game pad that was collecting dust, and disassembled it, rearranging some buttons in the process. Once he was happy with the layout, he built a cardboard enclosure for the PCB and hooked it up to the Wacom via USB.

He spent a few minutes mapping buttons to key presses using Qjoypad, and was up and running with an additional 14 buttons in short order. He says that the extra buttons make his job a ton easier, and add a little bit of comfort to his long drawing sessions. We like the fact that it is a non-permanent fixture, and that he was able to repurpose an old game pad in the process.

Check out the video below for a quick demonstration of his drawing pad hack.

[via Adafruit blog]

Continue reading “Adding Extra Buttons To A Cintiq Drawing Pad”

Building A Single-button Combination Lock

single_button_arduino_combination_lock

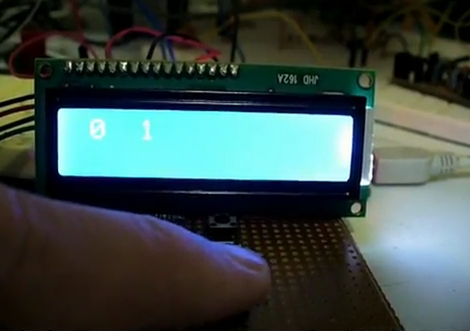
[John Boxall] of Little Bird Electronics was thinking about combination locks, and how one might improve or at least change the way these locks work. Traditional combo locks can be implemented in a variety of ways, most of which we are all familiar with. Standard rotary padlock and keypad-based electronic safes work just fine, but he was interested to see how one might implement a single button combination lock.

[John] determined that the best, if not only way, to build this sort of lock would require him to measure button press intervals. In his case he decided to monitor the intervals between his button presses instead, but the concept is the same. He first tested himself to see how accurately he could press and release the button, leaving a one-second space between presses. After looking at the results he determined that he would need to incorporate at least a 10% margin for error into his code in order to compensate for human error.

He then created an Arduino sketch to test his idea, defining a set of key press intervals that could be used to ‘unlock’ his imaginary vault. It worked quite well, as you can see in the video demo below.

Now we’re not suggesting that you lock up your mint condition My Little Pony collection or your illegal arms stash with this type of lock, but it could be useful as an extra failsafe for certain projects/gadgets that you want to keep all to yourself.

Continue reading “Building A Single-button Combination Lock”

Vodafone Femtocells Hacked, Root Password Revealed

vodafone_femtocell_network_diagram

As phone systems have evolved over time, the desire to break them and exploit their usage continues to flourish. Just recently, [The Hacker’s Choice (THC)] announced that they had accessed secure data from Vodafone’s mobile phone network last year, via their femtocell product.

The purpose of the femtocell is to extend mobiile network coverage to locations where reception might not be ideal, routing calls to Vodafone’s network via IPSec tunnels. [THC] knew that this meant the femtocells required a high-level of interaction with the carrier’s traditional mobile network, so they started poking around to see what could be exploited.

After gaining administrative access to the femtocell itself using the root password “newsys”, they found that they were able to allow unauthorized users to utilize the service – a simple ToS violation. However, they also had the ability to force any nearby Vodafone subscriber’s phone to use their femtocell. This enabled them to request secret keys from Vodafone, which they could then use to spoof calls and SMS messages from the victim’s phone without their knowledge.

They have been kind enough to release all of the pertinent information about the hack on their wiki for any interested parties to peruse. Now we’re just wondering how long it takes before stateside carriers’ femtocells are exploited in the same fashion.

[Thanks, kresp0]

Red Bull Creation Contest Results

72 hours of hacking came to a head with the completion of the Red Bull Creation. This years challenge was to build something out of junk that moves a human. It’s hard to pull all the aspects of the event together in one place, so here’s some links you’ll want to check out if you weren’t able to attend.

Tech Crunch has an overview of all the event winners. One of our favorites is pictured above. The spinning see-saw is not your average playground toy. Its built-in accelerometer waits for the forces to peak, then snaps a picture for later enjoyment. Techshop, a San Francisco hackerspace, took the team prize for their work on it. Don’t miss the video after the break

The overall winner was a team from Minneapolis called 1.21 Jigawatts. They produced a human-sized hamster wheel that pulled a small follower behind it. As you walk, the follower prints incoming text messages on the sidewalk, kind of like the chalkbot. We searched around for video of it, the best we could find is this one.

Continue reading “Red Bull Creation Contest Results”

IButton Is Opening Doors At The TkkrLab

Finding alternative ways to unlock doors is a favorite hacker pastime. TkkrLab recently took on the challenge themselves. The hackerspace, which is located in the Netherlands, faced a problem common to communal workshops; how could they manage keyed access for a large number of members? The metal keys for the door are special, and cannot be cheaply duplicated. To further compound the issue, they are not the only tenants in the building so they can’t replace the lock with one that uses less-expensive keys. So they decided to add an electronic solution.

They first looked at a method for electronically opening the door. Often, this comes in the form of an electronic strike, but rather than alter the door jamb, they replaces the latching mechanism. The electronic latch was compatible with the original cylinder, which means the old keys still work in it. You can see the new assembly above. Just to the left of the lock is an iButton reader. We’ve seen this hardware in projects many times before. It’s cheap, and easy to work with. Now TkkrLab issues an iButton to each member, and can keep track of who is coming in door.

A Beginner’s Guide To Magnetometers

magnetometers_for_beginners

The folks over at LoveElectronics recently published an article that explains some of the ins and outs of magnetometers for those who are interested in trying one out, but might not understand how to use them.

A good part of the article focuses specifically on how to manipulate the HMC5883L magnetometer from Honeywell, but a lot of the information can be applied to other makes/brands of compass sensors. They start out discussing in very basic terms how the compass works, then delve into some specifics on how to interface the chip with an Arduino, courtesy of a breakout board that they sell. The breakout board is actually quite simple, so any number of custom iterations could be built for your own testing purposes.

They walk through the use of an HMC5883L-specific Arduino sketch they produced, making it easy for beginners to start getting useful data from the compass units. While a pre-made sketch might seem like a bit of a cop out, it at least gives the curious/motivated beginner a chance to look at some completed code in order to see how things work.

If you are interested in cutting your teeth on some additional beginner concepts, check out these other how-to articles and tutorials.