Turning A Storefront Into A Video Game

invasion

[Kris]’ house/office has a huge store window, and instead of covering it up with newspapers, decided to do something cool. He’s had projections and other art pieces on display for his neighbors, but his new storefront arcade game very likely beats all of those.

Every video game needs a display, and this one is no slouch. The display is a 16*90 matrix of WS2812 LEDs with inset into a laser cut grid and put behind a layer of plexiglass. With this grid, the display has a great raster effect that’s great for the pixeley aesthetic [Kris] was going for. In front of the window is an MDF and steel arcade box powered by an Arduino Due.

The game is driven by the Adafruit neopixel library, with a few modifications to support alpha blending. There’s no external memory for this game – everything is running on a second Arduino Due inside the window.

It’s a great looking game, and if you’re ever in [Kris]’ area – behind the zoo in Antwerp – you’re free to walk up and give this game a spin.

Video demo below.

Continue reading “Turning A Storefront Into A Video Game”

CAN Hacking: The Hardware

So far we have discussed the basics of CAN, in-vehicle networks, and protocols used over CAN. We’re going to wrap up with a discussion of CAN tools, and parts to build your own CAN hardware.

Wiring

Unfortunately, there’s no set standard for CAN connections. The most common connector for high-speed CAN is a DE-9, with CAN high on pin 7 and CAN low on pin 2. However cables will differ, and many are incompatible.

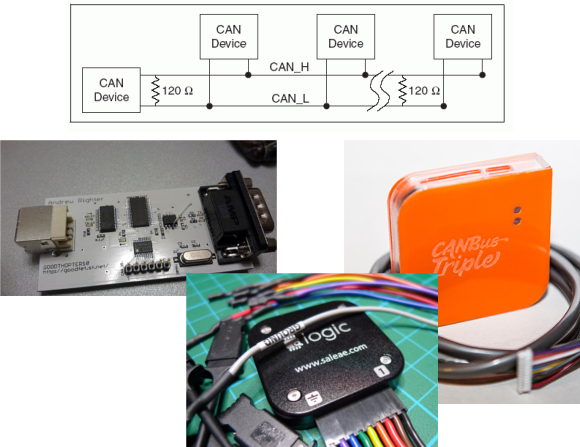
CAN needs to be terminated, preferably by a 120 ohm resistance on either end of the bus. In practice, you can stick a single 120 ohm resistor across the bus to deal with termination.

Tools

A good CAN tool will let you transmit and receive CAN messages, interpret live data using CAN databases, and talk CAN protocols. The tools with this feature set are proprietary and expensive, but some hacker friendly options exist.

GoodThopter
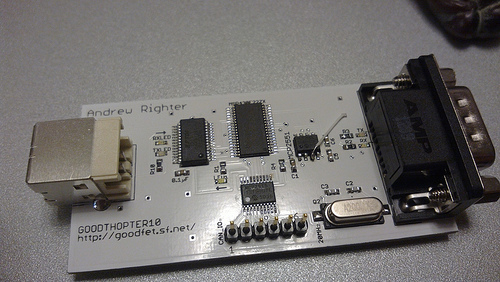
The GoodThopter12

Based on [Travis Goodspeed’s] GoodFET, the GoodThopter by [Q] uses the Microchip MCP2515 CAN to SPI controller to access the bus. The open hardware tool lets you send and receive messages using Python scripts.

CAN Bus Triple
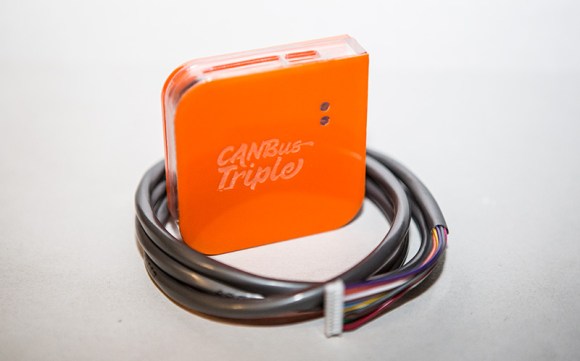
CAN Bus Triple

The CAN Bus Triple device provides an interface to three CAN buses, and can be programmed in an environment similar to Arduino. The open source code provided lets you muck with the second generation Mazda 3. Unfortunately, the hardware does not appear to be open source.

Saleae Logic
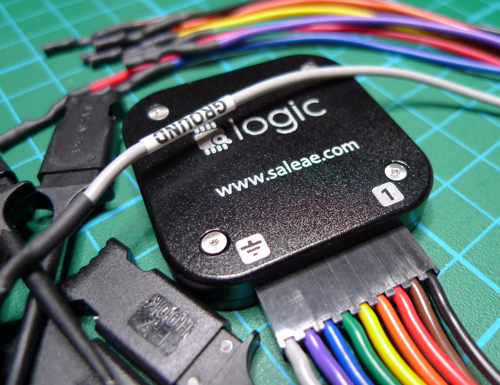
Saleae Logic

It’s not open source, but the Saleae Logic is a very handy and cheap tool for looking at CAN buses. It can capture, decode, and display CAN traffic. This is most useful when you’re building your own CAN hardware.

DIY

The Parts

If you want to design your own hardware for CAN, you’ll need two things: a CAN controller, and a CAN transceiver.

The CAN controller generates and interprets CAN messages. There’s many microcontrollers on the market with built-in CAN controllers, such as the Atmel ATmega32M1, Freescale S08D, and the TI Tiva C Series. When using a built-in CAN controller, you’ll have to use an external oscillator, internal oscillators are not sufficiently accurate for high-speed CAN. If you want to add CAN to an existing microcontroller, the MCP2515 is an option. It’s a standalone CAN controller that communicates over SPI.

The transceiver translates signals from the controller to the bus, and from the bus to the transceiver. Different transceivers are needed for high-speed and low-speed CAN networks. The NXP TJA1050 works with high-speed buses, and the ON Semi NCV7356 works with low-speed, single wire buses.

Dev Boards

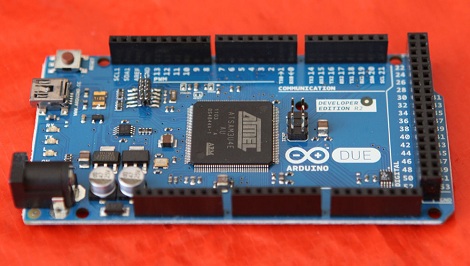
There’s a ton of development boards out there featuring microcontrollers with a CAN controller. The Arduino Due‘s SAM3 processor has a controller, but there’s no transceiver on the board. You can pick up a CAN bus shield, and the Due CAN Library to get started.

The ChipKIT Max32 is similar to the Due. It has two CAN controllers, but you’ll need to provide external transceivers to actually get on a bus. Fortunately there’s a shield for that. The ChipKIT is officially supported by Ford’s OpenXC Platform, so you can grab their firmware.

That concludes our discussion of CAN Hacking. Hopefully you’re now ready to go out and experiment with the protocol. If you have questions, send them along to our tip line with “CAN Hacking” in the subject, and we’ll compile some answers. If you liked this series and want to suggest a topic for the next set of posts we’d love to hear that as well!

CAN Hacking

Get Phone Calls Answered With The Moshi Moshi

Moshi Moshi

Have a significant other that isn’t the best at picking up the phone? [Aaron] was having a hard time reaching his wife, so he hacked up a solution. The Moshi Moshi detects calls from [Aaron], and plays music to get her attention.

A remote server running Asterisk picks up the call and uses a Ruby script to log the call. Every ten seconds, an Arduino Due with an Ethernet shield polls a Sinatra web server to see if a call has arrived. If a new call has come in, a music loop is played. Getting the Due to loop audio was a bit of a challenge, but the end result sounds good.

Quite a bit of tech is brought together to make the Moshi Moshi, and all the code is provided in the write up. This could be helpful to anyone looking to combine hardware with the Asterisk PBX. After the break, [Aaron] shows us how the system works.

Continue reading “Get Phone Calls Answered With The Moshi Moshi”

Building A Hardware Security Module

secure

[Stefan] was nervous about putting the secret key for his Amazon Web Services account in his config file. In the security world, storing passwords in plain text is considered a very bad thing. but luckily there are ways around it. [Stefan]’s solution was to make a hardware security module out of the newest ARM-powered Arduino Due.

The build puts the secret key for [Stefan]’s AWS account right in the firmware of the Arduino Due (with the security bit on the Arduino flipped, of course). A Python web service then receives sign requests and talks to the Due over a serial port. The Due then signs the request and sends it off to another bit of Python code that handles the AWS API.

Hardware security modules are frequently used by three-letter government agencies to manage cryptography keys and ensure their data are encrypted properly. Instead of a hardware module costing tens of thousands of dollars, [Stefan]’s only cost the price of an Arduino Due; not too shabby for a hardware security module that can sign more than 2000 requests per second.

The Arduino Due Is Finally Here

After a years-long wait, an ARM powered Arduino is finally due. The Arduino Due will finally be released this coming Monday.

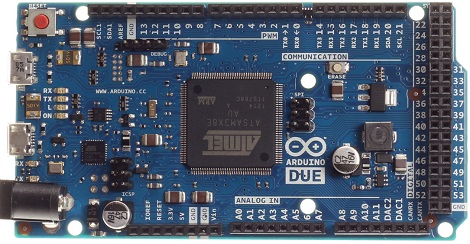
On board the Arduino Due is an Atmel-sourced ARM Cortex M3 microcontroller running at 84 MHz. The Due has an impressive list of features including a USB 2.0 host, compatibility with the Android ADK (lest you still need an IOIO), 12 analog inputs with 12-bit resolution, 2 analog outputs running at 12 bits, a CAN interface, and more input pins than you can shake a stick at.

For a full list of features, you can grab this PDF we picked up when we saw the Due at Maker Faire NYC

This hardware update to the Arduino platform makes a lot of very cool builds very possible for even the beginner hardware hacker. Of course the Due will be used for controlling drones and UAVs, laser cutters and 3D printers, and playing WAV files from the analog outputs. The much improved hardware opens up a lot of other possible builds including making your own guitar pedals – DSP is a wonderful thing – and reading the telemetry from your car in real-time via the CAN bus.

Although it’s not available right now, you will be able to buy an Arduino Due for $49 USD this coming Monday at your favorite electronics retailers. 

Finally, An ARM-powered Arduino

Far removed from the legions of 3D printers featured at this year’s Maker Faire in New York was a much smaller, but far more impressive announcement: The ARM-powered Arduino DUE is going to be released later this month.

Instead of the 8-bit AVR microcontrollers usually found in Arduinos, the DUE is powered by an ATSAM3X8E microcontroller, itself based on the ARM Cortex-M3 platform. There are a few very neat features in the DUE, namely a USB On The Go port to allow makers and tinkerers to connect keyboards, mice, smartphones (hey, someone should port IOIO firmware to this thing), and maybe even standard desktop inkjet or laser printers.

The board looks strikingly similar to the already common Arduino Mega. That’s no mistake; the DUE is compatible with existing shields, so connecting a RAMPS board for your 3D printer should be a snap.

Here’s a PDF the Arduino and Atmel guys were handing out at their booth. A few DUE boards have already made it into the hands of important people in the Arduino community, including 3D printer guru [Josef Prusa]. Sadly, the folks at Arduino didn’t think media personalities needed a DUE before its release, so you’ll have to wait until we get our hands on one later this month for a review.