Lots Of Seven Segment Displays With A Single ATtiny

7seg

These days they’ve been replaced with character LCD displays or even brightly colored graphical displays, but if you’re trying to display data on one of your projects, there’s nothing like the classic red glow of a red seven segment display. [five volts] got his hands on a few ancient segmented displays, but controlling even one took up more microcontroller pins than he was ready to spare. The solution to this problem was to use a shift register and control multiple segment displays with an 8 pin microcontroller.

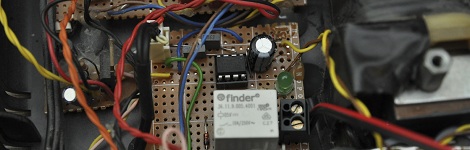
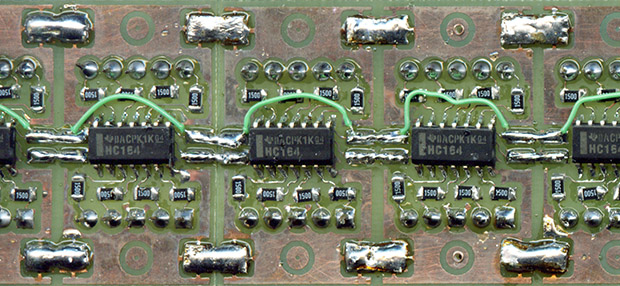
[volts] is using an ATtiny13 to control six seven segment displays. Each display is mounted on a hand-etched board, with a shift register and a handful of resistors soldered to the back. By having the microcontroller shift bits down the line, [volts] created an extremely easy to interface 6-digit segment display, and the entire device can be expanded even more.

The board files and schematics are available on [volt]’s project page. A great project if you’re just starting out to etch your own boards.

Asynchronous Fireflies Use Few Parts

led-firefly

[Karl Lunt] wrote in to share his LED firefly project. His goals for the project were to develop a low-power, low parts count module that can sense when it’s dark and then mimic the blinking patterns you’d associate with its biological namesake.

We like his design which uses a coin cell battery holder as the chassis for the project. The ATtiny13 driving the hardware is held in place by the two power wires. This lets him flash new firmware by rotating the chip and plugging in a little adapter he build. The LED connection might look a bit peculiar to you. It has a resistor in parallel, which doesn’t satisfy the normal role of a current limiting resistor. That’s by design. [Karl] is driving the LED without any current limiting, which should be just fine with the 3V battery and short illumination time of the diode. The resistor comes into play when he uses the LED as a light sensor. Past firefly projects included light dependent resistors to detect light and synchronize multiple units. [Karl] is foregoing the LDR, using the LED with a resistor in parallel to combat the capacitive qualities of the diode. As we mentioned, this senses ambient light, but we’d love to see an update that also uses the LED to synchronize a set of the devices.

Wireless Doorbell Battery Monitor

wireless-doorbell-battery-monitor

We know exactly what [Dan] is going through. We also bought a cheap wireless doorbell and are plagued by the batteries running down. When that happens, the only way you know is when people start pounding on the door because you’re not answering the bell. Well no more for [Dan]. He built a backup system which monitors the voltage of the batteries on the chime unit.

You can see the small bit of protoboard he used to house the microcontroller and the UI. It’s an ATtiny13 along with a green LED and a single push button. The idea is to use the chip’s ADC to monitor the voltage level of the pair of batteries which power the chime. When it drops below 3V the green LED will come on.

First off, we wish these things would come with better power supply circuits. For instance, we just replaced the CR2032 in an Apple TV remote and measured the voltage at 2.7V. That remote and the chime both run from a 3V source. Can’t they be made to work down to 1.8V? But we digress.

In addition to monitoring voltage [Dan’s] rig also counts the number of times the chime has rung. Every eight seconds it flashes the count in binary, unless he presses the red button to clear the count. This is shown in the video after the break. We guess he wants to know how many times this thing can be used before running the batteries down.

Seriously though, for a rarely used item like this how hard would it be to use ambient light harvesting to help save the batteries? Looking at some indoor solar harvesting numbers shows it might be impossible to only power this from PV, but what if there was a super-cap which would be topped off with a trickle from the panels but would still use the batteries when that runs down?

Continue reading “Wireless Doorbell Battery Monitor”

RF Switching Module Can Learn New Remotes

rf-remote-also-learns-by-itself

This breadboarded circuit is [Sergio’s] solution to controlling appliances wirelessly. Specifically he wanted a way to turn his pool pump on and off from inside the house. Since he had most of the parts on hand he decided to build a solution himself. What he ended up with is an RF base station that can learn to take commands from different remote devices.

The main components include the solid state relay at the bottom of the image. This lets the ATtiny13 switch mains voltage appliances. The microcontroller (on the copper clad square at the center of the breadboard) interfaces with the green radio frequency board to its left. On the right is a single leaf switch. This acts as the input. A quick click will toggle the relay, but a three-second press puts the device in learning mode. [Sergio] can then press a button on an RF remote and the device will store the received code in EEPROM. As you can see in the clip after the break, he even included a way to forget a remote code.

Continue reading “RF Switching Module Can Learn New Remotes”

ATTannenbaum

attiny

It’s that special time of year again where the smell of baking cookies fill the house and shopping mall parking lots are filled with idiots and very angry people. [Kevin] thought it would be a good idea to build an LED Christmas tree and ended up building a great looking tree that’s also very simple.

In the video, the imgur album, and the github, [Kevin] shows us the simplest way to make a color-changing LED Christmas tree. The circuit uses LEDs to drop the voltage and to provide a nice glow around the base of the tree. After that, it’s just an ATtiny13 and some LEDs in a very nice freeform circuit.

Of course, if LED Christmas trees aren’t your thing, [hb94] over on reddit created an LED menorah. Pretty nifty he used an 8-position DIP switch for the circuit. Let’s just hope someone gave him a soldering iron for the last night of Hanukkah.

Programming A Microcontroller One Bit At A Time

Imagine you’re stuck on a desert island, hundreds of miles away from the nearest person, and you finally have time to finish that project you’re working on. You have a single microcontroller, but you’re lacking a computer and you need to program an ATtiny13. How do you do it? [androidruberoid] figured out how to manually flash a microcontroller (Russian, surprisingly good translation) using just three switches and a lot of patience.

[androidruberoid]’s ATtiny13 – like nearly all Atmel microcontrollers – are programmed using an SPI interface. This interface requires four signals: SCK, a data clock, MOSI, the data line from master to slave, MISO, data from slave to master, and RESET. By connecting these data lines to buttons, [androidruberoid] is able to manually key in new firmware one byte at a time.

This technique of manually programming bits relies on the fact that there is no minimum speed for an SPI interface. In the video after the break, you can see [androidruberoid] manually programming an ATtiny13 with a simple program. It only lights up an LED, but with enough patience he could key in a simple ‘blink a LED’ program.

Continue reading “Programming A Microcontroller One Bit At A Time”

Turning On PC Speakers Whenever There Is Music Playing

If you’re like a lot of people, most of the time your computer speakers are on without actually playing any music. This wastes a bit of power, and [Bogdan] thought he could create a circuit to cut down on that wasted electricity. The result is a very tiny auto-on circuit able fit inside a pair of speakers.

The circuit is built around the ATtiny13, very nearly the smallest microcontroller available with an on-board ADC. When music is played on the computer, the ATtiny senses a bit of voltage in the audio line and switches a relay to power the speaker.

Of course, there is always the problem of music with a high dynamic range; if the sound played from the computer has too low of a volume, the ATtiny might turn the speakers off even if music is playing. [Bogdan] solved this problem by adding a timer to his code; if nothing is detected by the ADC for three minutes, the speakers turn off.