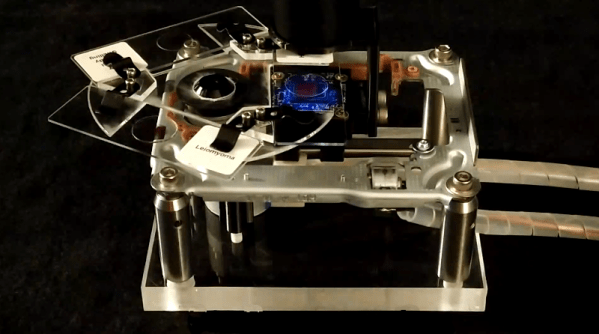
Blu-ray player with 3 slides on a disk

Blu-ray Microscope Uses Blood Cells As Lenses

When you think of high-throughput ptychographic cytometry (wait, you do think about high throughput ptychographic cytometry, right?) does it bring to mind something you can hack together from an old Blu-ray player, an Arduino, and, er, some blood? Apparently so for [Shaowei Jiang] and some of his buddies in this ACS Sensors Article.

For those of you who haven’t had a paper accepted by the American Chemical Society, we should probably clarify things a bit. Ptychography is a computational method of microscopic imaging, and cytometry has to do with measuring the characteristics of cells. Obviously.

This is definitely what science looks like.

Anyway, if you shoot a laser through a sample, it diffracts. If you then move the sample slightly, the diffraction pattern shifts. If you capture the diffraction pattern in each position with a CCD sensor, you can reconstruct the shape of the sample using breathtaking amounts of math.

One hitch – the CCD sensor needs a bunch of tiny lenses, and by tiny we mean six to eight microns. Red blood cells are just that size, and they’re lens shaped. So the researcher puts a drop of their own blood on the surface of the CCD and covers it with a bit of polyvinyl film, leaving a bit of CCD bloodless for reference. There’s an absolutely wild video of it in action here.

Don’t have a Blu-ray player handy? We’ve recently covered a promising attempt at building a homebrew scanning electron microscope which might be more your speed. It doesn’t even require any bodily fluids.

[Thanks jhart99]

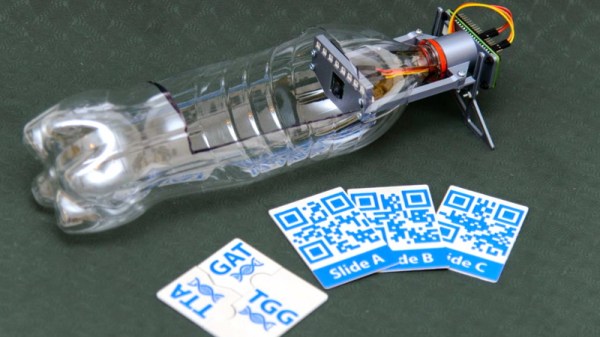
Teaching Science With An Empty Soda Bottle

Creating the next generation of scientists and engineers starts by getting kids interested in STEM at an early age, but that’s not always so easy to do. There’s no shortage of games and movies out there to entertain today’s youth, and just throwing a text book at them simply isn’t going to cut it anymore. Modern education needs to be engrossing and hands-on if it’s going to make an impact.

Which is exactly what the Institute of Science and Technology Austria hopes to accomplish with the popSCOPE program. Co-founded by [Dr. Florian Pauler] and [Dr. Robert Beattie], the project uses off-the-shelf hardware, 3D printed parts, and open source software to create an engaging scientific instrument that students can build and use themselves. The idea is to make the experience more personal for the students so they’re not just idle participants sitting in a classroom.

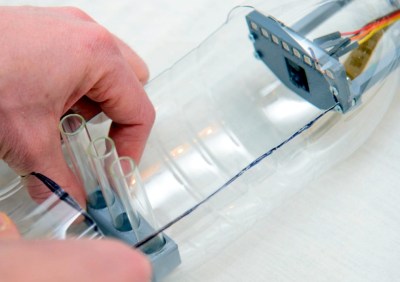
The hardware in use here is quite simple, essentially just a Raspberry Pi Zero W, a camera module, a Pimoroni Blinkt LED module, and a few jumper wires. It all gets bolted to a 3D printed frame, which features a female threaded opening that accepts a standard plastic soda (or pop, depending on your corner of the globe) bottle. You just cut a big opening in the side of the bottle, screw it in, and you’ve saved yourself a whole lot of time by not printing an enclosure.

So what does the gadget do? That obviously comes down to the software it’s running, but out of the box it’s able to do time-lapse photography which can be interesting for biological experiments such as watching seeds sprout. There’s also a set of 3D printable “slides” featuring QR codes, which the popSCOPE software can read to show images and video of real microscope slides. This might seem like cheating, but for younger players it’s a safe and easy way to get them involved.

For older students, or anyone interested in homebrew scientific equipment, the Poseidon project offers a considerably more capable (and complex) digital microscope made with 3D printed parts and the Raspberry Pi.

Broken 3D Printer Turned Scanning Microscope

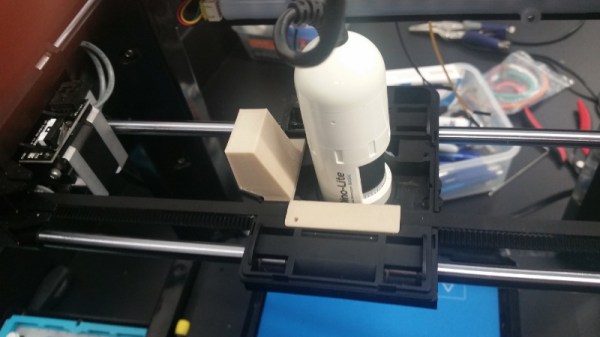
A few years ago, [Wayne] managed to blow out the main board of his Flashforge Finder attempting to change the fan. But the death of one tool ended up being the birth of another, as he ended up using its mechanical components and a Raspberry Pi to create an impressive scanning microscope.

Scan of Ulysses S. Grant from a US $50 bill

As you might have guessed from the name, the idea here is to scan across the object with a digital microscope to create an enlarged image of the entire thing. This requires some very precise control over the microscope, which just so happens to be exactly what 3D printers are good at. All [Wayne] had to do was remove the hotend, and print some adapter pieces which let him mount a USB microscope in its place.

The rest is in the software. The Raspberry Pi directs the stepper motors to move the camera across the object to be scanned in the X and Y dimensions, collecting thousands of individual images along the way. Since the focus of the microscope is fixed and there might be height variations in the object, the Z stage is then lifted up a few microns and the scan is done again. Once the software has collected tens of thousands of images in this manner, it sorts through them to find the ones that are in focus and stitch them all together.

The process is slow, and [Wayne] admits its not the most efficient approach to the problem. But judging by the sample images on the Hackaday.io page, we’d say it gets the job done. In fact, looking at these high resolution scans of 3D objects has us wondering if we might need a similar gadget here at the Hackaday Command Bunker.

The project is actually an evolution of an earlier attempt that used gutted optical drives to move the microscope around.