Self balancing wheeled robot with auto-righting arms lofted high

A Self Righting Balancing Robot Configured The Easy Way

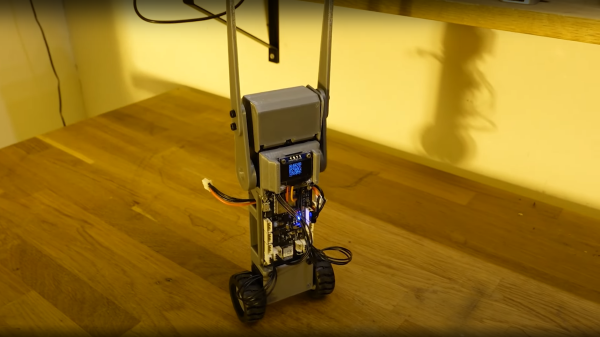
Norwegian electronics hacker [Hans Jørgen] aka [time expander] on YouTube, has a clear interest in robotics, and for his latest effort, decided that it was time to build a custom controller platform. Since [Hans] had a pile of Dynamixel servo motors lying around to test it with, a good first project for the platform was a simple self-balancing wheeled robot. (Video, embedded below)

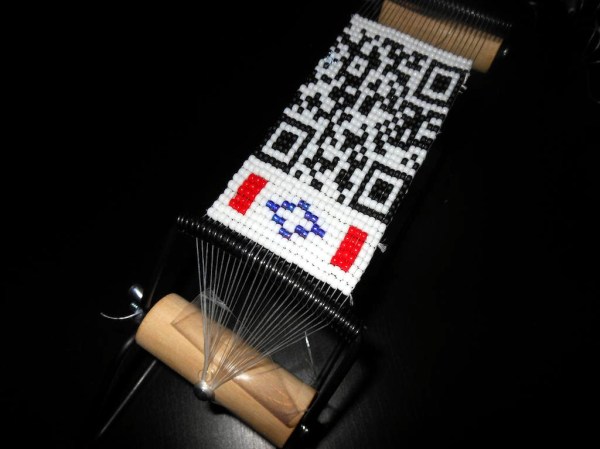
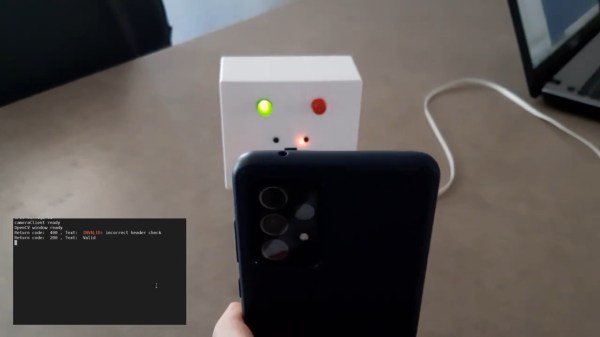
We say ‘simple’ but that isn’t really the case, as there is a fair bit going on to get this to work. The first problem, is sensing, which was quickly solved with the excellent BMO055 IMU chip. Next, what to do when it falls over? Simply adding some servo-controlled arms, allowed the robot to flip itself back upright. Control is covered with a ESP32-WROOM-32D module from our friends at Espressif, which enables remote firmware uploading over the air (OTA update) as well as parameter tuning. In order to implement the latter, [Hans] chose to use bonjour/mDNS which is an implementation of zero-configuration networking. This gets the ESP32 onto the WiFi, but it isn’t immediately obvious how to connect to it, without a little digging around. To simply connection, [Hans] implemented a dynamic QR code via the connected OLED. This is just one of the those tiny 0.96″ displays that you see touted all over our corners of the internet.

Simply by scanning the QR code with any compatible device to hand brings up a simple configuration web page, allowing one to tweak the PID controller parameters, and get that balancing robot into check. Great stuff!

The PCB was designed in Eagle, firmware for the ESP32 is available, 3D models for the plastic are designed with fusion 360, and [Hans] is even currently working on some preliminary Alexa integration. What a fun project!

All the above, albeit an early cut (look out for bugs!) is available on the project GitHub for your viewing pleasure.

We’re no stranger to self-balancing 3D-printed bots, whilst you’re here, why not checkout A problematic Self-Balancing Sonic the Hedgehog? If wheeled bots aren’t your cup-of-tea, there’s a not-at-all freaky one-legged bouncing bot that may be of interest.

Continue reading “A Self Righting Balancing Robot Configured The Easy Way”

This beaded QR code tells a story when scanned.

Beaded QR Code Bracelets Weave A Storytelling Interface

For centuries, people have been using patterns to communicate information in an eye-catching way. QR codes are no different, although they require a barcode scanner to decode rather than a knowledge of Navajo Native American history.

November is National Native American Heritage Month, and as part of their celebration, [ngaskins] and their students are making seed bead bracelets with QR codes. When scanned, each QR triggers a story written by the student in the form of an audio file, a video clip, or an animation. [ngaskins] says that this project was inspired by eyeDazzler, a beadwork tapestry made with software that generates Navajo weaving patterns.

The students started by designing their bracelets on graph paper, software, or a virtual loom before getting the seed beads and the tweezers out, and decided whether they would use a static or dynamic QR code. Aside from the aesthetics of beadwork, the bead loom is good for teaching math and computational ideas because the beads are laid out in rows and columns. It’s also a good tool for teaching lines of symmetry.

QR codes can hold quite a bit of information. In fact, there’s enough room in a version 40 QR for an executable version of Snake.

A Raspberry Pi-based COVID Green Pass validator verifies a QR code on a phone.

COVID Green Pass Validator With Raspberry Pi

It seems like every nation is dealing with the plague a little differently. In June, the EU instated a COVID Green Pass which comes in the form of a paper or digital QR code. It was designed to grease the wheels of travel throughout Europe and allow access to nursing homes. As of early August, the Green Pass is now required of those 12 and older in Italy to gain access to bars and restaurants, museums, theaters, etc. — anywhere people gather in sizeable groups. The Green Pass shows that you’ve either been vaccinated, have had COVID and recovered, or you have tested negative, and there are different half-lives for each condition: nine months for vaccinated, six for recovered, and just forty-eight hours for a negative test.

[Luca Dentella] has built a Green Pass validator using a Raspberry Pi and a Raspi camera. Actual validation must be done through the official app, so this project is merely for educational purposes. Here’s how it works: the user data including their status and the date/time of pass issuance are encoded into a JSON file, then into CBOR, then it is digitally signed for authenticity. After that, the information is zipped up into a base-45 string, which gets represented as a QR code on your phone. Fortunately, [Luca] found the Minister of Health’s GitHub, which does the hard work of re-inflating the JSON object.

[Luca]’s Pi camera reads in the QR and does complete validation using two apps — a camera client written in Python that finds QRs and sends them to the validation server, written in Node.js. The validation server does formal verification including verifying the signature and the business rules (e.g. has it been more than 48 hours since Karen tested negative?) Fail any of these and the red LED lights up; pass them all and you get the green light. Demo video is after the break.

Are you Canadian? Then check this out, eh?

Continue reading “COVID Green Pass Validator With Raspberry Pi”

Teaching Science With An Empty Soda Bottle

Creating the next generation of scientists and engineers starts by getting kids interested in STEM at an early age, but that’s not always so easy to do. There’s no shortage of games and movies out there to entertain today’s youth, and just throwing a text book at them simply isn’t going to cut it anymore. Modern education needs to be engrossing and hands-on if it’s going to make an impact.

Which is exactly what the Institute of Science and Technology Austria hopes to accomplish with the popSCOPE program. Co-founded by [Dr. Florian Pauler] and [Dr. Robert Beattie], the project uses off-the-shelf hardware, 3D printed parts, and open source software to create an engaging scientific instrument that students can build and use themselves. The idea is to make the experience more personal for the students so they’re not just idle participants sitting in a classroom.

The hardware in use here is quite simple, essentially just a Raspberry Pi Zero W, a camera module, a Pimoroni Blinkt LED module, and a few jumper wires. It all gets bolted to a 3D printed frame, which features a female threaded opening that accepts a standard plastic soda (or pop, depending on your corner of the globe) bottle. You just cut a big opening in the side of the bottle, screw it in, and you’ve saved yourself a whole lot of time by not printing an enclosure.

So what does the gadget do? That obviously comes down to the software it’s running, but out of the box it’s able to do time-lapse photography which can be interesting for biological experiments such as watching seeds sprout. There’s also a set of 3D printable “slides” featuring QR codes, which the popSCOPE software can read to show images and video of real microscope slides. This might seem like cheating, but for younger players it’s a safe and easy way to get them involved.

For older students, or anyone interested in homebrew scientific equipment, the Poseidon project offers a considerably more capable (and complex) digital microscope made with 3D printed parts and the Raspberry Pi.

HoloLens Brings Video Game Kart Racing To Life

There aren’t a lot of video game experiences we can easily recreate in the physical realm. You’ll quickly find that jumping on mushrooms in the real world doesn’t have nearly the same appeal as it does in Super Mario, and we won’t even get into the dangers of trying to recreate Frogger on your local multi-lane. But video game style go-kart racing? We have all the technology to pull that off, somebody just has to put all the pieces together.

Which is precisely what [Ian Charnas] is trying to do with his latest project. Using Microsoft’s HoloLens augmented reality headset, electric go-karts, 433 MHz wireless transceivers, and some Arduinos sprinkled in, he’s created the closest thing to Mario Kart that us flesh and blood mortals are likely to experience anytime soon.

The HoloLens headset worn by each driver overlays the necessary graphical elements like pickups and weapon effects, as well as puts over-the-top cartoon heads on the other racers. But of course, that’s only half of the story. Seeing the pickups and gadgets doesn’t do you any good if they don’t have any effect on the actual race.

To that end, [Ian] has come up with a way to control the performance of the go-karts using an electronic “backpack” that mounts to each kart. So speed boosting pickups actually make the kart go faster, and if a driver gets hit with a weapon fired at them, they get slowed down.

That’s the high-level version, anyway. There’s obviously a lot going on behind the scenes, some of which are detailed on the Hackaday.io page. One of the interesting notes is that the HoloLens needs visual markers to orient itself, which in the video after the break can be seen as black and white posters dotting the walls alongside the track. As the project progresses, [Ian] is hoping that these can be camouflaged in creative ways (such as being made to look like audience members or checkered flags) to make the overall experience more immersive.

According to [Ian], the next step is to find partners who want to help elevate this from a one-off project to something that you might actually see at an amusement park. We wish him luck, if for no other reason than we really want to play the thing ourselves. In the meantime, we’ll have to settle for racing hacked Power Wheels.

Continue reading “HoloLens Brings Video Game Kart Racing To Life”

Prusa Unveils Their Own Line Of PLA Filament

There’s little debate that the Original Prusa i3 MK3 by Prusa Research is just about the best desktop 3D printer you can buy, at least in its price bracket. It consistently rates among the highest machines in terms of print quality and consistency, and offers cutting edge features thanks to its open source iterative development. Unless you’re trying to come in under a specific budget, you really can’t go wrong with a Prusa machine.

But while the machine itself can be counted on to deliver consistent results, the same can’t always be said for the filament you feed into it. In a recent blog post, [Josef Prusa] explains that his team was surprised to see just how poor the physical consistency was on even premium brands of 3D printer filament. As a company that prides itself with keeping as much of the 3D printing experience under their control as possible, they felt they had an obligation to do better for their customers. That’s why they’ve started making their own filament which they can hold to the same standards as the rest of their printer.

Their new filament, which is aptly called “Prusament”, is held to higher physical standards of not only diameter but ovality. Many manufacturers simply perform spot checks on the filament’s diameter, but this can miss bulges or changes in its cross-sectional shape. On your average 3D printer this might cause some slightly uneven extrusion and a dip in print quality, but likely not a failure. But the Prusa i3 MK3, specifically with the Multi Material upgrade installed, isn’t most printers. During testing even these slight variations were enough to cause jams.

But you won’t have to take their word for it. Every spool of Prusament will have a QR code that points to a page which tells you the exact production date, length, percent ovality, and standard diameter deviation of that particular roll. An interactive graph will even allow you to find the filament’s diameter for a specific position in the spool, as well as determine how much filament is remaining for a given spool weight. It should be very interesting to see what the community will do with this information, and we predict some very interesting OctoPrint plugins coming down the line.

Prusament is currently only available in PLA, but PETG and ASA variants are coming soon. You can order it now directly from Prusa Research in Prague for $24.99 per kilogram, but it will also be available on Amazon within the month for help keep the shipping costs down.

Continue reading “Prusa Unveils Their Own Line Of PLA Filament”

Making QR Codes In Google Docs

screen-shot-2013-09-18-at-1-48-20-am

[Jordi] sent us this great tip on how to generate QR codes inside Google Docs. This can be super handy if you ever need to make a lot of them at one time, plus they update on the fly!

In his example he set up the code to create vCards so he could transfer contacts to his phone quickly and easily. The code pulls in a Google API QR generator and provides you with a QR code as an image! The following is his code, which can be easily modified to suit your needs:

=image("https://chart.googleapis.com/chart?chs=200x200&cht=qr&chl=BEGIN:VCARD%0AN:" & A2 & "%20" & B2 & "%0ATEL;CELL:" & C2 & "%0AEMAIL:" & D2 & "%0AEND:VCARD")

Or if you just want the bare bones:

=image("https://chart.googleapis.com/chart?chs=200x200&cht=qr&chl=<strong>YOUR CELL</strong>")

And if you need a full walkthrough, there is a video after the break. Those wanting to tinker around with more QR code hijinks will enjoy forming images from QR codes and milling QR codes into your copper layers.

Continue reading “Making QR Codes In Google Docs”