The Trials And Tribulations Of Building An IOT Garage Door Opener

Garage doors can be frustrating things, being a chore to open manually and all. Many people opt to install a motorized opener, but for some, even this isn’t enough. Hooking up a garage door to the Internet of Things has long been a popular project, and [Simon Ludborzs] decided to give it a shot. Naturally, there were some obstacles to be overcome along the way.

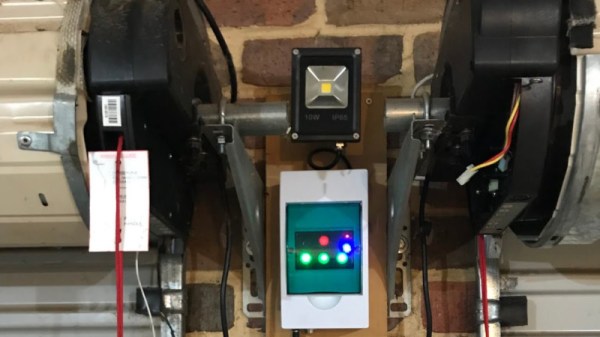
[Simon]’s build is relatively straight down the lines, using an ESP-12 as the brains of the operation, which connects to the internet over WiFi. However, robustness was a major goal of the project, and being reliant on shaky cloud-based services wouldn’t do. This opener is set up to work independently of an internet connection, too. There’s a nifty control panel with glowing buttons to operate the opener, in addition to the webpage served up on the network.

During the development, [Simon] ran into several roadblocks. A set of roller door motors were inadvertently killed, and there were issues in getting the web interface working as expected. None of these were showstoppers, though, and with a little work and some new parts, everything came together in the end. The project was then given a proper commercial-grade case, sourced from AliBaba. This is a great step to take for a project expected to hold up to daily use for years on end. He also took the time to document his tips for easier ESP8266 development, which may prove useful to those just getting started with the platform.

Garage door openers remain a common theme around here, but every project has its own story to tell. If you’ve developed a particularly unique solution to your garage access problems, you know who to call.

A Malicious WiFi Backdoor In A Keyboard’s Clothing

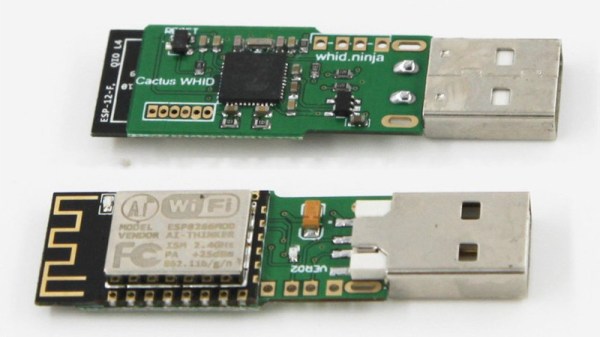
The USB Rubber Ducky burst onto the scene a few years ago, and invented a new attack vector – keystroke injection. The malicious USB device presents itself as a keyboard to the target system, blurting out keystrokes at up to 1000 words per minute. The device is typically used to open a phishing site or otherwise enter commands to exfiltrate data from the victim. Now things have stepped up a notch, with ESPloitV2 – a WiFi-enabled take on the same concept.

Running on the Cactus WHID platform, the device is so named for the ESP12 WiFi microcontroller it employs, along with an Atmega 32u4 for USB HID device emulation. By virtue of its wireless connection, no longer does the aspiring hacker have to rely on pre-cooked routines. Various exploits can be stored in the ESP12’s spacious 4 megabytes of flash, and there’s even the potential to live type your attack if you’re feeling bold.

It goes to show that the trust we implicitly place in foreign USB devices is potentially our future downfall. BadUSB is another great example, and the USB Wrapper is a great way to get a charge if you’re stuck using an untrusted port.


Rescue An Old Washing Machine With Modern Controls

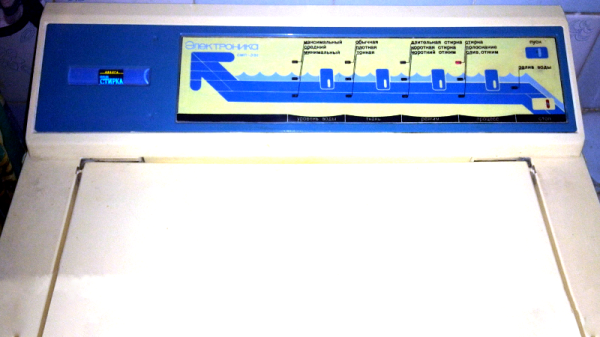
The humble washing machine is an appliance that few of us are truly passionate about. They’re expected to come into our lives and serve faithfully, with a minimum of fuss. In the good old days, it was common for a washing machine to last for well over 20 years, and in doing so ingratiate itself with its masters. Sadly now while the simple mechanical parts may still be serviceable, the electronics behind the scenes can tend to fail. This is a Russian story (Google Translate link) about giving a new brain to an old friend.

The machine in question is known as an Oriole, and had served long and hard. Logic chips and entire controllers had been replaced, but were continuing to fail. Instead, a replacement was designed to keep the machine operational for some time yet. Rather than relying on recreating the full feature set of the machine it was decided to eliminate certain things for simplicity. Settings for different fabric types or wash modes were eliminated, which is an easy choice if like most people all your washes are done in the same mode anyway. A water level sensor was found to be no longer functioning properly and was simpler to eliminate than repair.

The brain is a PIC microcontroller, with an ESP12 acting as a webserver for monitoring and control. Additionally, a glass lens was taken from some former medical equipment and neatly installed in the control panel of the machine before an OLED display, giving the machine far more feedback than before. Control is still done with the machine’s original buttons. Temperature sensors were added as well to allow the machine to shut itself down in the event of an overheating problem. It’s all tied together on what looks to be a classic single-sided homebrew PCB.

It’s a great project that shows it’s easy to bring modern electronic might to bear on vintage mechanical hardware, with great results. A washing machine lives to see another day, another load – and the landfill remains just that much lighter, to boot.

We’ve seen controller builds for old washing machines before, too – like replacing mechanical control with an Arduino.

[Thanks to Tirotron for sending this in!]

Adding Buttons To The ESP-12 – The Cheat Way

[sorki] had an ESP-12F and wanted to play with nodeMCU, but found they were lacking buttons for reset & flash. We’ve all been there – mucking about with a project on a breadboard, trying to save the time required to solder up a button by shorting pins with wire or bending component legs to touch. This either doesn’t work or ends up bricking the microcontroller when it inevitably goes wrong. [Buger] found a tidier solution to adding buttons to the ESP-12F with the minimum of effort.

It’s the spirit of deadbug applied to buttons. One side of a piece of wire is soldered to the pin needing to be pulled down. Component leg offcuts are ideal for this. The other end of the wire is bent up and left to float over the metal shield of the ESP-12, which is connected to ground. When you want the pin to go low, press the wire into the shield, grounding it. Let it go, and the pin returns high again, assuming your pullup resistors are all in order.

It’s a quick hack that’s much more robust than trying to hold two ends of a piece of hookup wire in place. It’s also still easier than trying to find a tactile switch solder leads to, and you don’t end up having it hanging off the board either.

For deadbug construction taken to an impressive conclusion, check out this clock built out of discrete components.

[Thanks to Richard Marko for the tip!]

WiFi Power Monitor Based on ESP8266

WiFi Power Monitor

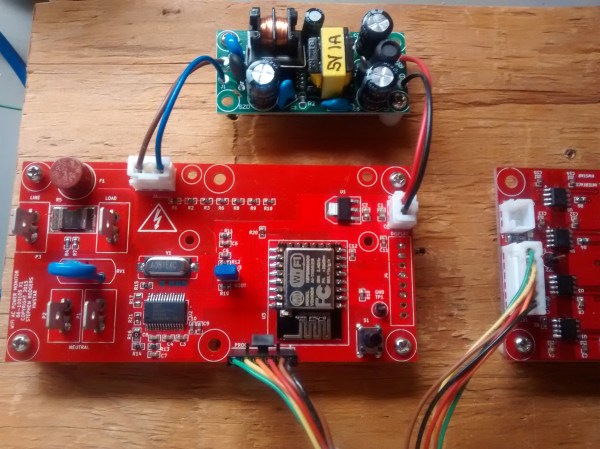
Building your own hardware to measure AC power isn’t a simple task. There’s a number of things to measure, including voltage, current, power, and power factor. The Atmel 90E24 is a single chip solution designed for this exact purpose. Connect a few components, and all the power data is available to a microcontroller over SPI.

[hwstar] built a custom power monitoring board based on this IC. His AC-Emeter will give you all the measurements you’d want, and includes an ESP12 module for data collection and WiFi connectivity. Aside from the Atmel 90E24 device, a high power and low resistance resistor is needed for shunt sense current measurement. An external module is used to convert mains voltage down to 5V to power the board.

Of course, working with mains voltages can be a dangerous endeavour. Fortunately, [hwstar] provides some tips on how to prevent “equipment from being BLOWN UP” along with the open source hardware and firmware.

[via Embedded Lab]

An E-Ink WiFi Connected Display

Wi-Fi Connected E-Ink Display

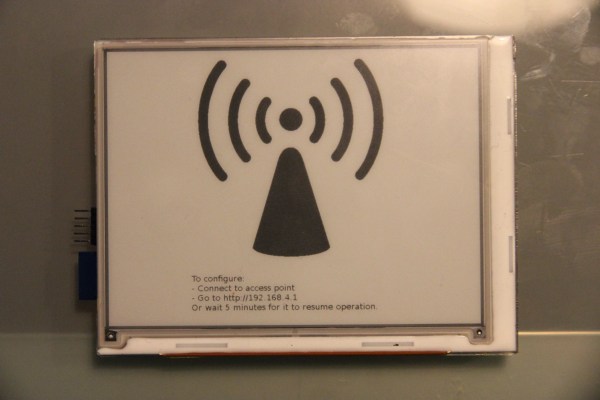
People implementing the Scrum Methodology for project management often record all their tasks on a big whiteboard. However, it’s useful to have up-to-date graphs to ensure projects are on track. [Sprite_TM] augmented the whiteboard by building an Wi-Fi connected E-Ink Display.

Interfacing with E-Ink displays isn’t easy. A variety of voltages are needed, and the connectors used are tiny. We’ve seen some nice solutions, such as the RePaper display. [Sprite_TM] chose the ED060SC4 display which is available from eBay and has been throughly reverse engineered. A custom breakout board was built up to connect to the tiny FPC pins and generate the required voltages using the LT1945 DC/DC converter.

The next step was adding on Wi-Fi. The ESP12 module was an obvious solution. This module provides Wi-Fi connectivity and a processor capable of controlling the display. The display is powered by a tablet battery, which makes it totally wireless and operates for about 200 days.

A simple laser cut enclosure holds all the bits together, and contains magnets that stick the screen to the whiteboard. On the software side, images are streamed to the ESP12’s processor and loaded directly to the screen, since the ESP12 doesn’t have enough RAM to store an entire screen worth of data. All the firmware can had by cloning a Git repository.