The Basics Of Frequency Modulation

fm-modulation

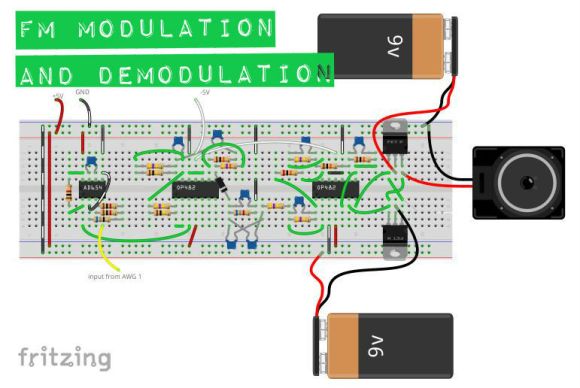
[brmarcum] takes us back to analog building block basics with his Frequency Modulation and Demodulation tutorial. Frequency Modulation (FM) sounds simple at first, but understanding the electronics behind modulation and  demodulation of an FM signal can be confusing. We’ve covered the basics before, but FM is so tightly associated with broadcast radio that searches often become muddled with references to RF, stereo, antennas, and transmitters.

[brmarcum] hopes to fill that gap with a simple circuit that modulates an audio signal to FM, then demodulates and amplifies it to be played on a small speaker. He used a Digilent Analog Discovery kit in his experiments, but an oscilloscope (an older analog scope would be perfect here) would work for output. Signal generation duties could easily be handled by a 555 circuit at the low end, and a computer sound card at the higher end.

[brmarcum] obviously put some time into his tutorial, but it’s not a tome of FM modulation. He’s broken down the modulation and demodulation circuits into their basic op-amp stages with examples of what the signal should look like on a scope after each stage. That’s the beauty here. By building and testing each section, anyone new to analog can learn how things work. In places where the theory behind what’s going on gets too in-depth for an Instructable, [brmarcum] gives links to Wikipedia.

RasPi FM Transmitter

Easily Turn Your Raspberry Pi Into An FM Transmitter

Have you ever wanted to be your own radio DJ? [Kevin] has made it easier than ever with his Raspberry Pi FM Transmitter program. The program is written in C. [Kevin] has made source code is available along with a compiled binary.

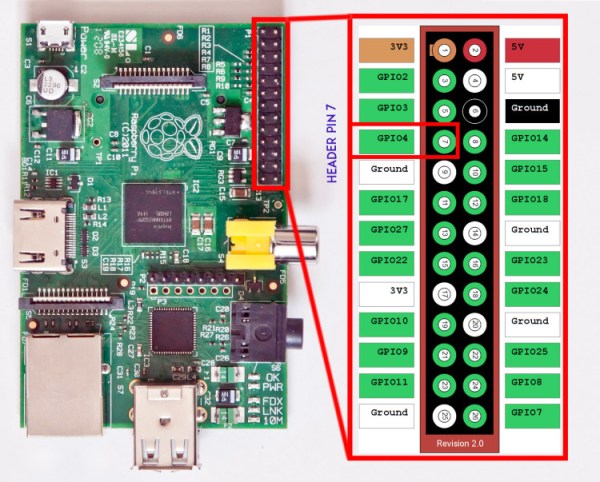
PIFM allows you to load up any audio file and specify a frequency to transmit. The program will then use PWM to modulate the audio sample through the Pi’s GPIO4 pin. [Kevin] claims that the RasPi alone will only transmit around a 10 cm distance. He says that making a simple antenna out of a jumper wire can increase the distance to around 100 meters. All you have to do is hook up the wire to the GPIO4 pin to drastically increase the range.

The legality of such a transmitter will vary from place to place, so be sure to check out your local regulations before you go transmitting audio on regulated frequencies. If this kind of thing is interesting to you, you may want to investigate ham radio. It’s not all Morse code and old fogies. Some people claim it’s a hacker’s paradise.

[via Reddit]

Controlling RC Toys With The Raspi

signal

An interesting trick you can do with a a fast CPU and a GPIO pin mapped directly to memory is an FM transmitter. Just toggle a pin on and off fast enough, and you have a crude and kludgy transmitter. [Brandon] saw a few builds that turned a Raspberry Pi into an FM radio transmitter and realized a lot of toy remote control cars use a frequency in the same range a Pi can transmit at. It’s not much of a leap to realize the Pi can control these remote control cars using only a length of wire attached to a GPIO pin.

The original hack that turned a Pi GPIO pin into an FM transmitter mapped a GPIO pin to memory, cycled through that memory at about 100 MHz, and added a fractional divider to slightly adjust the frequency, turning it into an FM transmitter. Cheap RC cars usually listen for radio signals at 27 and 49 MHz. It doesn’t take much to realize commanding RC cars with a Pi is possible.

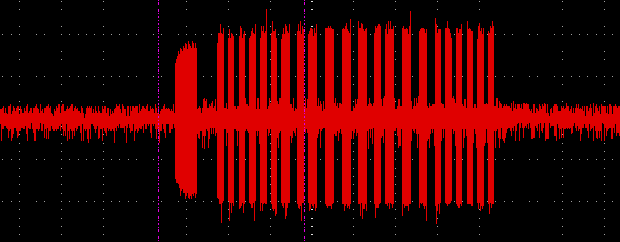
The only problem with this idea is that most RC cars use pulse modulation. For an RC transmitter to send the command for ‘forward’, a synchronization pulse is sent, then a series of pulses and pauses. The frequency doesn’t change at all, something the originally FM code doesn’t do. [Brandon] realized that if he just moved the frequency up to something the RC car wasn’t listening to, that would register as a zero.

All that was left was to figure out the command codes for his RC truck. For this, [Brandon] decided brute force would be the best option. Armed with a script and a webcam, he cycled through all possible combinations until the webcam detected a moving truck. Subtlety brilliant, if you ask us. Of course more complex commands required an oscilloscope, but now [Brandon] has a git full of all the code to control a cheap RC car with a Pi.

Retrotechtacular: Fundamentals Of AM And FM Radio Communication

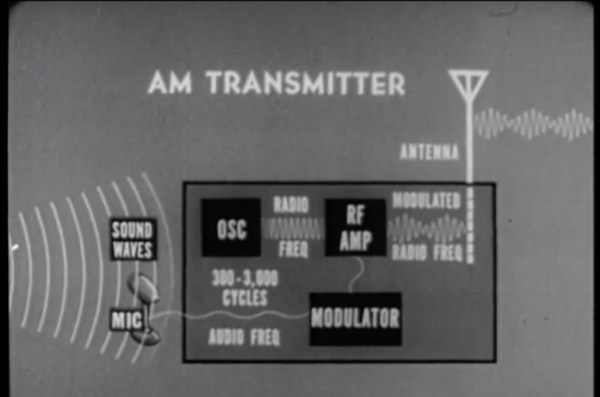
How radios send and receive information can seem magical to the uninformed. For some people, this week’s Retrotechtacular video, “Frequency Modulation – Part 1 Basic Principles”, from the US Army Department of Defense 1964 will be a great refresher, and for others it will be their first introduction into the wonderful world of radio communications.

The stated objective is to teach why FM radio communication reduces interference which normally afflicts AM radio communications. Fundamentals of AM and FM is a better description, however, because the first part of the video nicely teaches the principles of AM and FM radio communications. It isn’t until later in the clip that it delves into interference, advantages of FM modulation, and detailed functioning of FM radio. The delivery is slow at times and admittedly long, yet the pace is perfect for a young ham to follow along with plenty of time to soak in the knowledge. If you’re still on the fence about becoming a ham here’s some words or encouragement.

Though the video isn’t aimed at ham radio users it does address core knowledge needed by amateur radio hobbyists. Amateur radio is full of many exciting communication technologies and you should have a clear understanding of AM and FM communication methodologies before getting on Grandpa’s information super highway. Once you have your ham license (aka ticket) you have privileges to create and test amazing ham related hacks, like [Lior] implementing full programmable control of a Baofeng UV5R ham radio using an Arduino.

Join us after the break to watch the video.

Continue reading “Retrotechtacular: Fundamentals Of AM And FM Radio Communication”

The Folly Of Adding An Auxiliary Audio Input To A Hyundai Sonata

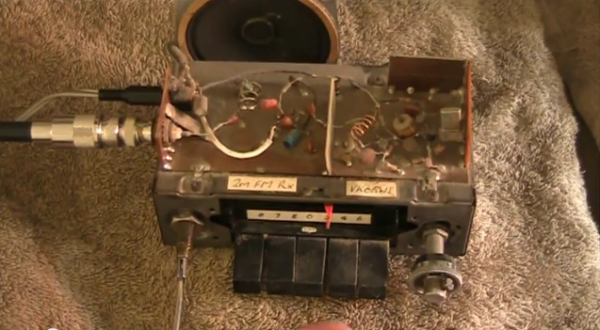
Why auxiliary audio inputs haven’t been standard on automotive head units for decades is beyond us. But you can bet that if you’re looking at a low-priced sedan you’ll need to buy an entire upgrade package just to get an audio jack on the dash. [Jon W’s] Hyundai Sonata didn’t have that bells-and-whistles upgrade so he decided to pop his stereo out and add his own aux port.

A big portion of this hack is just getting the head unit out of the dash. This is made difficult on purpose as an anti-theft feature, but [Jon’s] judicious use of a butter knife seemed to do the trick. He lost some small bits along the way which were recovered with a Shish Kebab skewer with double-stick tape on the end.

With the head unit out, he opened the case and plied his professional Electrical Engineering skills to adding the input. Well, he meant to, but it turns out there’s no magic bullet here. The setup inside the unit offered no easy way to solder up an input that would work. Having done all of the disassembly he wasn’t going to let it go to waste. [Jon] grabbed a nice FM transmitter setup. He wired it up inside the dash and mounted the interface parts in the glove box as seen here.

It’s nice to know we’re not the only ones who sometimes fail at achieving our seemingly simple hacking goals. At least [Jon] was able to rally and end up with the functionality he was looking for.

Building A Simple FM Transmitter Bug

simple_fim_transmitter_hack_a_week

[Dino] got his hands on an FM transmitter “bug” kit via a friend, and thought it would make for an easy and fun Hack a Week project. The kit is simple two transistor half-wave FM transmitter, which the manufacturer suggests could be used to bug a room, hence the name. After poking a bit of fun at the instructions, [Dino] gets to work building the transmitter, wrapping things up in a little less than an hour.

Once he finished soldering everything together, he takes a few moments to test out the bug and to explain how various parts of the board work together in order to transmit the FM signal. He mentions that adding a dipole antenna would make it easy to extend the range of the transmitter, and briefly teases next week’s episode, where he plans on constructing a similar dual-stage transmitter.

This sort of FM circuit is one of the first few simple projects you would see in a beginner’s electronics class, so if you know anyone that is just starting to get their feet wet, be sure to pass this Hack a Week episode along.

Continue reading to see [Dino] explain the ins and outs of his FM bug transmitter.

Continue reading “Building A Simple FM Transmitter Bug”

Simple FM Transmitter That Shows Off Its Own Circuitry

[Sean Michael Ragan] built this FM transmitter which shows off its circuitry via a clear plastic dome. The device is electrically identical to one we looked at in September. That version championed a construction method that used small squares of copper clad as solder points which were each super-glued to a large copper-clad platform serving as a ground plane. [Sean] is using a printed circuit board that was laid out by Sonodrome. You can check out their own glass-jar transmitter build where the board artwork is available for download.

One of the tips we enjoyed from [Sean’s] step-by-step build is the coil wrapping. He used the threads of a 1/4-20 bolt to guide copper wire as he wrapped a total of four turns. Once the bending is done, just unthread the bolt to separate it from the coil and gently stretch the wire for a 12mm distance between the two leads. Not only is this visually pleasing, but it will help with transmission clarity.