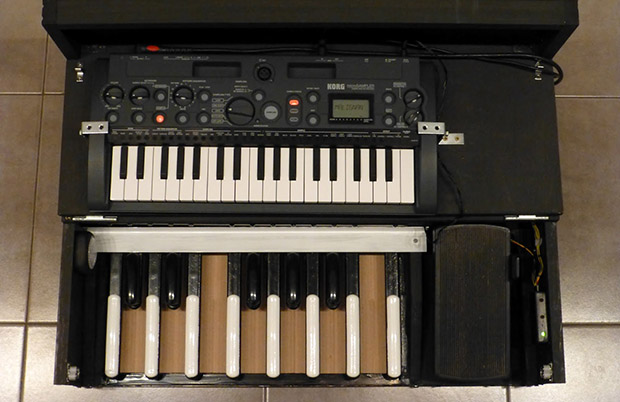
Organ Pedals Fill In When Your Bass Player Is Missing

organ-foot-pedals-instead-of-string-bass

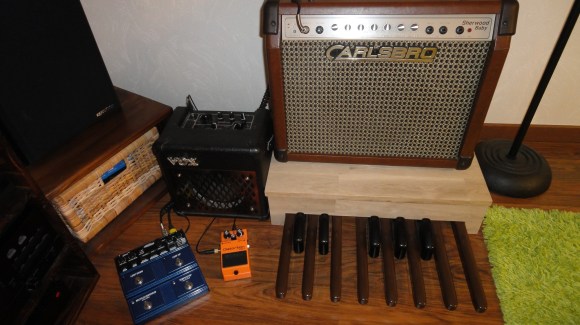
Since his string bass player isn’t always around [Antoine] built his own electric bass stand-in using the pedals from an old organ. The project — which he calls the Organ Donor — was inspired by a similar standalone organ pedal bass project. That instrument was built using a 555 timer to generate the sound. But [Antoine] has a little more room for growth as he’s using an old microcontroller development board to generate sound.

The octaves worth of pedals were pulled from an old broken Yamaha A55 Electone organ. After extracting the assembly from the instrument he built a nice wooden case around it. This doubles as a stand for the amplifier which broadcasts the sound. An old Freescale development board is wired up to twelve of the keys (the top C is unused). It generates a square wave at the appropriate frequency for each key. This signal is fed through a low-pass filter before being routed to the audio jack on the back of the case.

Future improvements include building an amplifier into the pedal assembly. We would also love to see different signal processing to expand the range of sounds the pedals can generate. We’re not sure of the capabilities of that microcontroller, but it would be neat to hear tone generation using stored samples.

Guitar Foot Controller Uses DSP For Audio Effects

guitar-pedal-dsp1

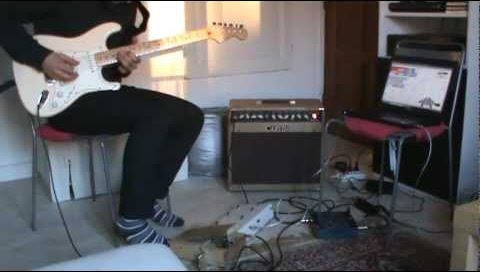
This a screenshot taken from [Pierre’s] demonstration of an electric guitar effects pedal combined with DSP and Pure Data. He pulls this off by connecting the guitar directly to the computer, then feeds the computer’s audio output to the guitar amp.

The foot controls include a pedal and eight buttons, all monitored by an Arduino. Pure Data, a visual programming language, interprets the input coming from the Arduino over USB and alters the incoming audio using digital signal processing. [Pierre] manages the audio connection using the JACK Audio Connection Kit software package.

In the video after the break he’s using a laptop for most of the work, but he has also managed to pull this off with a Raspberry Pi. There’s no audio input on the RPi board, but he’s been using a USB sound card anyway. The other USB port connects the Arduino and he’s in business.

Continue reading “Guitar Foot Controller Uses DSP For Audio Effects”

Automate Repetitive PC Actions With A Foot Pedal

foot_pedal

Instructables user [bkovac] was sick of clicking the terminal icon on his desktop whenever he wanted to launch a terminal window. Keyboard shortcuts aside, he figured the easiest way to take the tedium out of the process would be to launch terminal windows with a foot pedal.

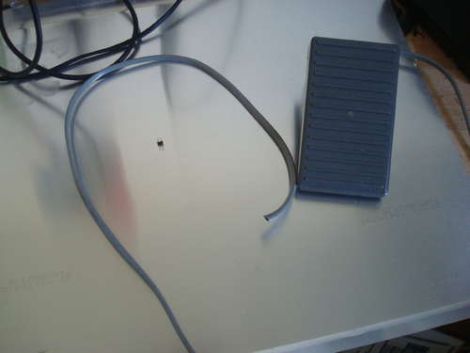
He grabbed a pedal that he had sitting around in his workshop and took it apart to ensure the switch contacts were configured for his particular use. The wires were run to an Arduino which talks to the computer over serial using a Python script.

While the setup works just fine, it’s definitely not the most efficient or simplest way of getting the job done. In fact, we have seen other methods that are quite a bit simpler, though they lack the potential versatility of this particular modification.

Rather than simply loading a terminal window on his computer, we would love to see this pedal enhanced to perform multiple functions – at which point the Arduino would be a pretty decent choice. We would probably start out by swapping out the full-sized Arduino for a Teensy, mounting it inside the pedal. Multiple foot presses could be used to trigger different events, based upon the number of presses that occur within a given time period. It could be made even more useful by using it to trigger gesture-based events, similar to those seen in plug-ins for Chrome and Firefox.

How would you enhance [bkovac’s] pedal interface? Let us know in the comments.

DIY ‘midi’ Footpedal


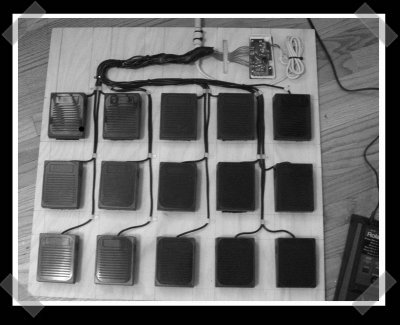
[forrest] passed along this diy foot-pedal ‘midi’ controller. It’s a good re-use of hardware, but not a true midi controller. The pcb was gutted from an old keyboard, and the pedals were scored from a mad 60 mile tour of the local radio shacks clearance bin. Since the pedals are simple momentary on switches, it was a matter of wiring them to the controller and using a laptop to generate signals via usb midi interface. Replace the keyboard pcb with a drum controller and you’d have an interesting stand alone solution.

Just so I could enjoy some extra crow, I managed to leave one other entry out of my published list of Design Challenge entries. [Jason] sent in this MEGA32 programmer/dev board. He kept it single sided, but you’ll need a parallel port to use it.