It’s 2025, and you’re still probably pressing modifier keys on your keyboard like a… regular person. But it doesn’t have to be this way! You could use foot pedals instead, as [Jan Herman] demonstrates.
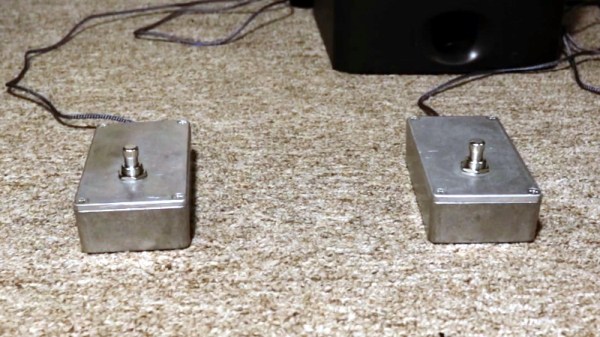
Now, if you’re a diehard embedded engineer, you might be contemplating your favorite USB HID interface chip and how best to whip up a custom PCB for the job. But it doesn’t have to be that complicated! Instead, [Jan] goes for an old school hack—he simply ripped the guts out of an cheap USB keyboard. From there, he wired up a few of the matrix pads to 3.5 mm jack connectors, and put the whole lot in a little metal project box. Then, he hooked up a few foot pedal switches with 3.5 mm plugs to complete the project.
[Jan] has it set up so he can plug foot pedals in to whichever keys he needs at a given moment. For example, he can plug a foot pedal in to act as SPACE, ESC, CTRL, ENTER, SHIFT, ALT, or left or right arrow. It’s a neat way to make the project quickly reconfigurable for different productivity tasks. Plus, you can see what each pedal does at a glance, just based on how it’s plugged in.
It’s not an advanced hack, but it’s a satisfying one. We’ve seen some other great builds in this space before, too. If you’re cooking up your own keyboard productivity hacks, don’t hesitate to let us know!