The Art Of Making A Nixie Tube

Three years ago we covered [Dalibor Farnby]’s adventures in making his own Nixie tubes. Back then it was just a hobby, a kind of exploration into the past. He didn’t stop, and it soon became his primary occupation. In this video he shows the striking process of making one of his Nixie tubes.

Each of his tubes get an astounding amount of love and attention. An evolution of the process he has been working on for five years now. The video starts with the cleaning process for the newly etched metal parts. Each one is washed and dried before being taken for storage inside a clean hood. The metal parts are carefully hand bent. Little ceramic pins are carefully glued and bonded. These are used to hold the numbers apart from each other. The assembly is spot welded together.

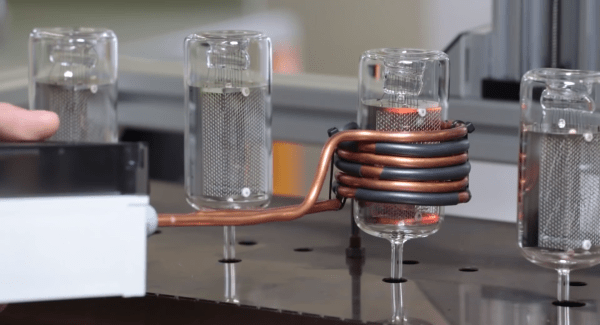
In a separate cut work begins on the glass. The first part to make is the bottom which holds the wire leads. These are joined and then annealed. Inspection is performed on a polariscope and a leak detector before they are set aside for assembly. Back to the workbench the leads are spot welded to the frame holding the numbers.

It continues with amazing attention to detail. So much effort goes into each step. In the end a very beautiful nixie tube sits on a test rack, working through enough cycles to be certified ready for sale. The numbers crisp, clear, and beautiful. Great work keeping this loved part of history alive in the modern age.

Continue reading “The Art Of Making A Nixie Tube”

thermostat

Arduino Thermostat Includes Vacation Mode

When [William’s] thermostat died, he wanted an upgrade. He found a few off-the-shelf Internet enabled thermostats, but they were all very expensive. He knew he could build his own for a fraction of the cost.

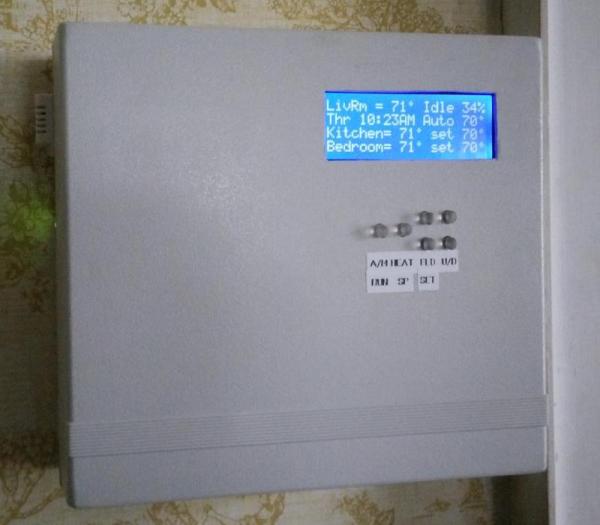
The primary unit synchronizes it’s time using NTP. This automatically keeps things up to date and in sync with daylight savings time. There is also a backup real-time clock chip in case the Internet connection is lost. The unit can be controlled via the physical control panel, or via a web interface. The system includes a nifty “vacation mode” that will set the temperature to a cool 60 degrees Fahrenheit while you are away. It will then automatically adjust the temperature to something more comfortable before you return home.

[William’s] home is split into three heat zones. Each zone has its own control panel including an LCD display and simple controls. The zones can be individually configured from either their own control panel or from the central panel. The panels include a DHT22 temperature and humidity sensor, an LCD display, a keypad, and support electronics. This project was clearly well thought out, and includes a host of other small features to make it easy to use.

Beating The Heat With Geothermal Cooling

geo

A while back, [Erich]’s oil heating system was due for a few repairs. Given the increasing price of fuel oil, and a few incentives from his Swiss government, he decided to go with a more green heating solution – geothermal heating. The system works well in the winter, but it’s basically useless in the summer. [Erich] decided to put his 180 meter investment to work for the summer heat, and made his geothermal heating system into a cooling system with a fairly low investment and minimal cost.

The stock system works by pumping cold liquid from [Erich]’s under floor heating into the Earth. In winter, the surface is always colder than the ground, thus heating [Erich]’s home. In the summer, the situation is reversed, with the cool earth insulated by the baked surface. All that was required to reverse the heating system was a few slight modifications to the heating controller.

Stock, [Erich]’s heat pump controller doesn’t have the capability to run the system in reverse, so he turned to a Freescale board to turn the compressor off and the pump on. With the additions, [Erich] is using 50 Watts to pump 1.5 kW of heat directly into the Earth below, a fairly efficient cooling system that’s basically free if you already have a geothermal setup.

PIC Based Boiler Controller


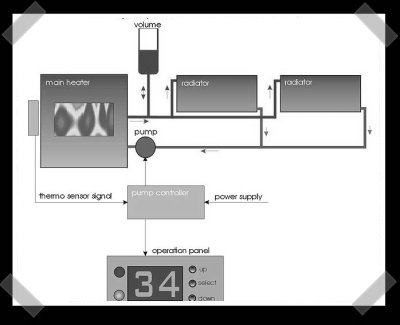
We’re used to central A/C, so we were surprised by this PIC controller based heater controller. It’s based around a pump controlled boiler/radiator system. A PIC 16F84 is used to input the set point and control a pump to circulate the heated water as needed. You can grab full schematics on the project page.

Update: We added a screen capture of the schematic after the break since the site keeled over.

Continue reading “PIC Based Boiler Controller”