A cylindrical red furnace is in the center of the image. To the left of it is a black power supply. A stand is in front of the furnace, with an arm extending over the furnace. To the right of the furnace, a pair of green-handled crucible tongs sit on an aluminium pan.

The Hall-Héroult Process On A Home Scale

Although Charles Hall conducted his first successful run of the Hall-Héroult aluminium smelting process in the woodshed behind his house, it has ever since remained mostly out of reach of home chemists. It does involve electrolysis at temperatures above 1000 ℃, and can involve some frighteningly toxic chemicals, but as [Maurycy Z] demonstrates, an amateur can now perform it a bit more conveniently than Hall could.

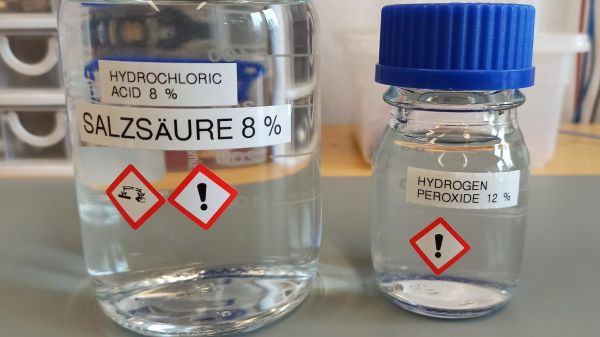
[Maurycy] started by finding a natural source of aluminium, in this case aluminosilicate clay. He washed the clay and soaked it in warm hydrochloric acid for two days to extract the aluminium as a chloride. This also extracted quite a bit of iron, so [Maurycy] added sodium hydroxide to the solution until both aluminium and iron precipitated as hydroxides, added more sodium hydroxide until the aluminium hydroxide redissolved, filtered the solution to remove iron hydroxide, and finally added hydrochloric acid to the solution to precipitate aluminium hydroxide. He heated the aluminium hydroxide to about 800 ℃ to decompose it into the alumina, the starting material for electrolysis.

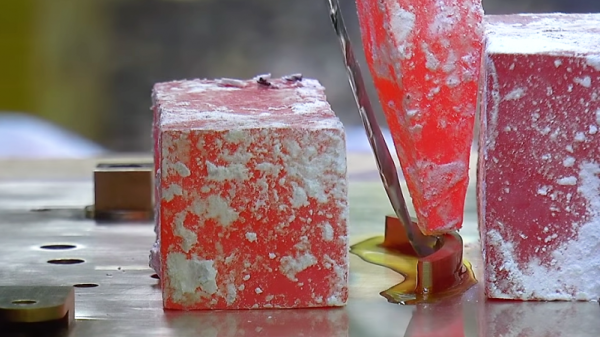
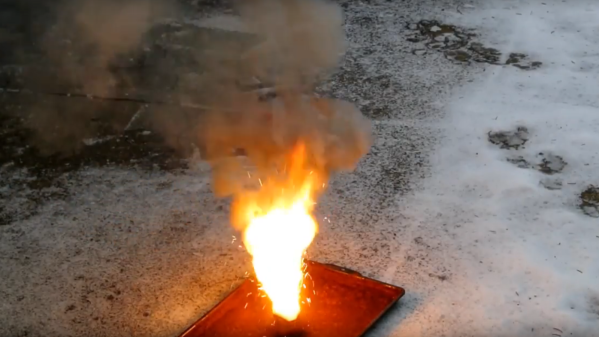
To turn this into aluminium metal, [Maurycy] used molten salt electrolysis. Alumina melts at a much higher temperature than [Maurycy]’s furnace could reach, so he used cryolite as a flux. He mixed this with his alumina and used an electric furnace to melt it in a graphite crucible. He used the crucible itself as the cathode, and a graphite rod as an anode. He does warn that this process can produce small amounts of hydrogen fluoride and fluorocarbons, so that “doing the electrolysis without ventilation is a great way to poison yourself in new and exciting ways.” The first run didn’t produce anything, but on a second attempt with a larger anode, 20 minutes of electrolysis produced 0.29 grams of aluminium metal.

[Maurycy]’s process follows the industrial Hall-Héroult process quite closely, though he does use a different procedure to purify his raw materials. If you aren’t interested in smelting aluminium, you can still cast it with a microwave oven.

Different Etching Strokes For Different PCBs, Folks

[Sebastian] probably didn’t think he was wading into controversial waters when he posted on his experimental method for etching PCBs (in German). It’s not like etching with hydrochloric acid and peroxide is anything new, really; it was just something new to him. But is it even possible these days to post something and not find out just how wrong you are about it?

Sadly, no, or at least so it appears from a scan of [Sebastian]’s tweet on the subject (Nitter). There are a bunch of ways to etch copper off boards, including the messy old standby etchant ferric chloride, or even [Sebastian]’s preferred sodium persulfate method. Being out of that etchant, he decided to give the acid-peroxide method a go and was much pleased by the results. The traces were nice and sharp, the total etching time was low, and the etchant seemed pretty gentle when it accidentally got on his skin. Sounds like a win all around.

But Twitter wouldn’t stand for this chemical heresy, with comments suggesting that the etching process would release chlorine gas, or that ferric chloride is far safer and cleaner. It seems to us that most of the naysayers are somewhat overwrought in their criticism, especially since [Sebastian]’s method used very dilute solutions: a 30% hydrochloric acid solution added to water — like you oughta — to bring it down to 8%, and a 12% peroxide solution. Yes, that’s four times more concentrated than the drug store stuff, but it’s not likely to get you put on a terrorism watch list, as some wag suggested — a hair stylist watchlist, perhaps. And 8% HCl is about the same concentration as vinegar; true, HCl dissociates almost completely, which makes it a strong acid compared to acetic acid, but at that dilution it seems unlikely that World War I-levels of chlorine gas will be sweeping across your bench.

As with all things, one must employ caution and common sense. PPE is essential, good chemical hygiene is a must, and safe disposal of spent solutions is critical. But taking someone to task for using what he had on hand to etch a quick PCB seems foolish — we all have our ways, but that doesn’t mean everyone else is wrong if they don’t do the same.

Continue reading “Different Etching Strokes For Different PCBs, Folks”

Soldering Like It’s 205 BC

Did you ever stop to think how unlikely the discovery of soldering is? It’s hard to imagine what sequence of events led to it; after all, metals heated to just the right temperature while applying an alloy of lead and tin in the right proportions in the presence of a proper fluxing agent doesn’t seem like something that would happen by accident.

Luckily, [Chris] at Clickspring is currently in the business of recreating the tools and technologies that would have been used in ancient times, and he’s made a wonderful video on precision soft soldering the old-fashioned way. The video below is part of a side series he’s been working on while he builds a replica of the Antikythera mechanism, that curious analog astronomical computer of antiquity. Many parts in the mechanism were soldered, and [Chris] explores plausible methods using tools and materials known to have been available at the time the mechanism was constructed (reported by different historians as any time between 205 BC and 70 BC or so). His irons are forged copper blocks, his heat source is a charcoal fire, and his solder is a 60:40 mix of lead and tin, just as we use today. He vividly demonstrates how important both surface prep and flux are, and shows both active and passive fluxes. He settled on rosin for the final joints, which turned out silky smooth and perfect; we suspect it took quite a bit of practice to get the technique down, but as always, [Chris] makes it look easy.

If you’d like to dig a bit deeper into modern techniques, we’ve covered the physics of solder and fluxes in some depth. And if you need more of those sweet, sweet Clickspring videos, we’ve got you covered there as well.

Continue reading “Soldering Like It’s 205 BC”

Old Batteries Yield Thermite And Manganese

Some people collect stamps, some collect coins, some even collect barbed wire. But the aptly named [Plutonium Bunny] is an element collector, as in one who seeks a sample of as many elements on the periodic table as possible. Whatever, we don’t judge – after all, there are more than a few Hackaday readers who collect lots of silicon, right?

So what’s a collector to do when he gets to the 25th place on the periodic table? Easy – harvest manganese from alkaline batteries with a thermite reaction. There’s a surprising amount of manganese in depleted alkaline batteries, which of course are easy to come by in bulk. The chemistry of [Plutonium Bunny]’s process is pretty straightforward and easy to reproduce with common ingredients, but you’ll want to be careful with a few steps – chlorine gas is not something to trifle with. The basic idea is to solubilize and purify the manganese dioxide from the other materials in the battery cathodes, recrystallize it, and mix it with aluminum powder. The aluminum acts as the fuel, the manganese dioxide is the oxidizer, and once the satisfyingly exothermic reaction shown in the video below is over, the collector-grade elemental manganese can be chipped away from the aluminum oxide slag.

So once you’ve got a few manganese nuggets, what can you do with them? Not much really – it turns out the oxides recovered from the battery are far more useful for things like supercapacitors. But it’s still a neat trick.

Continue reading “Old Batteries Yield Thermite And Manganese”