Simple Induction Heater Helps With Homebrew Shrink-Fitting

Machinists have a lot of neat shop tricks, but one especially interesting one is shrink-fitting tools. Shrink-fitting achieves an interference fit between tool and holder by creating a temperature difference between the two before assembly. Once everything returns to temperature, the two parts may as well be welded together.

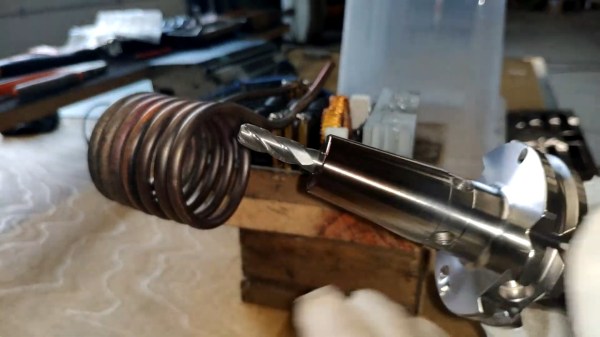
The easiest way to shrink-fit machine tooling is with induction heating, and commercial rigs exist for doing the job. But [Roetz 4.0] decided to build his own shrink-fitting heater, and the results are pretty impressive. The induction heater itself is very simple — a 48 volt, 20 amp power supply, an off-the-shelf zero-voltage switching (ZVS) driver, and a heavy copper coil. When the coil is powered up, any metal within is quickly and evenly heated by virtue of the strong magnetic flux in the coil.

To use the shrinker, [Roetz 4.0] starts with a scrupulously clean tool holder, bored slightly undersized for the desired tool. Inside the coil, the steel tool holder quickly heats to a lovely deep brown color, meaning it has gotten up to the requisite 250-300°C. The tool is quickly dropped into the now-expanded bore, which quickly shrinks back around it. The advantage of this method over a collet or a chuck is clear in the video below: practically zero runout, and the tool is easily released after another run through the heater.

You say you’ve got no need for shrink-fitting tools? How about stuck bolts? Induction heaters work great there too.

Continue reading “Simple Induction Heater Helps With Homebrew Shrink-Fitting”

Adding Crush Ribs To 3D Printed Parts For A Better Press Fit

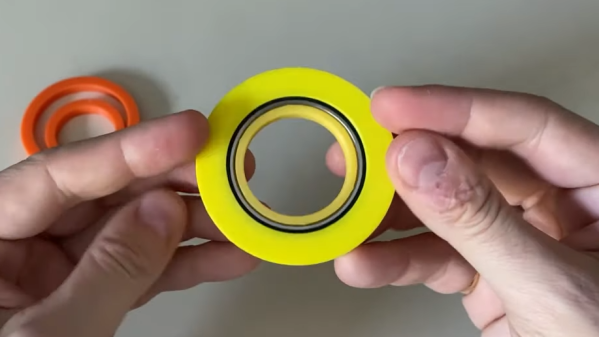
[Dan Royer] shared a tip about how to get a reliably tight fit between 3D printed parts and other hardware (like bearings, for example.) He suggests using crush ribs, a tried-and-true solution borrowed from the world of injection molding and repurposed with 3D printing in mind. Before we explain the solution, let’s first look at the problem a little more closely.

Imagine one wishes to press-fit a bearing into a hole. If that hole isn’t just the right size, the bearing won’t be held snugly. If the hole is a little too big, the bearing is loose. Too small, and the bearing won’t fit at all. Since a 0.1 mm difference can have a noticeable effect on how loose or snug a fit is, it’s important to get it right.

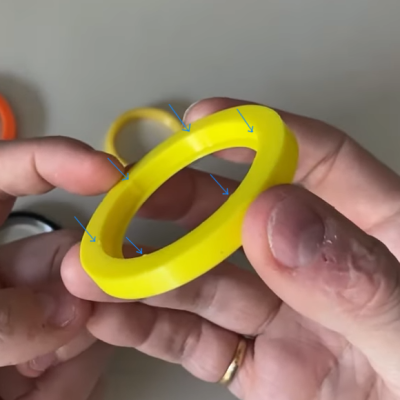
Crush rib locations highlighted with blue arrows.

For a 3D printed object, a hole designed with a diameter of 20 mm (for example) will come out slightly different when printed. The usual way around this is to adjust printer settings or modify the object until the magic combination that yields exactly the right outcome is found, also known as the Goldilocks approach. However, this means the 3D model only comes out right on a specific printer, which is a problem for a design that is meant to be shared. Since [Dan] works on robots with 3D printed elements, finding a solution to this problem was particularly important.

The solution he borrowed from the world of injection molding is to use crush ribs, which can be thought of as a set of very small standoffs that deform as a part is press-fit into them. Instead of a piece of hardware making contact with the entire inside surface of a hole, it makes contact only with the crush ribs. Press fitting a part into crush ribs is far easier (and more forgiving) than trying to get the entire mating surface exactly right.

Using crush ribs in this way is a bit of a hack since their original purpose in injection molding is somewhat different. Walls in injection-molded parts are rarely truly flat, because that makes them harder to eject from a mold. Surfaces therefore have a slight cant to them, which is called a draft. This slight angle means that press fitting parts becomes a problem, because any injection-molded hole will have slanted sides. The solution is crush ribs, which — unlike the walls — are modeled straight. The ribs are small enough that they don’t have an issue with sticking in the mold, and provide the mating surface that a press-fit piece of hardware requires. [Dan] has a short video about applying this technique to 3D printed objects, embedded below.

Continue reading “Adding Crush Ribs To 3D Printed Parts For A Better Press Fit”