Active “Dart-Sensing” Makes Your Nerf Gun Smarter

When choosing weapons to defend yourself in the next zombie apocalypse, dart jamming whilst firing your Nerf Gun can be a deal-breaker. This clogging is an issue with many “semi-automatic” Nerf Guns. When our trigger-happy fingertips attempt to shoot a dart that hasn’t finished loading into the firing chamber, the halfway-loaded dart folds onto itself and jams the chamber from firing any more darts. The solution, as intended by Nerf, would be to open the chamber lid and manually clear the pathway. The solution, according to [Technician Gimmick], however, is active sensing, and the resulting “smart” dart gun is the TR-27 GRYPHON.

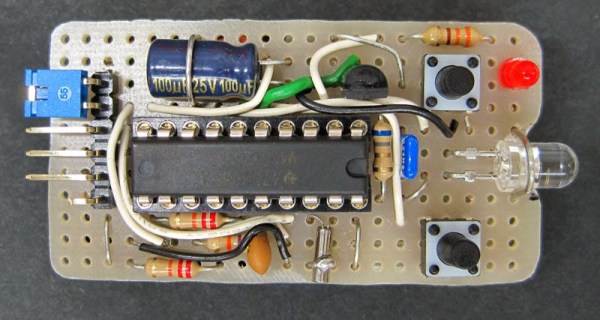
To prevent jamming from occurring altogether, [Technician Gimmick] added a trigger-disable until the dart has fully loaded into the firing chamber. An IR LED, harvested from a mouse scroll wheel, returns an analog value to the microcontroller’s analog-to-digital converter, allowing it to determine whether or not a dart is ready for firing. The implementation is simple, but the results are fantastic. No longer will any gun fire a dart until it has completely entered the chamber.

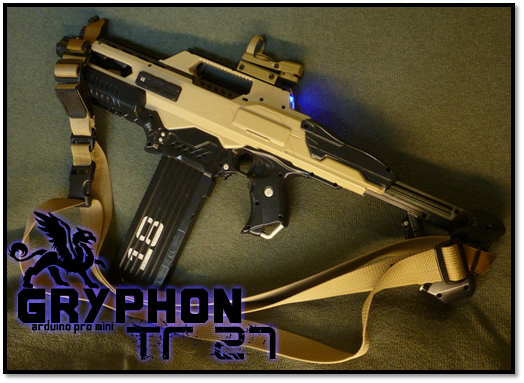
The TR-27 GRYPHON isn’t just a Nerf Gun that enables “smart” dart sensing. [Technician Gimmick] folded a number of other features into the Nerf Gun that makes it a charmer on the shelf. First, a hall-sensor array identifies the current cartridge loaded into the Nerf Gun and it’s carrying capacity. To display this value and decrement appropriately, [Technician Gimmick] added a dual-seven segment display, a trick we’ve seen before. Finally, a whopping 3S LiPo battery replaces the original alkaline batteries, and the voltage-reducing diodes have been cropped, enabling a full 12.6 Volt delivery to the motors at full charge.

We’re glad to see such a simple trick go such a long way as to almost entirely eliminate Nerf dart jams. For all those braving the Humans-Versus-Zombies frontier this season, may this clever trick keep you alive for just a bit longer.

Continue reading “Active “Dart-Sensing” Makes Your Nerf Gun Smarter”

An MSP430 Clone Of The Canon RC-1 Remote

For reasons we both agree with and can’t comprehend, most ‘prosumer’ SLR cameras don’t have mechanical shutter releases. Instead, IR LEDs are brought into the mix, the Canon RC-1 remote trigger being the shutter release of choice for people who didn’t choose Nikon. [Vicente] cloned the Canon RC-1, but he didn’t do it to save money; there’s a lot to learn with this project, and making his own allows him to expand it with more features in the future.

Studying the function of the Canon RC-1, [Vicente] found that some compromises needed to be made. The total power emitted by an IR LED is usually a function of its beamwidth; a smaller beamwidth means more photons reaching the IR receiver in the camera. This also means the remote must be aimed at the camera more accurately. In the end, [Vicente] decided on a higher power LED with a tighter beamwidth that’s just slightly below the optimum wavelength for the receiver. It’s all an exercise in compromise, but other components could see similar performance.

With the LED selected, [Vicente] moved on to building the actual controller. He chose an MSP430 microcontroller for its low power consumption, driving the LED with a watch battery and a transistor. Put together on a piece of protoboard, it’s actually pretty close to a TV-B-Gone. With everything soldered up, it’s good enough to trigger his camera’s shutter from about 5 meters away. Future improvements include cleaning up the code, making the timing more accurate with a crystal, and implementing low power mode on the MSP430.

Triple Sensor Mailbox Alert Really Delivers

Messing with the U.S. Mail is not something we generally recommend. But if you build your own mailbox like [Bob] did, you stand a much better chance of doing what you want without throwing up any flags.

Speaking of throwing up flags, one of the coolest parts of this project is the toy mailbox inside the house that monitors the activity of the real box. When there is mail waiting, the flag on the toy mailbox goes up. Once [Bob] retrieves the mail, the flag goes back down automatically. A magnet in the real box’s flag prevents false alarms on the toy box provided the Flag Raised On Outgoing protocol is followed. Best of all, he built in some distress handling: If the mailbox door is left hanging open or the battery is low, the toy mailbox waves its flag up and down.

So, where do the three sensors come in? A magnetic reed switch on the wall of the real mailbox pairs with a magnet in the flag. To determine whether the door is open, [Bob] initially used another magnetic reed switch on the underside of the box. This didn’t work well in wet weather, so he switched to a mechanical tilt sensor. An IR LED on the ceiling and a phototransistor on the floor of the box work together to detect the presence of mail.

[Bob]’s homebrew mailbox has a false back that hides a PIC 16F1825. When the door opens, the PIC wakes up, turns on a MOSFET, and checks the battery level. It waits two minutes for the mailman to do his job and then reads the flag state. After comparing the IR LED and phototransistor’s states, it sends a message to the toy mailbox indicating the presence or absence of mail.

The toy mailbox holds a modified receiver board and a servo to control its flag. [Bob] has made the code and schematics available on his site. Walk-through video is after the jump.

Continue reading “Triple Sensor Mailbox Alert Really Delivers”

Play Hide-and-go-seek With Infrared LEDs

Although we’re sure they exist, we wouldn’t want to meet anybody that can’t look back fondly on the halcyon days of youth that included playing hide-and-go-seek. Some kids never grow up and continue the tradition with geocaching or orienteering, but that sense of limitless discovery wanes over time. [Kurt] came up with a small scavenger hunt beacon that brings back the unending wonder that accompanies the unknown.

The beacon is just a simple ATtiny13 that flashes a message with an invisible IR LED. To receive the messages, [Kurt] made a scavenger decoder shield for an Arduino. The decoder includes a phototransistor and a 20×4 LCD display. All [Kurt] needs to do is hold the decoder up to the beacon for the text in the firmware of the ATtiny to be displayed. The beacon is only one inch square and powered by a watch battery, so it can be hidden anywhere.

[Kurt] suggests that the text of one beacon should provide the clue to the next. We’re thinking this is just a great excuse for a walk in the park. You can check out [Kurt]’s IR decoder getting data from a beacon after the break.

Continue reading “Play Hide-and-go-seek With Infrared LEDs”

Photo Interrupters Explained

img_0147 (Custom)

[Eric] sent in this very informative writup on how to use Photo interrupters. These things can be used for many things, he lists pellet dispensing and limit switches. He found one in his junk box and realized he knew very little about it. After some exploring and research, he’s here to educate the rest of us. There’s a good breakdown of the circuit itself which is pretty simple as well as a test circuit and some sample code.