Edwardian Laptop From A Steampunk Master

After receiving a Marconi from [Admiral Aaron Ravensdale] informing us of the completion of an exquisite steampunk laptop, we were simply delighted. [The Admiral]’s computational device, or Uhlian Calculator as is the preferred nomenclature, is a remarkable combination of design and function suitable for any remarkable gentleman bent on the domination of the fast approaching electrical frontier.

[Ravensdale]’s new steampunk laptop is built off his first laptop, an old Toshiba Satellite 1100. Not a speed demon by any means, but the quality of this build is phenomenal. The hinged keyboard tilts up into an ergonomic position when the laptop is opened, reveling a set of six LED jewels for the power, battery, and hard drive lights. To the left and right of the screen, a pair of miniature brass horns contain a set of stereo speakers.

The keyboard is an awesome modification of the stock keyboard very reminiscent of [Admiral Ravensdale]’s previous keyboard steampunkification.

[The Admiral] put up an Instructable going through the many hours he put into this fine piece of craftsmanship. There’s also a video showing the keyboard lifting mechanism and skeleton key power switch available after the break.

Continue reading “Edwardian Laptop From A Steampunk Master”

Laptop Touchpad As A Standalone Peripheral

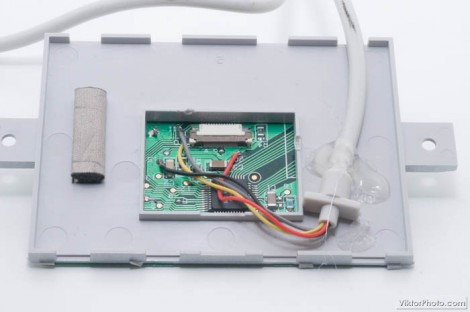
[Viktor] is working on salvaging parts from a dead laptop. In his eyes the biggest gem to be had is the touchpad, so he set out to see if he could make the touchpad a standalone device. You might be envisioning the many hells of interfacing this with a microcontroller and writing firmware to measure and translate the input to HID compatible commands. The good news is it’s quite a bit simpler than that, with just one gotcha.

He looked around to see what he could find about the chip that drives the touchpad. He couldn’t locate an exact match, but a datasheet from a similar family of controllers make him think that there should be a PS/2 data and clock output from the chip. After probing the test points on the board he found them, as well as the voltage and ground rails. Above you can see he soldered an old mouse cable to the board and it works when plugged in.

But we did mention the gotcha. There doesn’t seem to be any support for the right and left buttons. Those were housed on a flexible PCB which attached to the white connector seen above. That PCB also connected to the computer so we don’t know if they will work with this hack or not.

Ancient Laptop Given New Life As Mobile Prototyping Platform

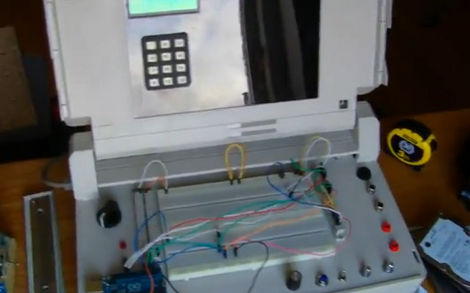
What can you do with a broken Compaq SLT 286? Its briefcase-like size and shape actually make for a pretty interesting portable electronic prototyping station. [Philip] gutted the components and started adding back the items he most commonly uses when developing a project.

He shares all of the details in the video after the break. At center stage is a double breadboard where the keyboard would normally be found. It’s hard to make out in the image above, but there is a set of terminal strips running vertically to either side of these breadboards. Each terminal is connected to a peripheral or power/ground bus. The black knob to the left lets him adjust the output of a variable voltage regulator. To the lower right there’s a rotary encoder, push button, toggle switch, and a couple of potentiometers. These, along with the keypad and character display (mounted where the screen used to be) and DB connectors (on the back of the case) have their pins mapped to the terminal block to the right. [Philip] has mounted an Arduino Uno over the area to the bottom left, but we’re sure that it’s pretty easy to swap out for just about any breakout board he needs.

To answer [Philip’s] running dialog from the video: no, it is not the worst demo ever. We think you did a great job demonstrating all the features. Loose connections are par for the course when it comes to prototypes.

Continue reading “Ancient Laptop Given New Life As Mobile Prototyping Platform”

Network Monitoring Panel Built From The IT Department Junk Heap

network-monitoring-panel

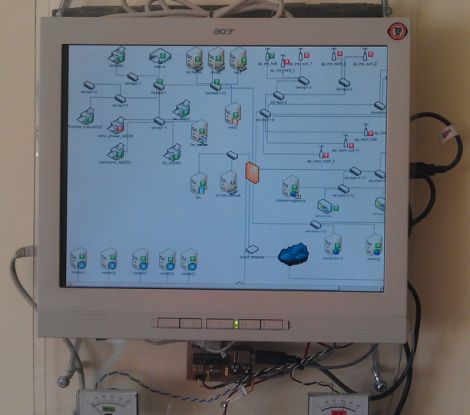
One of the benefits of working in IT is that there is typically a healthy supply of miscellaneous, half-functioning equipment to mess around with. [Vittore] had an old laptop with a busted LCD sitting around (Google Translation), so he figured he might as well get it to do something useful. With a spare desktop LCD panel and some software tweaking, he built himself a slick network monitoring panel that hangs in his office.

He stripped the laptop down to the bare essentials, and mounted it along with an LCD screen in a plexiglass enclosure. He has Nagios running a server in his office, and with the help of a few plugins, he created a simple web interface that show him the topology of his entire network. The panel itself runs a live version of Debian, which he configured to load up his Nagios web page each time it is started.

While having the ability to view the status of every network-connected device in an instant is great, he didn’t stop there. While browsing around online, he found diagram for a simple USB-based performance monitor that uses a PIC to drive a pair of VU meters. He hooked the meters up to a router monitored by Nagios, so he can watch office’s bandwidth usage in real time.

If you’re interested in seeing how it was built, be sure to check out the Flickr photo set put together by [Vittore’s] co-worker [Matthew].

Fixing That Broken Laptop Power Jack

It seems that there’s a whole range of Toshiba Satellite laptop computers that suffer from a power jack design that is prone to breaking. We see some good and some bad in this. The jack is not mounted to the circuit board, so if it gets jammed into the body like the one above it doesn’t hose the electronics. But what has happened here is the plastic brackets inside the case responsible for keeping the jack in place have failed. You won’t be able to plug in the power adapter unless you figure out a way to fix it.

We’d wager the hardest part of this repair is getting the case open. Once inside, just cut away all of the mangled support tabs to make room for the replacement jack. The one used here has a threaded cuff that makes it a snap to mount the new part to the case. Clip off the old jack and solder the wires (mind the polarity!) and you’re in business.

Anyone know why we don’t see more of the magnetic connectors (MagSafe) that the Apple laptops have? Is it a patent issue?

[Thanks Dan]

MAME Cabinet 3D Modeled And CNC Milled

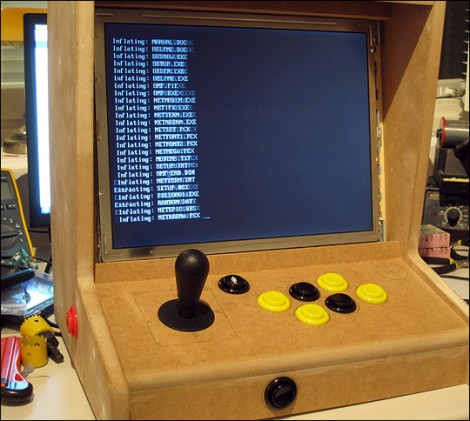
[Entropia] is just putting the final touches on his bar-top MAME cabinet (translated). The project started out as a 3D model to get the case dimensions just right. An old laptop is being, so the enclosure was designed to fit the bare LCD assembly and hide the rest of the computer. [Entropia] had access to a CNC mill through an education program and used it to cut most of the parts for the case out of MDF.

From there the build proceeds as normal. Mounting holes for the controls were cut with a drill and hole saws. We think it’s a bit easier to lay this design out once you have the control panel itself milled, rather than try to get it right in the 3D model. The image above is part way through the build. Since it was taken the case has been painted and a sound system was added but it looks like it’s still waiting for a bezel over the LCD and a marquee for the masthead.

You can see a demo of the game selection UI after the break.

Continue reading “MAME Cabinet 3D Modeled And CNC Milled”

18650_things_to_do_with_dead_laptop_batteries

Things To Do With Your Laptop Batteries When They’re Dead

[Roy] over at GeekDad had a dead laptop battery on his hands, and decided he would disassemble it to see what useful things he could do with the cells inside. He mentions in his article that even though your laptop might be convinced that its battery is toast, more often than not just one or two cells are damaged. This may not be news to all of our readers, but is worth pointing out to those who might not be aware.

With the bad cells separated from the good, [Roy] thought up a couple of different uses for his newly acquired batteries. His initial idea was to power an LED flashlight that was made to run on the 18650 cells he recovered from his laptop – not a stretch of the imagination, but definitely useful. The second use he came up with was to pair two of the cells together in order to simultaneously power an Arduino and some small Lego motors.

[Roy] lays out all of the standard caveats you would expect regarding the care and feeding of the lithium cells, and even suggests rebuilding the laptop battery as an option for the more skilled members of his audience.

Now we understand that dismantling and re-using old laptop cells is not necessarily groundbreaking, but it’s definitely something that’s worth a bit of discussion. [Roy] admits that his two ideas fall far short of the “18650 Things” his article title suggests, so how about adding a few of your own?

If you have stripped down some laptop batteries to salvage the cells, let us know what you did with them in the comments – we would be interested in hearing about it.