The Coming Age Of ARM Chips For The Hobbyist

The days of the 8 bit Arduino may be quickly coming to a close. Sure, there will always be a place for AVRs in blinking LEDs and turning on relays, but for doing anything cool – playing MP3s, driving LCD displays, or running a CNC machine – you need the power of a 32 bit chip. [Brian Carrigan] put up a great tutorial on getting started with these bigger, more powerful micros and moving beyond what is possible with an 8 bit PIC or AVR.

These new 32 bit chips are much more powerful, but aren’t exactly hobbyist friendly. Most of the ARM chips we’ve found are stuffed into very fine pitch QFN or QFP packages that require a reflow oven to solder to a board. In fact, we can only find one through-hole Cortex M0 chip that is suited for breadboard development. This doesn’t make it easy to whip up a circuit in a few hours, so builders needing a very powerful microcontroller will be more dependent on dev boards.

Already there are a good number of ARM-based 32 bit dev boards available including the offerings from Leaf Labs, the extremely inexpensive STM Discovery boardKinetis KL25Z Freedom Board, the outrageously powerful BeagleBone, and the perpetually delayed Arduino (over) Due.

None of these boards are particularly new developments; they’ve all been around the block once or twice. However, there are many more options for 32 bit development than the current 8 bit PIC and AVR holy war. We’re going to turn the comments over to Hackaday readers with the following questions: what supersized dev board are you rolling with? What’s good for a beginner, and what should they watch out for?

Making An RF Controlled Light Switch Work With IR

ir-rf-light-switch

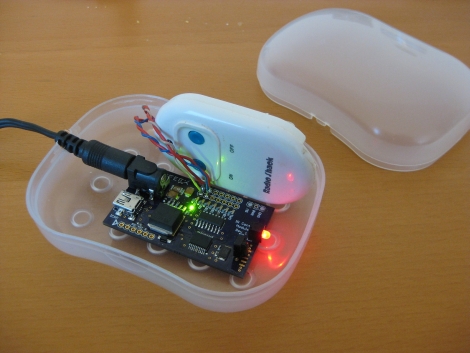
[Gary] had an RF triggered light switch kicking around, and wanted to find a way to control his lights using a home theater remote. The switch, which he bought from RadioShack years ago, came with a simple remote that uses two buttons to toggle the lights on and off. While you might think that switching from RF to IR control would be a step backwards, [Gary] really just wanted to consolidate remotes more than anything else.

He designed a circuit board specifically for interacting with the remote half of his RF controller. It sports a PIC16F628A micro controller, which is tasked with processing IR commands from his home theater remote and triggering the lights when requested.

The code he developed for the project is relatively simple, but very useful all the same. When his board is powered on, it stores the first IR code it receives, then retains it as long as it stays powered on. This lets [Gary] use any button on his remote to turn the lights on and off, without any IR codes permanently defined in software.

As you can see in the video below, the modified switch works just as intended, saving [Gary] from having to walk all the way to the light switch when it’s time to fire up a movie.

Continue reading “Making An RF Controlled Light Switch Work With IR”

Minimalist DIODER Hack Requires No External Microcontroller

pic_dioder_hack

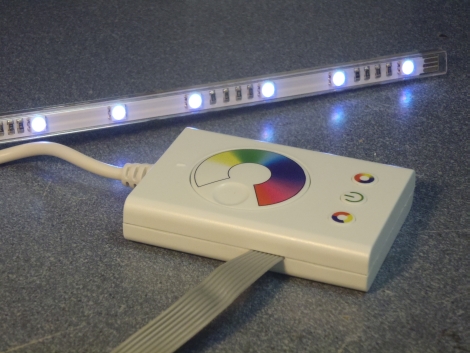
Hackaday reader [chrysn] picked up a 3-button RGB model DIODER light from IKEA and thought he might as well take it apart to see what he could do with it. Having seen several DIODER hacks featured here, he knew it was easily hackable, but he didn’t want to simply rehash what other had already done.

All of the DIODER hacks we have come across thus far incorporate some sort of AVR chip or add-on board to expand its capabilities. [chrysn] saw that the controller already had a PIC16F684 inside, and thought that installing his own firmware onto the existing hardware would be a far more simple solution. He installed a small programming cable onto the DIODER’s control board, and using his PICkit2 programmer, flashed the chip with a custom firmware image.

His modifications worked great, and [chrysn] says that there is plenty potential in the existing hardware to have all sorts of fun with it. Even so, he notes that there are several AVR-flavored drop-in replacements that can be used if that happens to be your microcontroller family of choice.

Microcontroller Communications Using Flashing Lights

phototransistor_pc_microcontroller_communications

[Scott] was driving in the pouring rain behind a car with its blinkers on when inspiration struck. He had previously created a simple communications system using his sound card that allowed him to send data to a microcontroller from his PC, but he thought that doing the same thing with light would be an interesting exercise.

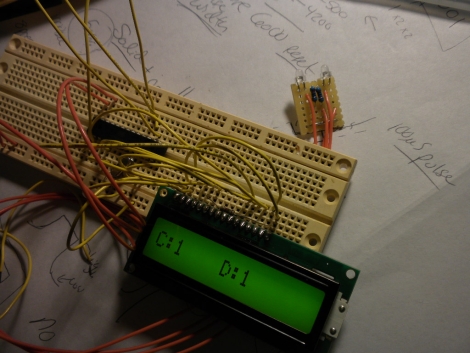
He decided that the best way to go about building such a system would be to use a phototransistor along with his computer monitor to send data to his microcontroller. While he couldn’t really think of any practical application for the project, that didn’t stop him from putting it together just for grins.

[Scott] says the circuit is dead-simple, and includes a pair of phototransistors along with their required resistors. The receiver was tied into the ADC of his microcontroller, where he was easily able to pick up some simple light patterns. His ultimate goal is to put together a javascript application that sends data to his microcontroller, though he’s looking for a bit of assistance on the programming side of things – any takers?

While [Scott] couldn’t come up with any applications off the top of his head, we know of at least one. Anyone familiar with the Bloomberg financial application will likely have come across their “B-Unit”. This piece of hardware is about the size of a credit card, but thicker. Armed with a fingerprint scanner and a photodiode, it reads a series of flashing lights from your computer screen in order to ‘synchronize’ the unit for each login session that is not initiated with an official Bloomberg keyboard. So there’s one for you!

Continue reading to see a video of the system in action.

Continue reading “Microcontroller Communications Using Flashing Lights”

Enhancing Simple Circuit Kits With Microcontrollers

picaxe_powered_circuit_learning_kits

[manuka], aka [Stan Swan] is a teacher in New Zealand who enjoys enlightening his students on the wonders of electrical circuits. He primarily uses “snap connector” circuit kits, sold under the BrainBox name in NZ, for his interactive labs as they can be easily manipulated by pupils of all ages.

While the kits are great, he says that the range of experiments they provide can be a bit limited, so he decided to swap out the kit’s sound module for something far more useful – a PICAXE-08M. The space left by removing the sound module was pretty small, but [Stan] got everything to fit without too much hassle. His modification allows his students to program the PICAXE, as well as utilize four of the uC’s output pins.

Needless to say, the addition of the PICAXE module was a huge hit with his students, allowing them to create far more exciting circuits. [Stan] has been revising his system over the years, adding extra output pins, enabling lamp and motor control, as well as tweaking his setup to respond to IR commands.

We think [Stan’s] work is pretty awesome, and we’re still wondering how this flew under our radar for so long. He says that his students vary from preschool kids to centenarians, so if you’ve got someone that you would like to introduce to the fun world of electronics, we suggest picking up one of these kits and getting to work.

[Thanks Haku]

Programming An ATtiny Using An Arduino

attiny

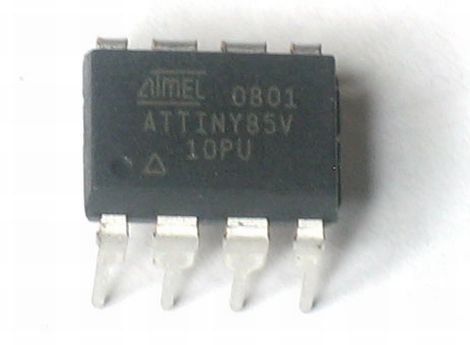
[Scott] is a big fan of the Arduino platform, and he’s not afraid to admit it. It does all the things he needs, but now and again he would like to use something a bit smaller, without all the bells and whistles the Arduino has to offer. He contemplated using an ATtiny for smaller projects, but after looking into what he would need to program the chip under Linux, he could never find the motivation to give it a go.

That all changed when he discovered the Arduino-Tiny project, which aims to bring a limited Arduino IDE to the ATtiny line of microcontrollers. He found the project to be quite useful, so he put together a brief tutorial that walks through everything you need to get started.

The tutorial is fairly straightforward, and even demonstrates how the Arduino can be used as an ISP for the ATtiny, removing the need to purchase a standalone programmer. Be sure to check it out if you are searching for an easy way to get started with ATtiny chips under Linux.