The BGA chip in question flipped onto a piecce of breadboard, all its pins broken out with magnet wire.

Heroic Efforts Give Smallest ARM MCU A Breakout, Open Debugger

In today’s episode of Diminutive Device Technology Overview, [Sprite_TM] is at it again – this time conquering the HC32L110. A few weeks ago, we have highlighted the small ARM Cortex M0+ microcontroller, which is outstanding because of its exceptionally small size. We also pointed out a few hurdles, among them – hard-to-approach SDK and documentation, and difficulties making and assembling a PCB for such a small BGA. Today, we witness how [Sprite_TM] bulldozed through all of these hurdles for all of us, and added a few pictures to our collective “outrageous soldering” galleries while at it.

First, he figured out an example layout for this MCU that’s achievable for us even on a cheapest 2-layer board from JLCPCB, keeping distances within the generic tolerance standards by snubbing out a few pins. As a result, we only lose access to four GPIOs – those will have to be kept as inputs, so that nothing burns out. However, that’s the kind of tradeoff we are okay making if it helps us keep our PCB small and lightweight for projects where these factors matter. After receiving the resulting board, he also recorded a short tutorial on soldering such packages at home with a mere hot air gun and a few bare necessities like flux and tweezers – embedded below.

It doesn’t end there, however, as he decided to work around the GPIO fanout limitation in a non-intended way. Evidently, [Sprite_TM] decided to have some fun, taking a piece of regular 0.1″ spacing protoboard and deadbugging the chip with magnet wire, much to our amusement. The resulting contraption, pictured above, worked – and this is ever something you’d like to be able to achieve yourself in times of dire need, whether you make something work or simply to be entertained by making use of a cursed mounting technique, there’s an one-hour-long livestream recording of how this magnet wire contraption came to be. And, of course, that wasn’t the last thing to be shared.

Continue reading “Heroic Efforts Give Smallest ARM MCU A Breakout, Open Debugger”

The teeny tiny MCU mentioned in the article, merely a blimp on a giant devboard

New Part Day: Smallest ARM MCU Uproots Competition, Needs Research

We’ve been contacted by [Cedric], telling us about the smallest ARM MCU he’s ever seen – Huada HC32L110. For those of us into miniature products, this Cortex-M0+ package packs a punch (PDF datasheet), with low-power, high capabilities and rich peripherals packed into an 1.6mm x 1.4mm piece of solderable silicon.

This is matchstick head scale computing, with way more power than we previously could access at such a scale, waiting to be wrangled. Compared to an 8-bit ATTiny20 also available in WLCSP package, this is a notable increase in specs, with a way more powerful CPU, 16 times as much RAM and 8-16 times the flash! Not to mention that it’s $1 a piece in QTY1, which is about what an ATTiny20 goes for. Being a 0.35mm pitch 16-pin BGA, your typical board house might not be quite happy with you, but once you get a board fabbed and delivered from a fab worth their salt, a bit of stenciling and reflow will get you to a devboard in no time.

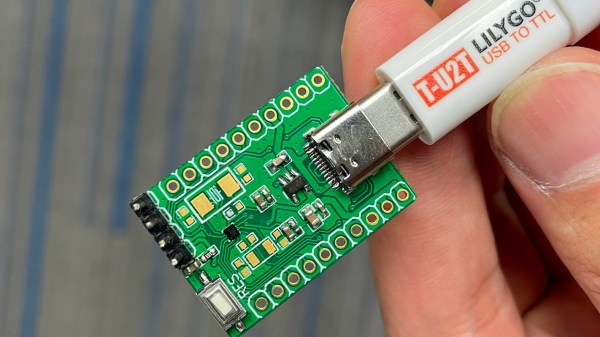
Drawbacks? No English datasheet or Arduino port, and the 67-page PDF we found doesn’t have some things like register mappings. LILYGO promised that they will start selling the devboards soon, but we’re sure it wouldn’t be hard for us to develop our own. From there, we’d hope for an ESP8266-like effect – missing information pieced together, translated and made accessible, bit by bit.

When it comes to soldering such small packages, we highly recommend reflow. However, if you decide to go the magnet wire route, we wouldn’t dare object – just make sure to send us pictures. After all, seems like miniature microcontrollers like ATTiny20 are attractive enough of a proposition that people will pick the craziest route possible just to play with one. They say, the madness of the brave is the wisdom of life.

We thank [Cedric] for sharing this with us!

Instruction Set Hack For Protected Memory Access

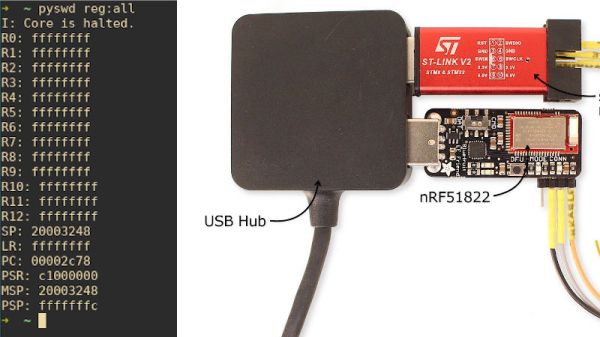
The nRF51 Series SoCs is a family of low power Bluetooth chips from Nordic Semiconductor that is based on ARM Cortex cores. The nRF51822 has the Cortex M0 core and is used in a lot of products. [Loren] has written a blog post in which he claims to be able to circumvent read back protection on the chip, thus giving access to the ROM, RAM and registers as well as allow for interactive debugging sessions.

The hack stems from the fact that the  Serial Wire Debug or SWD interface cannot be completely disabled on these chips even if the Memory Protection Unit prevents access to any memory regions directly. The second key piece is the fact that CPU can fetch stuff from the code memory. Combined with the SWD super powers to make changes to the registers themselves, this can be a powerful tool.

Continue reading “Instruction Set Hack For Protected Memory Access”

Unbricking A 3D Printer The Hard Way: By Writing A Bootloader

There’s a sinking feeling when a firmware upgrade to a piece of equipment goes wrong. We’ve all likely had this happen and  bricked a device or two. If we are lucky we can simply reapply the upgrade or revert to a previous version, and if we’re unlucky we have to dive into a serial debug port to save the device from the junk pile. But what happens when both those routes fail? If you are [Arko], you reverse-engineer the device and write your own bootloader for it.

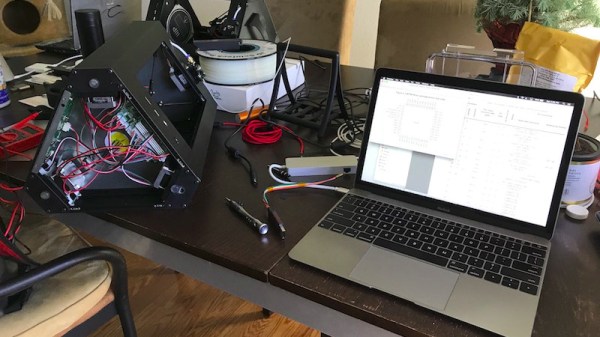
The offending bricked object was a Monoprice MP Mini Delta 3D printer to which he was foolhardy enough to apply new firmware after seeing a friend’s machine taking it without issue. Finding the relevant debug interface on its main PCB he applied the firmware upgrade again, only to realise that in doing so he had overwritten its bootloader. The machine seemed doomed, but he wasn’t ready to give up.

What follows in his write-up is a detailed examination of the boot mechanism and memory map of an ARM Cortex M0 processor as found in the Monoprice’s STM32F070CB. We learn about vector tables for mapping important addresses of interrupts and execution points, and the mechanics of a bootloader in setting up the application it launches. This section is well worth a read on its own, even for those with no interest in bricked 3D printers.

In the end he had a working bootloader to which he appended the application firmware, but sadly when he powered up the printer there was still no joy. The problem was traced to the serial connection between the ARM doing the printer’s business and the ESP8266 running its display. After a brainstorm suggestion with a friend, a piece of code was found which would set the relevant registers to allow it to run at the correct speed.

So after a lot of work that resulted in this fascinating write-up, there was a working 3D printer. He suggests that mere mortals try asking Monoprice for a replacement model if it happens to their printers, but we’re extremely glad he persevered. Without it we would never have had this fascinating write-up, and would be the poorer without the learning experience.

This isn’t the first time we’ve brought you 3D printer bootloader trickery.

Sniff Your Local LoRa Packets

As the LoRa low-bandwidth networking technology in license-free spectrum has gained traction on the wave of IoT frenzy, LoRa networks have started to appear in all sorts of unexpected places. Sometimes they are open networks such as The Things Network, other times they are commercially available networks, and then, of course, there are entirely private LoRa installations.

If you are interested in using LoRa on a particular site, it’s an interesting exercise to find out what LoRa traffic already exists, and to that end [Joe Broxson] has put together a useful little device. Hardware wise it’s an Adafruit Cortex M0 Feather with onboard LoRa module, paired with a TFT FeatherWing for display, and software wise it scans a set of available frequencies and posts any packets it finds to the scrolling display. It also has the neat feature of logging packets in detail to an SD card for later analysis. The whole is enclosed in a 3D printed case from an Adafruit design and makes for a very attractive self-contained unit.

We’ve featured quite a few LoRa projects here, including this one with a Raspberry Pi Compute module in a remote display. Of more relevance in a LoRa testing sense though is this look at LoRa range testing.

New Part Day: Tiny, Tiny Bluetooth Chips

The future of tiny electronics is wearables, it seems, with companies coming out with tiny devices that are able to check your pulse, blood pressure, and temperature while relaying this data back to your phone over a Bluetooth connection. Intel has the Curie module, a small System on Chip (SoC) meant for wearables, and the STM32 inside the Fitbit is one of the smallest ARM microcontrollers you’ll ever find. Now there’s a new part available that’s smaller than anything else and has an integrated Bluetooth radio; just what you need when you need an Internet of Motes of Dust.

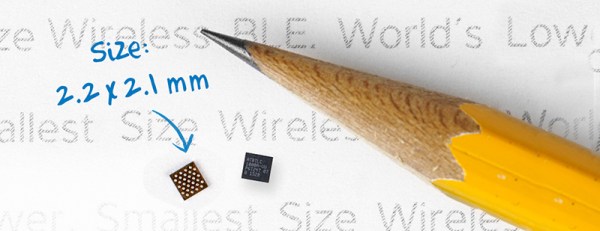
The Atmel BTLC1000 is a tiny SoC designed for wearables. The internals aren’t exceptional in and of themselves – it’s an ARM Cortex M0 running at 26 MHz. There’s a Bluetooth 4.1 radio inside this chip, and enough I/O, RAM, and ROM to connect to a few sensors and do a few interesting things. What makes this chip so exceptional is its size – a mere 2.262mm by 2.142mm. It’s a chip that can fit along the thickness of some PCBs.

To provide some perspective: the smallest ATtiny, the ‘tiny4/5/9/10 in an SOT23-6 package, is 2.90mm long. The smallest PICs are similarly sized, and both have a tiny amount of RAM and Flash space. The BTLC1000 is surprisingly capable, with 128kB each of RAM and ROM.

The future of wearable devices is smaller, faster and more capable devices, and with a tiny chip that can fit on the head of a pin, this is certainly an interesting chip for applications where performance can be traded for package size. If you’re ready to dive in with this chip the preliminary datasheets are now available.

Hackaday Prize Entry: A Bit Dingus

There was a time when just about every computer – even laptops – came with a parallel port. That’s 25 pins of bit-banging goodness, accessible from every programming environment, that could control any random pile of electronics sitting on a desk. The days of parallel ports are behind us now, and if you want to blink a pin with a computer, you’re looking at controlling a microcontroller over USB or something.

[ajlitt]’s Tiny Bit Dingus is just that: a microcontroller stuffed into a USB plug with a few pin headers. With the right app, you can control these pin headers over USB. It’s the closest you’re going to get to a parallel port with modern hardware.

This bit dingus isn’t meant to replace the Bus Pirate, an Arduino, or anything else; it’s meant to be a small and simple way to connect random electronics to a computer with as few parts as possible. If you’re looking for a part to add to your electronic tinkerer everyday carry rig, this would be it.

There’s a few bits of interesting hardware inside the Bit Dingus. A while back, [ajltt] ran into the Freescale KL27, a Cortex M0+ that does USB without a crystal, has a USB bootloader, and doesn’t require many additional components at all. It’s the perfect size for the project at 5x5mm, and is unbrickable while still being flashable over USB.


The 2015 Hackaday Prize is sponsored by: