Easy Web Interface With GPIO Access Runs On Raspberry Pi

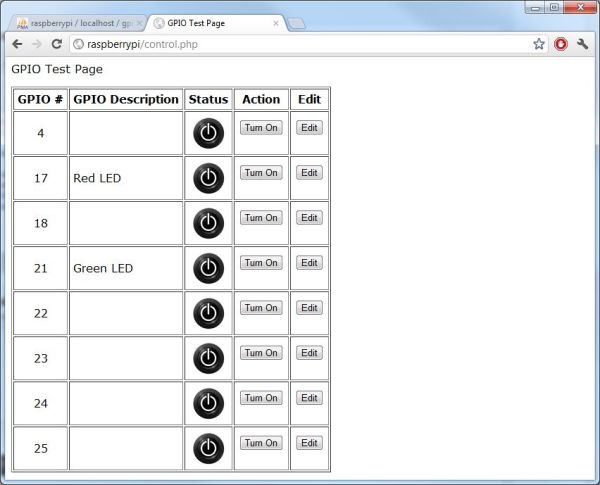
Here’s a Raspberry Pi hack that adds web control using PHP and MySQL. As you can see in the image, it serves up a webpage (using the Apache2 server) which allows you to change the state of the GPIO pins. It’s not super-complicated, but it is nice to see a step-by-step guide for installing and configuring the package.

Web interface GPIO control is one of the features we loved about the Adafruit Web IDE. But this offering is loaded completely from the RPi (the Adafruit package uses cloud based code) and utilizes the tools most Linux network admins will be used to. A MySQL database manages the connection between GUI commands and GPIO modification. The webpage is served up by a PHP script which takes care of polling and changing database values. Configuration requires a new database, plus the username and password which has access to it.

Electric Imp Makes A Cat Door Tweet Its Activities

electric-imp-tweeting-cat-door

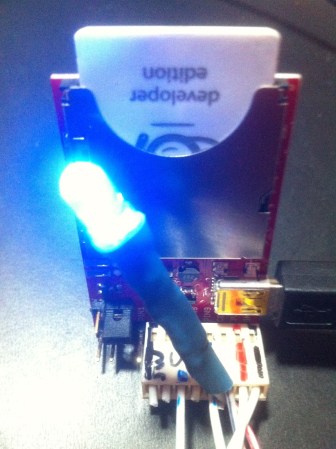
This Tweeting cat door uses the Electric Imp to read a sensor and report back to the server. The hardware is pretty neat. The board hosts an ARM Cortex-M3 processor and gets on your home network via WiFi. The mini-USB cable simply provides the power. Programming is done over the network. Our own [Brian Benchoff] had a chance to try the Imp out earlier in the Fall.

Monitoring a cat door is as good a reason as any to undertake a project. The hardware added to the board includes a reed switch mounted on the jamb along with a magnet on the door itself. There is also a blue LED that gives a bit of user feedback. The software isn’t quite as easy but it still wasn’t that bad. As with most web-connected projects getting all the parts to talk to each other was a bit of a chore. The Imp reports back to a server on the local network which then activates a PHP script that uses Sen.se to push out a Tweet.

[Thanks Pat]

What You Can Do When A Raspberry Pi Teams Up With An Arduino

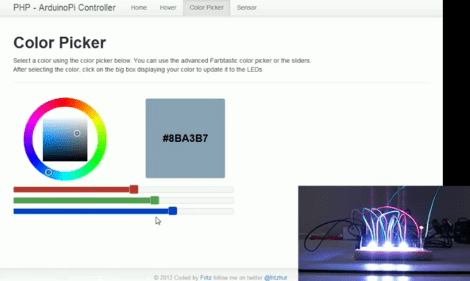
We thought that connecting an Arduino to a Raspberry Pi was overkill, but one thing caught our attention. [Jan Stevens] mentions that the RPi is less expensive than the Ethernet Shield. Interesting. As we looked into his writeup a bit more we began to think he’s onto something. [Jan] uses the PHP serial class to communicate between the RPi and Arduino (dead link; Internet Archive). This ends up being a very inexpensive way to bring some of the more powerful web programming options to your hardware devices.

Sure, he’s just driving three RGB LEDs. But the demo video after the break gives us a glimpse as some of the interface options that become available when an embedded Linux machine is in play. He’s using jQuery, AJAX, PHP, and JSON to name a few. If you want to give this a try yourself you can grab the code from his Github repo. Of course we’re going to want to hear about any projects you develop from this starting point!

Continue reading “What You Can Do When A Raspberry Pi Teams Up With An Arduino”

Turning A Light Off Over The Internet

Because reaching over a few feet to turn off a switch is too much to bear for [Bruce], he connected his desk lamp to the Internet. It’s a pretty cool build that’s the perfect tutorial for connecting just about anything to the internet.

For his build, [Bruce] used an Arduino with a relay attached to an output pin. When the Arduino receives a signal on its serial port, a tiny voltage is applied to the relay, turning on the light.

This could have been done with an Arduino Ethernet, but the PHP script [Bruce] went with is a little more versatile. Whenever someone pulls up this digital light switch web page, they can turn [Bruce]’s desk lamp on and off.

For an introduction to connecting bare bones projects to the Internet, we’re really liking [Bruce]’s build. Just try no to go crazy with that link and leave the failure testing to the professionals. You can check out the demo video after the break.

Continue reading “Turning A Light Off Over The Internet”

Detecting ASCII Art Across The Internet

As a web developer and designer, [Victor] has a habit of putting a very nice ASCII signature in an HTML comment at the top of every web page he designs. He was inspired by seeing others do this,  and this piqued his curiosity to see who else was doing this. His idea was to scan through a chunk of the Internet and see what other web pages had ASCII signatures in an HTML comment. With a lot of very clever work, [Victor] managed to grab some interesting ASCII art that would have been missed without looking at the source of millions of web pages.

After gathering a list of the top million top-level domains from Alexa, [Victor] wrote a script to download the HTML for all the pages in parallel. After that, it was just an issue of detecting the ASCII art in all the HTML files. There were a few earlier ASCII art detection algorithms, but nothing that suited [Victor]’s use case. The best result came from only looking at the first comment (otherwise the signatory wouldn’t want you to find it with a quick glance at the source) that were at least 3 lines long and 40 characters wide. After discarding everything with HTML tags in it, [Victor] had an awesome gallery of the ASCII art from webpages all around the Internet.

What did he find? Well, there’s far too many ASCII signatures for [Victor] to put up on his webpage, but he did provide a nice sample of what he found. They’re mostly logos, although there is a Hypnotoad and Aperture Science sentry turret in there.

If you’d like to try out [Victor]’s script, he made everything available on GitHub.

Smartphone Operated Garage Door Is Beginning Of Arduino Home Automation System

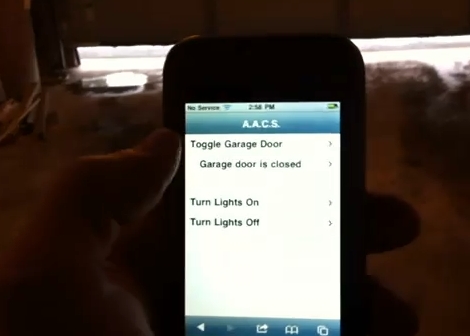
[Tim] is showing off the first step in his home automation projected with this smart-phone garage door interface. In the video after the break you can see him open and close the garage door with the touch of a button. There’s also an open or closed indicator that he can check when away from home.

An Arduino takes care of a portion of the control for this project. Like the post we saw yesterday, he’s using PHP code on a webpage to manipulate the Arduino via its USB connection in order to open and close the door using a relay. The door status is also monitored by the Arduino and sent to the PC over the serial connection. The computer uses a Python script to monitor the incoming data and update a text file which is merged into the web interface using a PHP include. Future plans for the system include adding control for heating and air conditioning systems.

If you’re looking to do something like this but wirelessly here’s some advice on ditching the Arduino and using an XBee module instead.

Continue reading “Smartphone Operated Garage Door Is Beginning Of Arduino Home Automation System”

The Basics Of Controlling An Arduino With PHP

You can easily add Internet-based control for your Arduino if it is close enough to your server to be connected via USB. This tutorial will give the basics you need to get it working.

The gist of this method involves a webpage that includes PHP elements. When one of those elements is manipulated, a command is sent via serial connection to the Arduino which then reacts based on what it received. This example uses an Ubuntu box that is running an Apache server. The Arduino sketch sets up the serial connection and then listens for incoming traffic. Whenever it receives a non-zero character an LED will blink. On the server side of things you’ll need to make sure that the system user that runs Apache (www-data) has permission to write to a serial port.

This base example may seem extremely simple, but there’s no end to what you can build on top of it. Different PHP events can be added to push new commands over the serial connection with matching test conditions added to the sketch.

[Thanks Jarryd]