Monitoring Your Home Energy Use

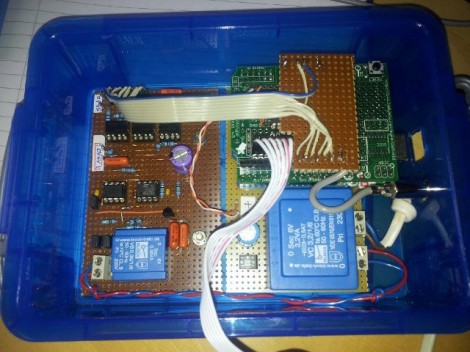
[Dave’s] been elbow-deep in mains voltage while building this home energy monitoring rig. He started with an approach that is different from most we’ve seen before. He wanted a system that could make a linear measurement to keep the accuracy as high as possible. His first thought was to use a opto-isolated linear amplifier to measure voltage, but ended up altering that plan since he’s looking for digital values when all is said and done.

He’s using an ADC on the mains side of the interface board, then sending the digital values to an Arduino with opto-isolators to keep the high voltage separate from the low. This does complicate things a little bit, as he has low voltage rails on either side; 0V and 5V to run the ADC on the mains side, and separate 0V and 5V to run the Arduino. To solve the problem of accurate current measurement over the full range a house uses he opted for a Programmable Gain Amplifier. It’s addressed via SPI and allows him to adjust resolution to facilitate accurate measurement of very small currents. We think anyone who has tried to measure small appliances (like an alarm clock) with a Kill-A-Watt and gets a zero reading will appreciate this.

The Arduino sends data via a serial connection, which [Dave] is currently graphing using his laptop. It would be nice to see a simple web-server using the Ethernet shield (or a different board like the RPi) so you could log in from the couch and see what’s been going on with your home grid.

Monitoring A Solar Array Output

After years of hoping and wishing [Dave] finally took the plunge and installed solar panels on the roof of his house. He’s got twelve panels that are each rated at 240 Watts! But just having them sitting there and pumping power back to the grid isn’t enough. Understandably, he decided to add his own solar array monitor so that he could see just what those babies are bringing to the party.

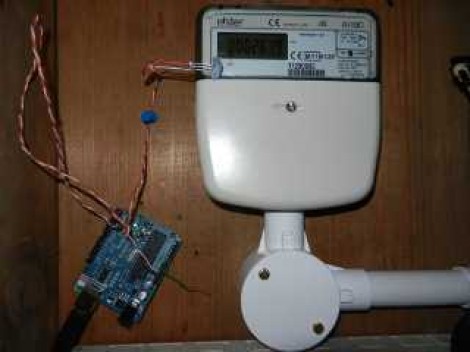
The solar array has an inverter which takes the DC from the cells and converts it to mains voltage AC for use on the grid. The system includes a panel meter which you’d normally find on the supply to the house. All he needed to do is find a way to grab the data from that device. It’s an Elster meter, and offers two types of feedback: a blinking LED that corresponds to each Watt-hour passing through the meter, and an IrDA port which provides a more error-proof method of reading data. Monitoring the 1 Wh pulse is quite a popular method for keeping track of your electric meter, but if your hardware misses a pulse the data will be off. [Dave] chose to use a light sensor to monitor the IrDA output, which is encoded data. As long as you can read the protocol, which has been published by Elster, a transmission can be missed now and again without disturbing the overall power consumption data.

Monitoring Home Electricity Usage Via A Tidy Wall Display

power-meter-display

[Janne Mäntyharju] wanted to get an idea as to how much electricity he consumed in his new home, mainly to see if using his fireplace for additional heat had any effect on his bill. Luckily his power meter was mounted in the utility room of his house, making it easy to keep tabs on his usage.

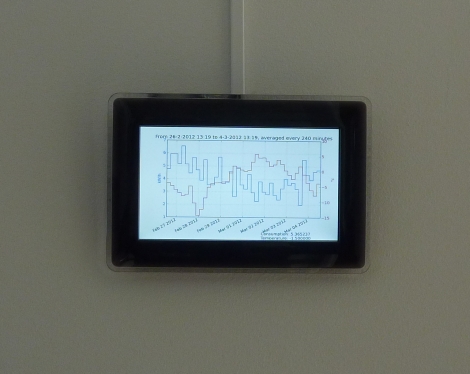
His meter features a small LED that blinks a fixed number of times per consumed Kilowatt hour, so he mounted a photoresistor and ATtiny2313 above it to detect the light pulses. [Janne’s] server polls the microcontroller every 5 minutes over an XBee connection, recording the power usage in an SQL database for further analysis. From this database, he generates graphs showing both the temperature in his home as well as the average electricity usage for the specified time period.

[Janne] also wanted to make the data easily accessible, so he constructed a wall-mounted display using a Beagleboard and digital picture frame. The display not only shows his electricity usage, but it toggles between the weather, calendar events, IRC logs, and pictures from his security camera.

We’ve certainly seen this sort of electric meter monitoring before, but it serves as a quick reminder that given the right tools, watching your power usage (among other things) can be as easy as taking a quick glance over at the wall.

Hackaday Links: July 24, 2011

Plasma speakers

Apparently if you run AC and DC currents through a welding torch flame you can use the resulting plasma as a loudspeaker. [Thanks Cody]

Power metering

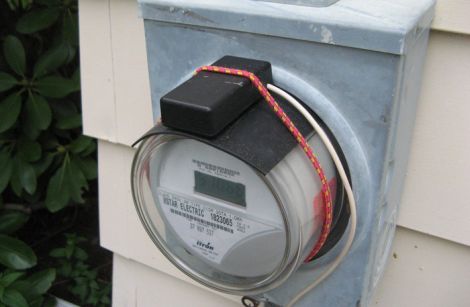
The Google Power Meter API is no longer in development but that didn’t stop [Pyrofer] from finishing his metering hardware. It uses a reflectance sensor to read the meter instead of using clamp-based current sensing.

Music videos from inside the instrument

Filming from inside of a guitar creates the camera effect seen above which looks like the waveform you’d see on an oscilloscope. [Thanks Philleb]

Hidden messages in audio files

GhostCoder lets you encrypt and hide audio files within other audio files. The thought is, you can piggyback your own data into Torrents that are circling the interwebs.

2×4 Chair

If you’re skilled with a Skill saw you can make a chair out of one 2 by 4. You can see the pattern you’ll have to cut out from the board in the image above, wow!

ir_power_meter

Monitor Your Home’s Power Usage On The Cheap

[Paul] was pretty sure that he and his family used a lot of electricity throughout the day. Admittedly, he enjoys his creature comforts, but was wiling to try living a little greener. The problem was, he had no idea how much electricity he was using at a given time.

While some power companies offer devices allowing homeowners to monitor their energy usage, [Paul’s] did not. After a bit of research however, he was ready to build a power monitoring system of his own. He found that his meter emits a small infrared pulse every time a watt-hour of electricity is consumed, so his system counts how many flashes occur to measure usage.

The counting circuit is pretty simple consisting of only an AVR, a resistor, a capacitor, and a phototransistor. The data is fed to a computer where the results are graphed with gnuplot.

It’s quite a useful little hack, and undoubtedly far cheaper than purchasing a whole house power monitor.

Tweet-a-Watt Now Speaks To Google Power Meter

Hackaday’s own [Devlin Thyne] has been working with Adafruit to come up with a way to use the Tweet-a-Watt along with Google Power Meter. Back in March we put out the word that Google had unveiled the API for Power Meter and [Devlin] is the first we’ve heard of to come up with a way to use your own equipment with the service. You can build your own or use Adafruit’s kit and the data pulled from your energy use will be nicely displayed using the big G’s tools. Right now there’s only support for one Tweet-a-Watt but we’d image this will evolve fairly quickly into a much larger house solution. Head over to the Tweet-a-Watt code page to get the source files for this project.

[Thanks PT]

Tweet-a-Watt Kits

tweetawatt

[adafruit] wrote in to let us know that the Tweet-a-Watt is now available in kit form. While the plans have been available for a while, a kit is a welcomed addition. The kit doesn’t include the Kill-a-Watt monitor, but rather the XBee adapters and parts necessary to make it talk to your Arduino or computer. The kit is $90, while the Kill-a-Watt can be found for roughly $20.