Monitoring A Solar Array Output

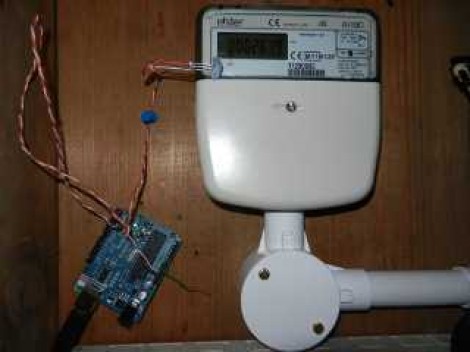
After years of hoping and wishing [Dave] finally took the plunge and installed solar panels on the roof of his house. He’s got twelve panels that are each rated at 240 Watts! But just having them sitting there and pumping power back to the grid isn’t enough. Understandably, he decided to add his own solar array monitor so that he could see just what those babies are bringing to the party.

The solar array has an inverter which takes the DC from the cells and converts it to mains voltage AC for use on the grid. The system includes a panel meter which you’d normally find on the supply to the house. All he needed to do is find a way to grab the data from that device. It’s an Elster meter, and offers two types of feedback: a blinking LED that corresponds to each Watt-hour passing through the meter, and an IrDA port which provides a more error-proof method of reading data. Monitoring the 1 Wh pulse is quite a popular method for keeping track of your electric meter, but if your hardware misses a pulse the data will be off. [Dave] chose to use a light sensor to monitor the IrDA output, which is encoded data. As long as you can read the protocol, which has been published by Elster, a transmission can be missed now and again without disturbing the overall power consumption data.

8-bit Logic Chip Computer Build

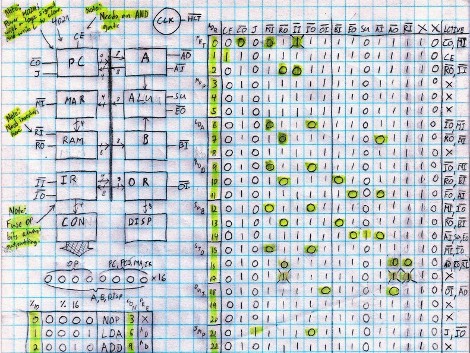
[Kyle] has been hard at working building an 8-bit computer from the ground up. He’s using a set of logic IC’s for the various components, and some NVRAM chips to store the control words. What you see above is the roadmap for his instruction set. He’s just started writing them to the chips, making the job easier by building an Arduino-based programmer.

We’ve enjoyed watching [Quinn Dunki’s] progress with her Z80  6502-based PC build which started on a breadboard in much the same way but has come a long way since those humble beginnings. Recently we also looked in on a 4-bit computer that is using discrete components. But [Kyle’s] take on the challenge falls somewhere in between the two.

The gist of his design can be found in one of his earlier post. He’s got a ring counter which starts by clearing the address register. It then loads the NVRAM address of the next instruction which is then executed on the subsequent count. It seems the build still has some way to go so make sure to keep your eye out for updates.

[via Reddit]

Driving A T6963C Based Graphic LCD

[Tom Fleet] spent the dreary weekend inside learning how to drive this T6963C based graphic LCD controller. Although this is his first time venturing away from HD44780 character displays, the availability of an Arduino library helped him go from being a newbie to coding his own animated graphics.

The hardware setup is straight-forward. The screen has a 20-pin connector and operates at 5V. We don’t see it on his protoboard, but usually these displays also need a potentiometer which serves as a voltage divider for the screen contrast. The data and control pins eat up most of the available I/O on the ATmega328 chip he used, but the I2C and SPI pins are still open and he plans a future project to make this a wireless display for his PC using one of those protocols.

As for fonts and animation, [Tom] links to several tools which will come in handy. There’s a font program that will convert Windows system fonts into a C file for use on the Arduino. The animations start with a 1:1 ratio animated graphic drawn with his favorite image editing software. He then converts those to monochrome bmp files and used bmp2c to convert each frame to a C array. After the break there’s a seven second example that would work well as a boot screen for his project.

Continue reading “Driving A T6963C Based Graphic LCD”

Cardboard Hexapod Gets Around With Three Motors

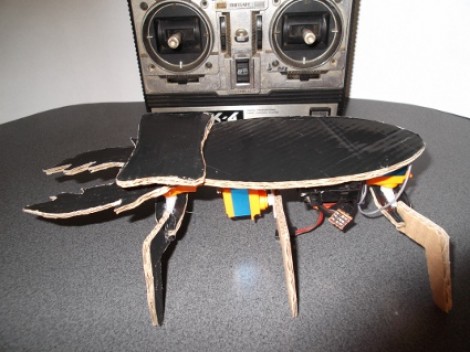
Here’s a lesson in doing a lot with very little. [Oldrobot] built this hexapod using cardboard for most of the pieces. He still had the box from his vacuum clear and it just happened to have a large black area the makes the top of the beetle look like it’s been painted.

The control board is from an old radio controlled airplane. Since RC airplanes used servos for flight control, it was a snap to hook up the three that make the bug go. One controls the set of middle legs which lift the body and change which of the propulsion legs are in contact with the ground. The other two servers move pairs of the front or back legs. It uses the same concept as this other RC controller hexapod, but much less time went into crafting the chassis and legs.

As you can see in the video after the break, the control scheme isn’t the most intuitive. But once you get a hang of which stick orientation affects each leg movement the bot ends up having fairly precise steering.

Continue reading “Cardboard Hexapod Gets Around With Three Motors”

Cabbage Haters Can Turn Their Leftovers Into Litmus Paper

[William Finucane] is making his own litmus paper by harnessing the power of cabbage. The process is much easier than the faux gunpowder he made, as it take just the one ingredient and a few kitchen tools.

In case you’ve forgotten your High School chemistry, Litmus is a set of dyes that change color when exposed to basic or acidic materials. It is common in liquid form, or as a paper. [William] is getting his dye from the leaves of red cabbage by running half a head through a blender with just a bit of water. Once that is reduced to pulp and boiled in the microwave (mmm, must smell great!) he separates the liquid using a coffee filter. A fresh coffee filter serves as a donor for the substrate, just dip some strips in the cabbage juice and let them dry. You can test them with some Ammonia as seen in the video after the break, or just start grabbing whatever is under the sink and see what happens.

Continue reading “Cabbage Haters Can Turn Their Leftovers Into Litmus Paper”

MIT Students Take Tetris To A Grand Scale

Careful, this hack might foster doubts about the level of fun you’re having at you own Computer Science department. Last weekend a group of students at MIT pulled off a hack of great scale by turning a building into a Tetris game board.

The structure in question is the Green Building on the Massachusetts Institute of Technology Campus. It houses the Earth, Atmospheric, and Planetary Sciences Departments, but was chose based on the size and regularity of the grid formed by the windows on one side. The group hasn’t provided much in the way of details yet, but the video after the break shows the game play and start-up screen. The middle portion of the building is used as a scrolling marquee to display the word “Tetris” before the game pieces start falling. We’re only guessing (and we hope you will add your conjecture in the comments section) but we’d bet they assembled a set of wireless RGB LED lamps and set one on the sill of each window. There does seem to be a number of ‘dead’ pixels, but it doesn’t diminish the fun of the overall effect.

If you don’t have your own building to play on, you should go small-scale and implement Tetris on a character display.

Continue reading “MIT Students Take Tetris To A Grand Scale”

Cheap And Easy Linear Supported Rail

Some of the very largest – and coolest – CNC machines use supported linear rail for their movement axes. For any home tinkerer trying to reproduce these supported rails, the problem of cost comes up very quick; these rails can run over $100 for just a few feet. [Michael] came up with a great way to build his own supported rail so he can build his very large CNC router.

There aren’t many tools needed to build [Michael]’s rail. He put a 90° notch in a 2×4 to support his 25mm rail, and clamped it down with a piece of plywood. After drilling a 5/16″ hole every 12 cm, he tapped these holes out to receive 3/8″ threaded rod. Yes, we also hate the mix of metric and imperial units in that description, but the results speak for themselves.

The now-supported rail was mounted to a piece of MDF with a few bolts and washers. MDF isn’t the most dimensionally stable material, so [Michael] will be covering the whole thing in a coat of epoxy very soon. Now, he’s one step closer to his gigantic CNC gantry router.

You can check out [Michael]’s demo video after the break.

Continue reading “Cheap And Easy Linear Supported Rail”