Apple MagSafe Cord Repair

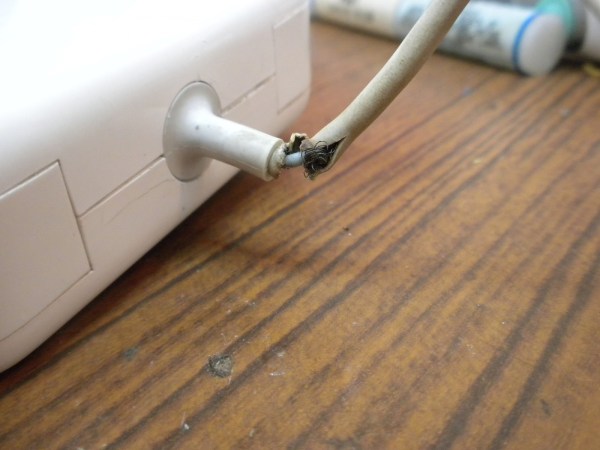
[Tommy Ward] had a big problem with the cord for his laptop power supply. This thing’s not cheap so he figured out a way to fix the frayed cord on his Apple MagSafe. He asserts that the shortened rubber collar on the plug end of the cord is to blame for this type of damage. We think rough use may have something to do with it too, but having had to repair our own feline-damaged power cords we’re not about to start pointing fingers.

To pull off an appropriate fix [Tommy] pries apart the case housing the power converter. This lets him get at the solder connections of the cord. After removing it from the circuit board he clips off the damaged portion of the cable. To reuse the strain relief grommet he drilled out the old portion of wire and insulation, making room for the undamaged cable to pass through, adding a cable tie on the inside to aide in strain relief. The last part of the fix involves gluing everything back together.

If your power supply problems have to do with the computer connector itself there’s a fix for that too.

Ammo Box PSU

PAB-PSU-1

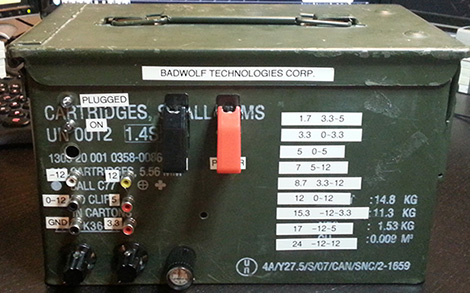
Sometimes you need a power supply that can be thrown into the back of a car and taken into the field. [BadWolf] didn’t want to take his bench supply, so he whipped up this very portable power supply made from a computer PSU. To ruggedize his build a little, he put it in a 50 caliber ammo can making it more than able to handle the roughest field work.

While not a proper adjustable power supply, this ammo can is more than capable of delivering a whole lot of current in a number of different voltages. There are a few bells and whistles – a ‘plugged in’ and ‘on’ light, as well as a few very cool looking toggle switches that are sure to arouse the suspicions of unsuspecting bystanders.

[BadWolf] kept all the safety features built-in to the computer PSU, so this ammo box power supply is still protected from short circuits, and over-current, making it much safer than its appearance belies. It’s also a great example of what can be done if you don’t have a proper bench supply, so we’ve got to tip our hat to [BadWolf] for that.

Mr. Tea Is A Hot Plate And Magnetic Stirrer In The Same Enclosure

mr-tea-stir-and-hot-plate

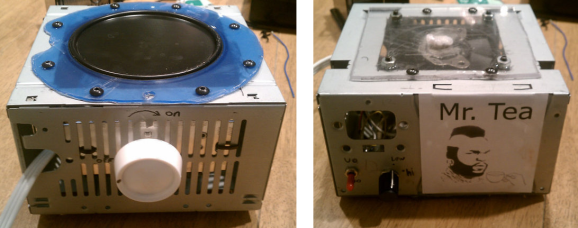
Not being a coffee drinker [Hunter Scott] wanted a way to make tea while lurking in his workshop. Well it’s not exactly rocket science, as all you need is water at the right temperature and a vessel in which the tea can be steeped. But we do commend him on not only building a nice little hot plate enclosure, but rolling a magnetic stirrer into the other side of the box.

You heard us right, the stirrer is not combined with the plate, but resides on the underside of the same PSU enclosure. The plate itself is from a unit he bought at the store and cannibalized. The light switch dimmer lets him adjust the heat it puts out. When not hot, he can flip it over and use the stir plate. This consists of a hard drive magnet attached to a PC fan. For the stirrer itself he encased a neodymium magnet in some thermoplastic. The magnetic combination works well together with a demonstration which shows it stirring water through the base of a tea-cup.

Ask Hackaday: What’s An Easy Way To Build A Potentiometer For A Soldering Iron?

diy-potentiometer-2

[Lee] wrote in to share the work he’s done in building a controller for his soldering iron. The idea started when he was working with an ATX power supply. He figured if it works as a makeshift bench supply perhaps he could use it as the source for an adjustable iron. To get around the built-in short-circuit protection he needed a potentiometer to limit the current while allowing for adjustments. His first circuit used a resistor salvaged from an AT supply and a trimpot from some computer speakers. That melted rather quickly as the pot was not power rated.

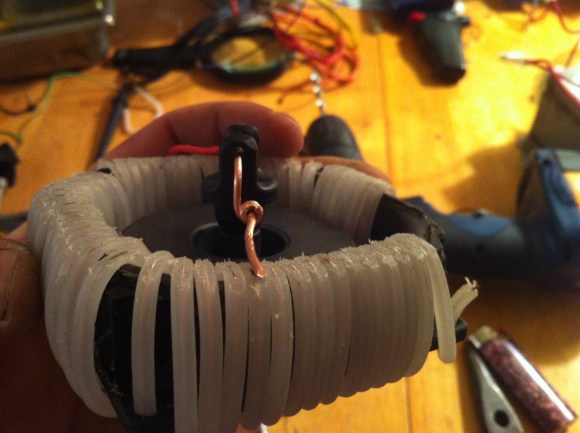
This is a picture of his next attempt. He built his own potentiometer. It uses the center conductor from some coaxial cable wrapped around the plastic frame of an old cooling fan. Once the wire was in place he sanded down the insulation on top to expose the conductor. The sweeper is a piece of solid core wire which pivots to connect to the coil in different places. It works, and so far he’s managed to adjust a 5V rail between 5A and 20A.

How would you make this system more robust? Short of buying a trimpot with a higher power rating, do you think this is the easy way to build a soldering iron controller? Let us know by leaving your thoughts in the comments.

Continue reading “Ask Hackaday: What’s An Easy Way To Build A Potentiometer For A Soldering Iron?”

Laptop Motherboard Reborn As A Low-wattage Server

[Darknezz] sent us a set of photos and some details about his damaged laptop motherboard turned into a server. A client brought him a Dell 1525 on which nothing was showing up on the LCD screen. The HDMI and VGA still worked, and he traced the problem to no signal coming out of the motherboard. He swapped the board out to get the laptop working again, but he client said he could keep the damaged one.

It has a dual-core CPU which meets his needs and since it’s meant to run off of a battery it’s as energy-efficient as possible. [Darknezz] dug through his parts bin and found a PSU that could supply the needed 19.5V at 3.5A. The connector didn’t match but it didn’t take him too long to patch into it using a spare Molex connector. He also needed a power button and ended up soldering a momentary push switch to a couple of pads which he traced out form the original connector. The only thing he actually ended up purchasing were the memory modules. Check out the photos he took of the alterations in the gallery after the break.

Continue reading “Laptop Motherboard Reborn As A Low-wattage Server”

Dual-channel, Variable Voltage Test Box Is A Busy Console Modder’s Dream

multi-voltage-test-box

It seems like [Chris Downing] is always up to something new. If he’s not keeping busy by creating slick portable iterations of previous-gen gaming consoles, he is dreaming up ways to make his modding life a bit easier.

Recently while working on a Nintendo controller designed to control three different consoles, [Downing] found his desk buried in a pile of power supply and A/V cabling. Annoyed with his growing rat’s nest, he decided to build a universal power supply that would allow him to quickly switch between consoles with little effort.

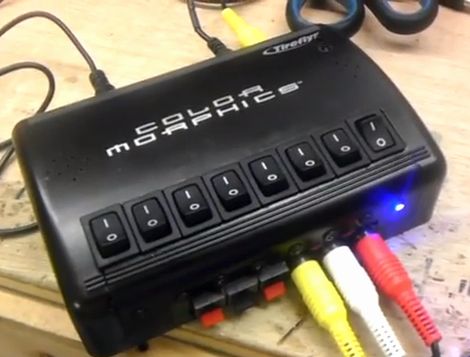
He dug up an old PC power supply, and fed it into a LED control box built for cars. [Downing] then mounted an array of nine rocker switches on the box, adding A/V inputs and outputs along the way. A set of voltage regulators hidden inside allow [Downing] to dial in whatever custom voltages he might need at the moment.

The test box should come in pretty handy as [Downing] pursues even more modding projects in the months to come. In the meantime, be sure to check out the video below where he covers the finer points of the device’s design.

Continue reading “Dual-channel, Variable Voltage Test Box Is A Busy Console Modder’s Dream”

Giving An ATX Bench Supply The Case It Deserves

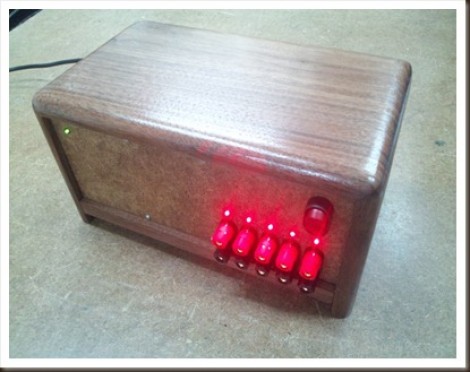
Your bench supply doesn’t need to look sad just because you’re using an ATX power supply instead of a commercial product. Follow [Ian Lee’s] example and you could have beautiful wooden enclosures for the tools in your own shop.

The woodworking skills used here aren’t all that advanced, but you need to have a knack for it so we suggest running some test pieces before you start the actual build. [Ian] ran a dado for the front and back panel in each piece of the wood sides. At each corner the inside of the the pieces were mitered at 45 degrees. To put it all together he laid the pieces end to end on a the work bench, then applied painters tape to the outside of the joints. This holds the joints together so that he can flip the collection over, apply glue, and then start hinging the sides into place. It’s almost like rolling up a box.

As with other ATX supply projects we’ve seen [Ian] designed this so that the PSU can be swapped out later if necessary. Instead of wiring his own cable harness he used an ATX breakout board. To get the interface layout he wanted he mounted the banana jacks separately and just ran jumper cables back to that board.