Power Tool Battery Charger Repair

drill_battery_charger_repair

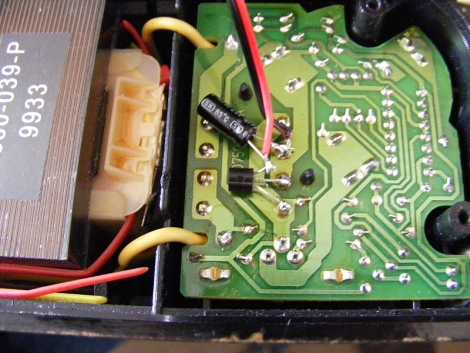
[Webby] inherited a cordless drill from his dad and when he finally got around to using it, found that the charger was dead in the water. He disassembled it and narrowed the issue down to the charger’s primary transformer, but didn’t know where to go from there. A friend suggested that the coil’s thermal fuse might have blown, and upon further investigation, [Webby] discovered that his friend was right.

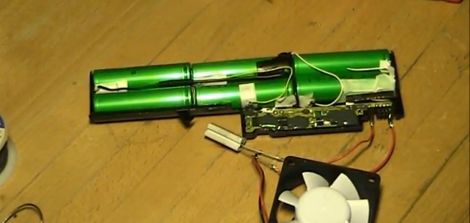
He removed the dead fuse and soldered in a piece of wire just for testing – not surprisingly the charger sprang to life. He picked up a new thermal fuse to replace the old one, but he wasn’t quite satisfied with the fix just yet. If the fuse burned out once already, there’s little to stop it from happening again, so he decided that installing a small cooling fan would be a good idea. He mounted the fan on the outside of the case after cutting some vent holes, leeching power from the charger itself.

While simply adding a fan to the charger might not be everyone’s idea of a perfect solution, it has worked out quite well for [Webby] in the past, so if it isn’t broken…

[via HackedGadgets]

Bypassing Manufacturer-imposed Battery Lockouts

sony_battery_cell_swapping

When [Barret] went to use his camera the other day it kept shutting down on him, and upon inspecting the battery, he found that it was a bit swollen. Knowing that he needed a replacement, he turned to an aftermarket battery he had sitting around, but grew pretty annoyed when his Sony Cybershot camera would not accept it.

Apparently a recent firmware update causes his camera to reject non-Sony batteries, a situation he describes as “battery DRM”. There was no way he was going to pony up another $50 to Sony instead of using the perfectly good $10 battery he already had, so he decided to rectify the issue himself.

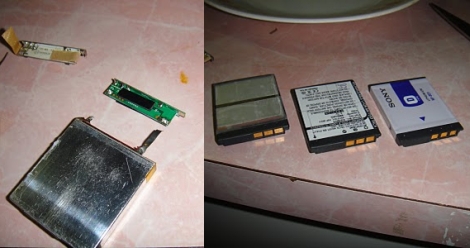
He stripped both batteries of their plastic coatings, revealing the lithium cells and their charging circuits. He desoldered the PCB from his Sony battery, transplanting it to his aftermarket battery after a little bit of trimming. He wrapped everything up with some tape and gave his franken-battery a spin. It worked a treat, and he was so satisfied with it that he did a similar swap in his aging Logitech mouse.

As more and more companies lock competitors out of the user-replaceable consumables market, these sorts of hacks are certain to become more and more prevalent.

Bringing An IWallet Back To Life

iwallet_bluetooth_hack

The iWallet is a slick little device if you’ve got a big wad of cash burning a hole in your pocket. The $600 price tag was a little much for [cmw] to swallow, so he bought a water damaged iWallet on eBay with hopes of repairing it. Once took a close look, he knew that repairing it was a lost cause, so he decided to hack it instead.

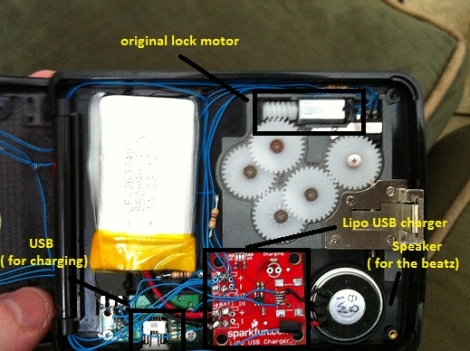
He pulled out most of the wallet’s electronics save for the motor that opens the device, and replaced the damaged parts with his own. He installed an Arduino pro as well as a Bluetooth module, powering the pair with a small rechargeable LiPo battery. The iWallet’s fingerprint reader was then replaced with a series of LEDs that show the device’s Bluetooth connectivity status.

[cmw] can now connect his wallet to his phone, issuing unlock commands via Bluetooth. If you don’t want to fork out the cash, his version is nearly as good as the real thing.

Continue reading to see a quick video of [cmw’s] iWallet hack in action.

Continue reading “Bringing An IWallet Back To Life”

Replacing Non-standard USB Charging Ports

htc_charging_port_replacement

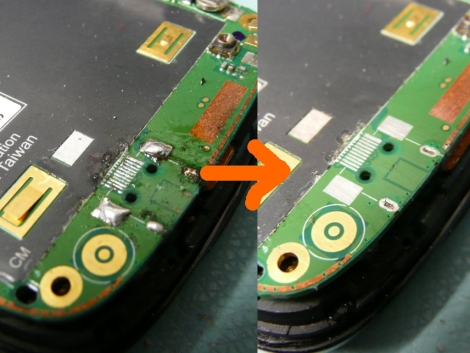
While many mobile phone manufacturers are moving towards the micro-USB interface as a standard, others such as Apple and HTC are still bucking the trend. Part of [arto’s] job includes repairing mobile phones, and last month he found himself faced with a pair of broken HTC handsets that needed their charging ports replaced.

Replacements for HTC’s proprietary connectors are apparently quite hard to find, and [arto] says he had to source them from an HTC repair center. With the proper parts in hand, he could finally get down to work.

The HTC Hermes handset he repaired was a breeze, as it had plenty of space available around the charging port. He said that this allowed him to replace the jack pretty easily, but the HTC Touch Dual was a mess in comparison. He started by removing the old adapter, which was done by cutting it out bit by bit. He says that he did it this way rather than desoldering, due to its proximity to other heat-sensitive components. After some careful soldering under a microscope, everything was back in working order.

While his repairs are not necessarily the things that hacks are made of, the information is still quite helpful. Broken charging ports are extremely common among smart phones, and with plenty of these older models still floating around, his pointers just might help someone save a few bucks on a replacement phone.

Repaired Microwave Keypad Looks As Good As New

microwave_keypad_repair

Instructables user [Rohit] had an out-of-warranty microwave with a broken membrane keypad. Much like our friend [Alexandre] from Brazil, he found the cost of replacement parts beyond reasonable, so he had to find a way to repair it instead.

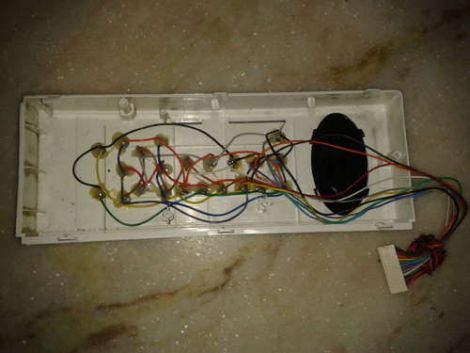
He disassembled the front cover of his microwave to get at the main controller board. Once it was detached, he removed the keypad’s cover to get a closer look at the matrix underneath. While taking notes on how the matrix was wired, he found that some keypad traces connected to other traces rather than buttons. He says that they are likely used by the microwave to detect that the keypad is present, so he made sure to short those traces out on the controller board when he wired everything back together.

He replaced the aging keypad with microswitches, but rather than mount them on the front panel of the microwave, he drilled holes for each switch so that he could mount them inside the face plate. Once everything was wired and glued in place, he re-mounted the keypad’s cover. Now the microwave looks stock but has firm, reliable, user-serviceable buttons that are sure to last quite a while.

Repairing A Broken Microwave Keypad

microwave_keypad_fix

[Alexandre Souza] needed a microwave pretty badly, but he didn’t have a lot of cash on hand. He located one for a great price, but once he got home he found that things weren’t working quite like they should be (Google translation).

After some investigation, he narrowed the problem down to a bad keypad membrane. Unfortunately for him, this model of microwave was never sold in Brazil (who knows how it got there) and the only membrane he could track down had to be shipped in from the US at a cost of $80.

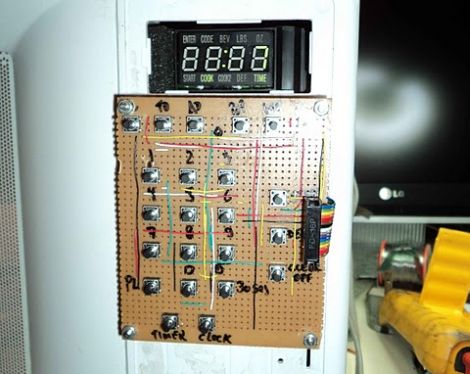
Rather than pay such a high price for a simple membrane, he opted to fix the microwave himself. He dismantled the control panel and thoroughly traced the keypad matrix to get an understanding of which pins toggled which functions. With a piece of protoboard and almost two dozen push buttons in hand, he built his own keypad and wired it directly into the microwave’s control board.

With labels written in marker it might not be the nicest looking thing you have ever seen, but it works a treat and is a great money-saving hack.

Hey OEMs, Arduino Controlled Dishwasher Has Much Potential

I think we can all agree that sometimes projects are a bit of a stretch. We rack our brains for something interesting and unique to bring to the table and end up stretching for that special strange twist trick or technique that will garner that special kind of admiration from our peers. In that sense it is easy to loose sight of some of the best projects, the simple ones that prove you can fix anything anytime anywhere and improve it while you are at it.

This is just such that kind of project, [UnaClocker] had a washer fall victim to its own condensation. Instead of shelling out a ton of money for the repair man he took on the job himself, fitting the washer with an Arduino, relays and a breadboard. A little reverse engineering revealed the (notably well labeled) control board, evidently the control signals involved are extremely easy to interpret. [UnaClocker] also found a temperature sensor to control dish sanitation. At this point he had FULL CONTROL over the dishwasher and was able to design the ideal prewash/wash cycle timings.

Now that a wash cycle is all set [UnaClocker] can now go ahead and embarrass the hell out of the OEM. He plans on adding a real time clock module to time washings and a clean dish indicator, after which we think he should get rolling on some wireless/tweet/ethernet/capacitive touch/voice communication. After that he is going to work on buttoning up the design and making it pretty.

Check out the setup in action after the jump!

Continue reading “Hey OEMs, Arduino Controlled Dishwasher Has Much Potential”