Resurrecting The Optigan Disc Format

optigan

The Optigan and Orchestron were a pair of electronic organs built by Mattel in the 1970s which used swappable optical discs to store instrument information. The discs can still be found today, but the organs are extremely scarce, much to [Gan’s] dismay. After researching the organs for a bit, he decided he could probably build his own MIDI-compatible interface for the audio discs.

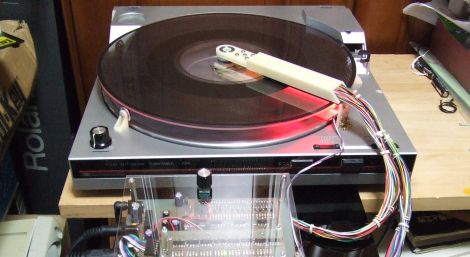
The discs have audio waveform data printed on them, which can be read using an LED on one side of the disc and an optical transistor on another. After successfully prototyping a reader that could interpret one of the disc’s audio tracks, he constructed a device to read all of the tracks simultaneously, just like the original organs.

His makeshift turntable was constructed on top of an old record player using acrylic discs and toy car wheels to keep things steady. Once the disc is placed on the turntable, he sets his reader in place, and via some custom circuitry, he is able to play the discs using his much more modern keyboard. It sounds pretty decent as you can see in the video below, though he does admit he would like to tweak a few things to make it sound even better.

[thanks Bryan]

Continue reading “Resurrecting The Optigan Disc Format”

Mini LED Message Board Built From Retro Displays

personal_electronic_retro_telegram

[Iain] is getting to the point in his life where he finds himself waxing nostalgic about various different technologies from his youth. One item he has always been fond of is first generation 7 segment consumer LED displays, like those found in old calculators.

He was excited to find one of these displays at the bottom of a box full of electronics odds and ends he received from a friend. After identifying the display and tracking down a data sheet online, he decided that he wanted to build some sort of little gadget out of it.

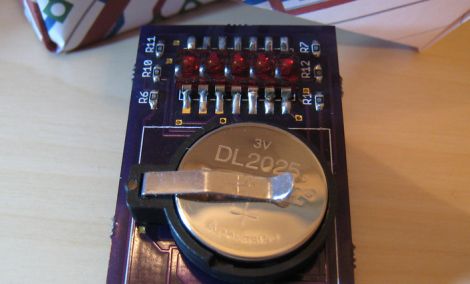
His first inclination was to build a tiny text scrolling gadget from the display, and thus his “Personal Electronic Retro Telegram” (P.E.R.T) was born. With Arduino in hand, he prototyped the circuit on a breadboard, then sent away to have some PCBs built. Once he received the boards, alll of his prototyping components were swapped out with SMD versions, including a TQFP ATMega168 chip in place of the full-sized Arduino board.

The final result is a nice melding old and new technology which he decided to give to his girlfriend as a gift. Continue reading to see a quick video of the P.E.R.T in action.

Continue reading “Mini LED Message Board Built From Retro Displays”

Apple II Weather Display (part 3)

In parts 1 and 2, I discussed the important parts of what is going on the PC side with lua. While not 110% detailed I hope it gave you an idea on how the data is processed so the Apple II computer could quickly digest it. Now its time to see what happens at the other end of the serial cable. I am using basic, but its not 100% off the rom Applesoft basic, that would be even slower, so I am using a compiler and a fast graphics driver. Both are from “The Beagle Compiler” which was produced by the ever awesome Beagle Bro’s software company, and though still under copyright, the publishers have given permission for use of their software (within reason I don’t think you will get very far selling it).

Continue reading “Apple II Weather Display (part 3)”

Apple II Weather Display (part 2)

In part one of the Apple II weather display I quickly went over how data is fetched and phrased. Now its time to do something with it in part 2. In the order of functions I do the text parts first, and though its very similar to the process that the radar image goes through, its in monochrome and a bit simpler to explain. Before I go into how it works I should explain how I am dividing the Apple II’s screen.

Continue reading “Apple II Weather Display (part 2)”

Apple II Weather Display (part 1)

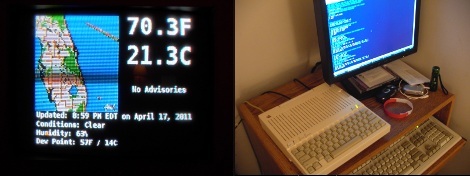
Due to computer issues I had to rob some parts from my “electronics” computer, which wasn’t bad, since I was not working on anything at the time and I felt a software project itch. I also wanted to do something with my Apple //c, which resides on my computer desk, so this ghetto brute force “solution” to use the 25 year old computer as a weather display came about.

In a nutshell there is the Apple II, a serial cable, and a PC running linux mint 10 and a handful of command line utilities. My specific Apple is the fist revision of the //c which means its got a buggy rom and the serial port(s) can be troublesome, the best speed I was able to get was 600 baud with just basic, though every other model could probably go a little faster.

On the linux side, wget downloads html and the radar image from Weather Underground’s mobile site, which is not a perfect source, but its easy. A lua script phrases text and graphics into string patterns that the Apple II can handle as keyboard input, and its sent down a serial cable where it is drawn on screen in basic.

Yea its pretty darn slow … it typically takes about eight to twelve minutes to redraw the screen, which is not all that horrid (imo) considering what is going on, but anyone with a more serious take on this could find numerous ways to optimize it, I just wanted to see what it would look like.

Join us after the break for a short video and to read all the details about how this all works!

Continue reading “Apple II Weather Display (part 1)”

Portable Gaming For Retro Console Lovers

atari_2600_portable

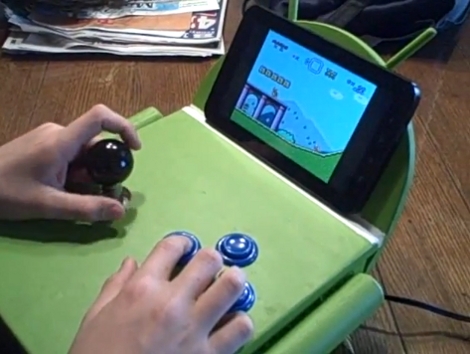
There have been a fair share of portable video game console conversions over the years, but few tug at our retro-loving heart strings more than this one. Modretro forum member [Mario] constructed a fantastic looking portable Atari 2600 using a Flashback 2 Atari console clone.

He hacked apart the Flashback board to fit inside a small plastic case, then added a 3.5″ LCD screen, as well as some donated controller bits from other portable game systems. A pair of rechargeable batteries were added along with a small amplifier and speaker for sound.

While the Flashback comes with 40 games built in, he really wanted to add a cartridge port, so with the little bit of space he had left in the case, he did just that. When everything was finished, he sprayed on a few coats of retro orange paint and called it a day. Really the only thing that’s missing is some nice fake wood veneer and maybe some shag carpet.

Continue reading to see his portable creation in action.

Continue reading “Portable Gaming For Retro Console Lovers”

Calc Is High-tech For 1970’s Homebrew

Just one look at that banner image and you’ve got to be thinking “that’s old”! This 1970’s era home made calculator used a 4-function calculator IC that was quite advanced for its time. The only problem is that the chip couldn’t do anything other than calcuations, which left it up to the maker of this dinosaur to get the display and keypad working. Circuit boards were made by drawing on copper clad with resist marker. These controlled the VFD digits for the IC’s output and also fed it the user inputs.

[Thanks Brian]