Broken Lens Provides Deep Dive Into Camera Repair

While most of us are probably willing to pick up the tools and void the warranty on just about anything, often just to see what’s inside, many of us draw the line at camera gear. The tiny screws, the complex mechanisms, and the easily destroyed optical elements are all enough to scare off the average hacker. Not so for [Anthony Kouttron], who tore into a broken eBay Sigma lens and got it working again.

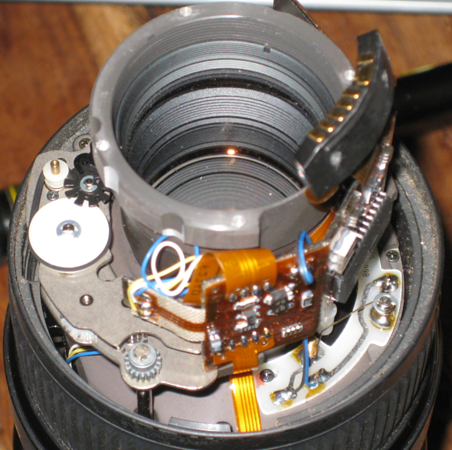
Now, to be fair, modern lenses tend to have a lot more in them that’s amenable to repair than back in the old days. And it seemed from the get-go that [Anthony]’s repair was going to be more electronic than optical or mechanical. The 45-mm lens was in fantastic shape physically, but wouldn’t respond to any controls when mounted to a camera body. Removing the lens bayonet mount exposed the main controller PCB, which is tightly packed with SMD components and connectors for the flex cables that burrow further into the lens to its many sensors and actuators. By probing traces with his multimeter, [Anthony] found a DC-DC converter on the main PCB with an unknown component nearby. This turned out to be an SMD fuse, and as luck would have it, it was open. Replacing the fuse got the lens working again, and while there’s always the nagging suspicion that whatever blew the fuse the first time could happen again, the repair seems to have worked.

Despite the simplicity of the fix, [Anthony] continued the teardown and shared a lot of tips and tricks for lens repairs, including where he would have looked next if the fuse had been good. One tip we loved was the use of double-sided tape to organize parts as they’re removed; this is particularly important with camera gear where screws or different lengths can make for a really bad day on reassembly.

Feeling the need to dive deeper into lens repair? This step-by-step repair should keep you satisfied.

Converting A Sigma Lens To Canon, Digital Functionality Included

These days, camera lenses aren’t just simple bits of glass in sliding metal or plastic housings. They’ve often got a whole bunch of electronics built in as well. [Dan K] had just such a lens from Sigma, but wanted to get it working fully with a camera using the Canon EF lens fitting. Hacking ensued.

The lens in question was a Sigma 15-30mm f/3.5-4.5 EX DG, built to work with a Sigma camera using the SA mount. As it turns out, the SA mount is actually based on the Canon EF mount, using the same communications methods and having a similar contact block. However, it uses a mechanically different mounting bayonet, making the two incompatible.

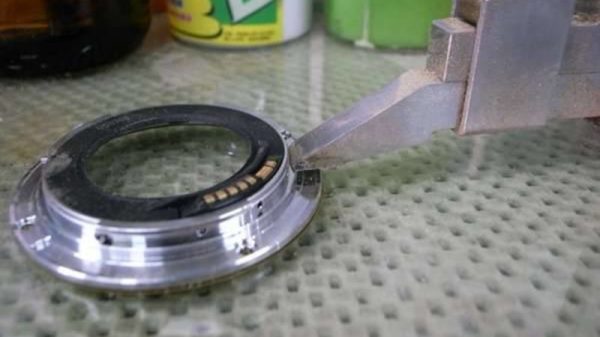
[Dan] sourced a damaged EF lens to provide its mount, and modified it on a lathe to suit the Sigma lens. A short length of ribbon cable was then used to connect the lens’s PCB to the EF mount’s contacts. When carefully put back together, the lens worked perfectly, with functional auto-focus and all.

It goes to show that a little research can reveal possibilities for hacking that we might otherwise have missed. [Dan] was able to get his lens up and running on a new camera, and has taken many wonderful pictures with it since.

We’ve seen some great lens hacks over the years, from 3D printed adapters to anamorphic adapters that create beautiful results. If you’ve got your own mad camera hacks brewing up, drop us a line!

Hacking A Sigma Lens To Work With A Canon Camera

sigma-lens-canon-camera

[Martin Melchior] wanted to use an older Sigma lens with his Canon camera. The problem in trying to do so is that the camera uses a different communications protocol than the lens is expecting. But if you don’t mind cracking it open and doing a little microcontroller work you’ll be using the lens in no time.

The hack uses an ATtiny24 chip, two resistors, and a capacitor. You won’t need to do any coding, but you do need to burn the firmware to the chip (you can use an Arduino if you don’t have a proper AVR programmer). There’s plenty of room for the add-on hardware inside the lens so after reassembling the enclosure you won’t even be able to tell that the unit was altered. Unfortunately it doesn’t look like [Martin] took any pictures of the lens with his added electronics, but the schematic he posted should be enough for you to get the job done yourself.

If you’re into these types of DSLR hacks you should try something extreme, like using view camera parts with your modern camera.